Cape Wrath

Even though Scotland has the world’s most lax trespassing laws, with private property not even being off limits, a police officer in Durness didn’t appreciate me setting up my tent behind a soccer pitch along the northern coast.

“Does this look like a campground to you?” he said in a stern voice.

“I was under the impression that this was okay in Scotland,” I said.

“Well, we don’t mind if you wild camp, just not in the village.”

I was on the northern edge of town. Much closer to the edge and I would have fallen into the ocean. Actually, the only people who might see me were the proprietors of a nearby campground. I wondered if they called the police. It must be hard to run a campground when wild camping is free and legal. 

Even though I still don’t think I broke any laws, I wasn’t going to argue. I packed up and left. I wouldn’t have minded as much if he didn’t wait until after nightfall and I hadn’t been cozy in my sleeping bag.

Rather than move just outside of town, I walked to the dock in Keoldale a couple miles away. In the morning a boat and minibus would be taking a few of us across the Kyle of Durness to Cape Wrath, the northernmost point in Western Scotland and the northern terminus of the Cape Wrath Trail and Scottish National Trail. I found a place just barely big enough to setup my tent between the Kyle of Durness and the small parking area next to the dock.

The next morning brought beautiful weather. Every Scot I met who knew my plans made sure I knew that this has been exceptional for Scotland in September. I hoped it would stay that way for the next few weeks. I have been feeling a lot of pressure to get out of the Highlands before the weather turns unpleasant.

I packed up and walked to the dock to wait for the ferry. Cape Wrath is sometimes closed by the Ministry of Defense to use it as a bombardment range, but a sign posted said there would be no delays today. 

It took four trips on the tiny boat to get the thirty or so people and dogs across. On the other side they packed twelve of us, plus three large dogs and several backpacks into a 12-seater minibus, which then crept up the only road on Cape Wrath.

“They tarred this road in 1955 for the first and last time,” the driver said as we bumped along at fifteen miles per hour.

“Will you be able to use this road if you get a Yes vote on Thursday?” a woman in the back asked, regarding the referendum on Scottish independence from the United Kingdom.

“Sure, why not?” he said. “This is a public road.”

“Because you said it was used by the Ministry of Defense,” she said.

“Well… there is the law and then there is the local law,” he said, making a few people to chuckle.

The baby on the woman’s lap next to me decided we were going to be best friends. When I looked at her, I noticed she was smiling at the nothing happening on my face as I stared out the window.

“Hi there,” I said.

She giggled and said something in baby gibberish that I didn’t understand. It’s not her fault, I even have a hard time understanding a lot of the adults in Europe. She kept trying to put the buckles and straps on my backpack into her mouth until her mom said, “It’s okay, I think her immune system can handle anything.”

“You see this small stream coming up here,” the driver said. A few days ago a flash flood came through and took out all these fences.” He pointed at a scattering of wooden fence posts and tangled barbed wire. “The bridge here a good example of speedy Scottish workmanship,” he said. He slowed down even more before crossing. “A storm took out the old bridge, so this was setup as a temporary replacement... in 1981.”

“Then it’s a good example of quality Scottish workmanship,” a man behind me said.

“You all came on a good day, though,” the driver said. “The weather isn’t always this nice. We often have thick fog and can get gale force winds of a hundred miles per hour.”

Later we came to a small metal structure used by the military painted with black and yellow checkerboard pattern.

“That’s a testament to the weather on Cape Wrath,” he said. “That building is made of solid steel and you can see that it’s still bolted down to the ground with thick steel cables.

Right before the lighthouse on Cape Wrath would come into view, a thick fog rolled in. “Ah, give it a half hour, this might clear out of here,” the driver said.

In addition to the lighthouse, and although remote and subject to harsh unpredictable weather, Cape Wrath is home to a small café called the Ozone Café. I walked inside to wait out the fog as the driver suggested. A plague on the wall designated the café as the official end of the 470-mile Scottish National Trail, with the last 221 miles being on the Cape Wrath Trail. For me it would be the beginning.

The man behind the counter was the owner, John. I've read about him in my guidebook. His welcoming face is the one you see at the end of these long, difficult, and often dangerous routes, so to many backpackers, the fringe of gray hair around his balding scalp, the crow’s feet radiating from the corners of his soulful eyes, and his thin stoic smile are something like the Cathedral of Santiago or the peak of Mount Katahdin. Although, I hardly think he looks at himself this way. He would probably prefer to be known as the quiet friendly man who runs the most remote café in all of Britain.

“Where you headed?” he asked after I ordered a hot bowl of tomato soup.

“I’m doing the Cape Wrath Trail to the West Highland Way, but I’m thinking about doing this Scottish National Trail now.” I said.

“Well, you’d be the first person to ever do it south,” he said.

“Oh, really?” I said. “Then I’m doing the Scottish National Trail.”

“It’s only been an official trail for two years, so only 27 people have even completed it,” he said.

I don’t know that I’ve ever been the first to do anything, so I had a new excitement for the trail. This additional excitement would only last two days, however, when I was later told by a shop owner who met two backpackers attempting a southbound hike earlier this year.

“Maybe they didn’t finish,” I thought. “And even if they did I’m sure they didn’t continue going south to the English Channel. Or begin their journey after a 700-mile trip across Ireland and Northern Ireland.”

I ate my bowl of soup, plus a complementary refill John offered after I finished. By then the fog had cleared. I walked past the lighthouse to the edge of a cliff overlooking a deep blue ocean. That was as far north as I could safely go in Western Scotland, so I turned and started walking to the English Channel.

Grocery Shopping with a Thru-hiker, Part 2

A Thru-Hiker Shopping List

In part one, I wrote about the features of the best backpacking foods (calorie dense, easy to prepare, nutritious, non-perishable, appetizing, inexpensive, and versatile). Below are common items on my resupply shopping list that take all of that into account with more nutrition advice from New Orleans Saints sports dietitian, Tavis Piattoly.

Obviously, taste is too subjective to tell you specifically what to buy, so my goal instead is to give you new things to consider when buying food. It's inevitable that I will miss something, so please share your own suggestions in the comments below.

Olive Oil
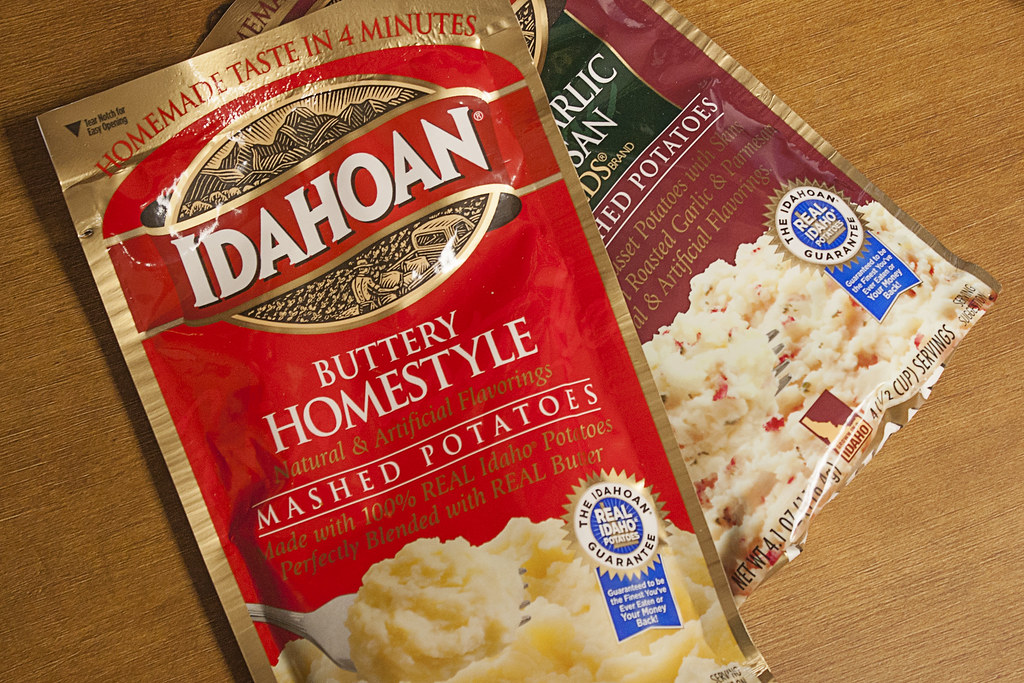
Oil is all fat, so it's the most calorie dense thing you can pack (about 242 calories per ounce). By adding olive oil to pasta, potatoes, rice, beans, etc, you can increase all of their calorie density. Instant potatoes, for example, have about 111 calories per ounce, but has 176 if you mix in two tablespoons of olive oil.
That brings up an important point: If you need 6,000 calories per day, and your meals average 110 calories per ounce (the average number of calories in freeze-dried pasta meals and instant potatoes), you'd need 3.5 pounds of food per day. If you instead carry meals that average 150 calories per ounce, you will reduce your food weight by 1 pound for every day's worth of food in your pack.
There are lots of oils to choose from, but olive oil has a nice buttery flavor, it's easy to find in resupply towns, and it's cheap (as low as US$0.99 per 1,000 calories), which brings up another important point: If you want to do a long distance hike on a budget, think of the cost of food per calorie, not the shelf price or the price per meal.
Another benefit to olive oil is that it's nearly 75% monounsaturated fatty acids, which is a healthy dietary fat. It also contains Omega-3 Fatty Acids, which help reduce joint and muscle inflammation.
One more thing, even if you can find the small plastic bottles of olive oil, I found that an empty soda bottle works better to prevent leaking. 
Instant Potatoes
Instant mashed potatoes taste good and cook quickly, but nutritionally they're not great. Their glycemic index (GI) is higher than table sugar. I put them high on this list, however, to talk about blood sugar spikes from consuming a high GI diet.
In the morning, and during the day while hiking, high GI foods will provide you with an immediate source of energy, but pair that with fats, protein, and fiber: 
"Adding fat or protein to any high glycemic carbohydrate source will blunt the spike in blood sugar," says Tavis Piattoly, MS, RD, LDN and Sports Dietitian and Nutrition Consultant for the New Orleans Saints. "I wouldn't recommend high GI foods while you are resting (before bed or during any period of inactivity) as your blood sugar could drop quickly and a hiker could experience fatigue. It would be best to have a meal mixed with protein, carbs, and fat to keep blood sugar in check." 
For example, when eating a high GI food like instant potatoes, mix in olive oil and bacon bits to add fat and protein to help blunt the spike in blood sugar. Add a side like peanut butter on whole-wheat bread or tortilla for additional fiber, fat, and protein.
Nuts
Some of the best backpacking foods are nuts and seeds. Macadamia Nuts and Pecans pack about 200 calories per ounce. Most other nuts average about 185 and peanuts have about 150 calories per ounce (Peanuts are higher in protein, however, and considerably cheaper). Nuts are also versatile, since most are great mixed with oatmeal, trail mixes, or eaten plain.
My favorite are walnuts. They offer a good balance of calories and protein per ounce. They are not the best in those categories, but a good average in both. What really makes them my top choice are their high levels of Omega-3 fatty acids, which can reduce muscle and joint inflammation. No other nut has more.
Peanuts are my second choice for cost, taste, and protein per ounce, but eating a variety of nuts and seeds is always a better choice.
Here is a comparison of commonly available nuts in a variety of categories:
Nut Calories / oz Protein / oz Cost / 1000 cal. Omega-3
Walnuts1894.72$2.99 2.50 g
Macadamia Nuts  2132.02$3.940
Peanuts152 6.07 $1.460
Almonds172
6.07
$1.830
Pecans2002.83$2.880.29 g
Cashews1625.06$2.450
Mixed Nuts172 6.07$1.95-

Peanut Butter

My favorite backpacking food is peanut butter. It has a lot of calories per ounce (about 169), it keeps for a very long time, and it is one of the cheapest foods per calorie (as low as 88¢ per 1,000). It's also a great substitute for meat protein, which can be limited on the trail.
Perhaps the best thing about it as a backpacking food is its versatility. Slather some on a tortilla, bread, or crackers, make a peanut butter sauce for pasta (see recipes in part 3), add it to oatmeal to increase protein in your breakfast, or just eat a big spoonful with any meal or snack for extra fat, protein, and calories.
It’s tempting to buy powdered peanut butter (like PB2) to save weight, but it has almost 40% fewer calories per ounce, so it's actually heavier. It also costs nearly twice as much, is less nutritious, and in my opinion tastes absolutely terrible. It should be ashamed to call itself peanut butter. 
Tortillas, Breads and Crackers
Unlike bread or crackers, whole wheat tortillas can take a lot of abuse when stowed in a backpack. Per calorie, however, tortillas cost about twice as much. Cheaper bread alternatives that can take more abuse are bagels, pita bread, and English muffins. (Campfire English muffin pizzas are amazing on the trail, by the way, more on that in part 3.)
If you want more calories per ounce, consider whole wheat Ritz crackers with your peanut butter, tuna, meats, or cheeses. They have twice as much as bread and tortillas. 
Always go with whole wheat when possible to get all the fiber you can get:
"I typically recommend trying to get 10 g [of fiber] for every 1000 calories consumed," said Tavis. "The importance and benefits for a hiker would be to help regulate blood sugar and keep you full longer. The more stable your blood sugar and insulin levels are, the more energy you should have throughout the day. A more stable carbohydrate [from whole grains] will be better utilized as an energy source and keep you more full during a long day of activity." 
Whole Wheat Pasta
It’s tempting to go with cheap ramen noodles or Knorr Pasta Sides (and sometimes I still do), but with regular whole wheat pasta you can improve your diet without adding to your food budget. Unlike ramen noodles and many prepackaged pasta meals, whole wheat pasta is high in fiber and protein, it has a lower glycemic index, and it has no saturated fat. Diets high in saturated fat can lead to sluggishness and inflammation.
Whole Wheat Pasta is also versatile and, with only slightly more effort, you can make some meals every bit as good as a freeze-dried Mountain House meal, which will weigh less per calorie and at a fraction of the cost. 
Save fuel by purchasing thinner pastas, like angel hair pasta or mini rotini, which cook much faster (al dente in about 4-7 minutes, 30-50% faster than regular spaghetti). Also, cooking it al dente, so it's still firm when bitten, has the added benefit of slowing digestion, which levels out the spike in blood sugar and makes you feel fuller longer.
My last pasta tip, you don't need a giant pot of boiling water to cook pasta. This of course wastes fuel and would be impractical in a small backpacker cook pot. Instead, fill your pot with enough water to cover the pasta and stir regularly, especially in the first minute or two when the sticky starches are at a high concentration on the surface of the pasta. Your pasta will cook just as well as if you had a large pot of boiling water and without clumping. After the pasta is finished boiling, save that starchy water to use in sauces to make them thicker and creamier.
Cheeses
Unlike soft cheeses, hard block cheeses like Parmesan and Romano do not need to be refrigerated. They can last for several days if sealed and if temperatures do not exceed 85°F. 
Other reasons to carry Parmesan is that it has 11 g of protein per ounce. That's more than nuts, peanut butter, powdered milk, and non-dehydrated meats. It can be added to prepackaged pasta dishes or used with whole wheat pasta and olive oil to make Parmesan Noodles.
Softer cheeses, when individually sealed, can keep for a few days if it isn't too hot. String cheese, in particular, packs well. On a warm day, keep cheese in the center of your pack to keep it cool. 
Mac and Cheese
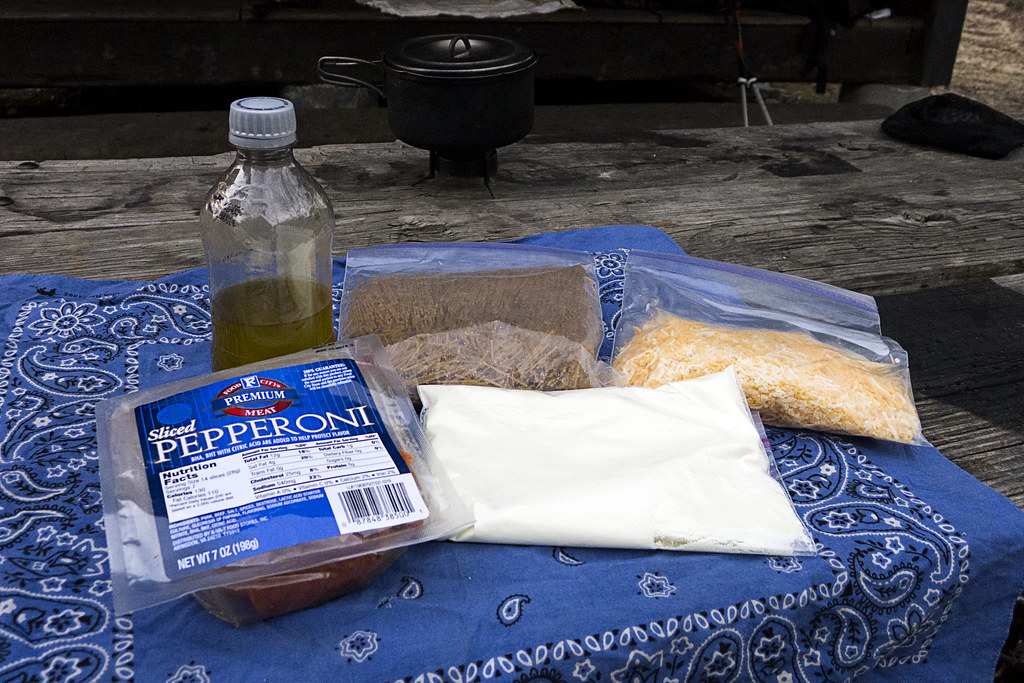
Skip the box of Kraft Macaroni and cheese and make it from scratch using versatile ingredients that can be used in multiple ways. Just cook your pasta, add powdered whole milk, olive oil, and melt in shredded cheese or block cheese that has been shredded or cut into tiny pieces. 
Another reason I suggest versatile ingredients such as these, is because the more ways you use them the larger quantities you can buy, which will save you money on a long distance hike. 
 Oatmeal
Oatmeal also has a high glycemic index and instant oatmeal, although convenient, is loaded with additional sugar. Plain rolled oats are often less expensive per calorie and can be prepared in a number of healthier ways.
Reduce the overall glycemic index of the meal by adding nuts, peanut butter, whey protein, and/or powdered milk. You can also add a little olive oil or butter (if it's cold enough to carry butter) to increase the calories and improve flavor. Oatmeal can also be mixed with dried fruit or cocoa mixes such as Nestle or Ovaltine. It's great with a freshly chopped apple or fresh picked berries too.
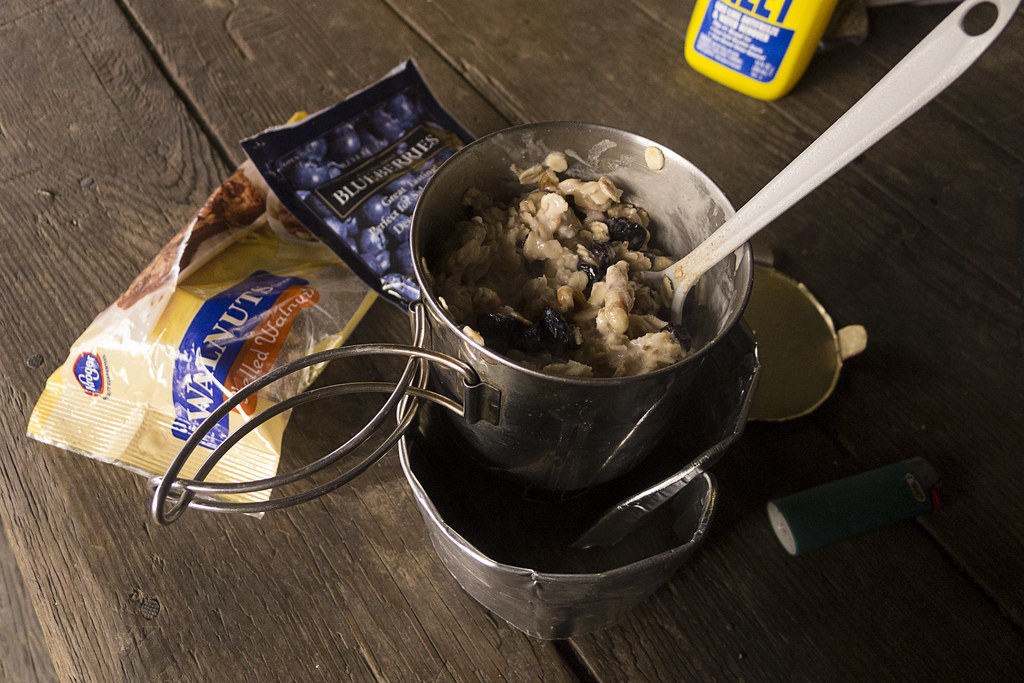
In the photo of my oatmeal above, I added walnuts, peanut butter, blueberries,and protein powder for a 1,000 calorie breakfast with about 30g of protein 80g of carbs, and 35g of fat. 
 Dried Fruit
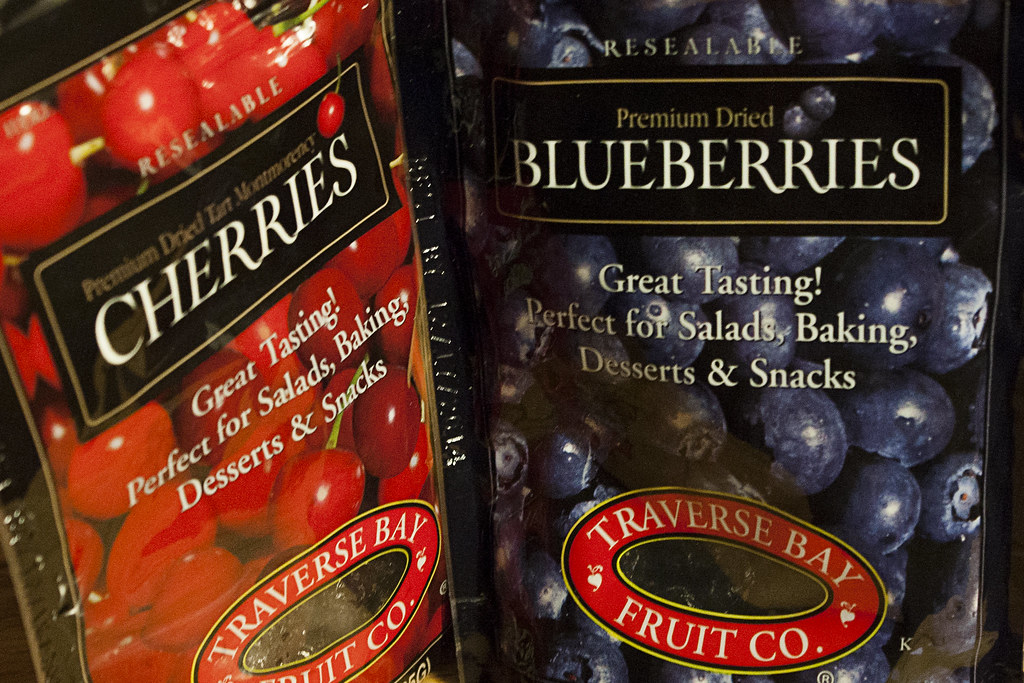
Dried fruit is not calorie dense, but a variety of dried fruit will prevent some vitamin deficiencies on your thru-hike. Not only are they a convenient quick snack, but many dried fruits are great in oatmeal, trail mixes, and when used to sweeten certain rice and pasta dishes.
Tart cherries are particularly excellent on the trail, because they have been shown to reduce joint and muscle inflammation. 
Powdered Whole Milk
You can find powdered whole milk in the Hispanic section in most grocery stores, usually the Nestle Nido brand. Whole milk has 50% more calories (151 per ounce) than powdered skim milk and is usually a little bit cheaper per calorie. 
Another reason many people, including myself, prefer whole milk is that it's creamier and tastes better in recipes, but both are a great way to add calories and protein to coffee, hot cocoa, oatmeal, and many other meals.
Cocoa drink mixes
Ovaltine with powdered milk will mix well hot or cold, which is why I stopped taking hot cocoa mix on the trail. It also tastes better to me than hot cocoa mix and is fortified with vitamins and minerals. It can also be added to oatmeal, coffee, or used in other trail recipes.
Instant Coffee or Cider
Definitely not a necessity, but when it's cold I like to have hot beverages in my pack. It can do a lot for morale at the end of a long cold day. 
For more protein and calories, mix instant coffee with cocoa and powdered milk to make a trail mocha. Add a little sugar to that, drink it cold, and it tastes similar to a Frappachino from Starbucks. 
Cereal
Breakfast cereals with powdered whole milk are like dehydrated foods that don’t require a stove, which is great when going stoveless or when you're unable or unwilling to cook. They are usually fortified with vitamins and minerals that hikers may become deficient in without taking a multi-vitamin.
The major drawback to cereals on the trail is they take up a lot of space in your pack. Many cereals also have a high glycemic index, so look for ones that are high in fiber and protein, such as Kashi Go Lean Cereal or shredded wheat. Dried or freshly picked fruit is a great addition.
Some cereals are also great in trail mixes and oatmeal. Cinnamon Toast Crunch, although not a healthy option, makes nearly all trail mixes better. Actually, it makes life better in general. Cereal is my comfort food.
Candy Bars
Candy bars are a cheap and convenient snack to carry and I'm always in the mood for them. Energy bars are generally higher in protein and lower in saturated fat, but they are 2-4 times more expensive and not as calorie dense. And I personally don't like the taste of most energy bars. Anyway, there are much cheaper ways to get that protein you need.
I'm a big fan of Snickers bars, but possibly the best candy bar for backpacking is Payday. It's about the same cost per calorie and has about the same calories per ounce as Snickers (134 calories per ounce), but Paydays have nearly 60% more protein and half as much saturated fat. They also don't melt on a hot day.
Peanut Butter M&Ms are also popular on the trail for their high calorie content (150 cals/oz.). They are lower in protein than Payday, however, and nearly three times as high in saturated fat. They are great in trail mixes though.
Foil pouch of Chicken, Tuna, and Salmon
Salmon and Tuna costs about $21.00 per 1000 calories. What salmon and tuna do provide, however, is protein and omega-3 fatty acids.
Tuna is a decent protein source (7g/oz), but foil pouches of chicken have just as much at half the price ($10.20 per 1000 calories). 
All of these only have about 30 calories per ounce, so I rarely buy more than one or two pouches on a resupply. Of course, if you have the time and it's legal in your area, fishing makes the weight and cost of fish irrelevant. 
 Dehydrated and pre-cooked meats
Beef Jerky is more calorie and protein dense than tuna or chicken, with about 81 calories and 14 grams of protein per ounce. The price is comparable too, at $12.48 per 1000 calories or more.
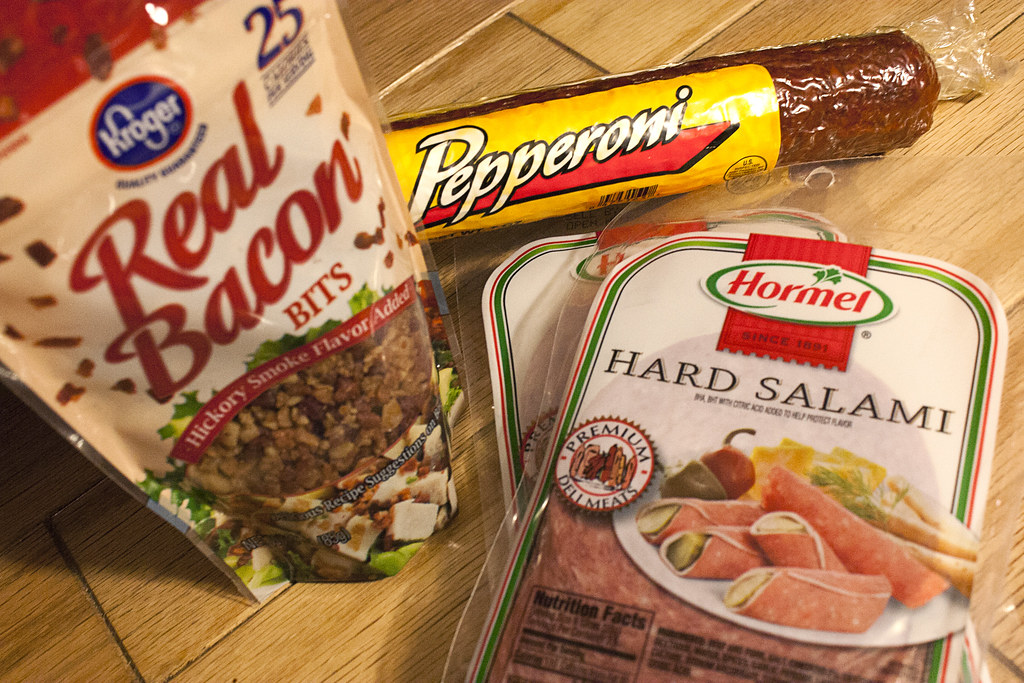
Pepperoni is one of my favorite trail-suitable meat sources, due to its higher calorie density (132 calories/oz.) and its versatility. It's good on crackers, tortillas, trail pizzas, or eaten plain. It's also the cheapest meat suitable for the trail, if you buy a pound unsliced it can be as low as $2.63 per 1000 calories if you order it from Walmart.com. (I'll be testing out using Walmart.com for a few mail drops on the PCT, I'll let you know how that works out in a future post.) Grocery store pepperoni runs more like $4.60 per 1,000 calories, so still the cheapest meat on my list.
Another great meat option on the trail is pre-cooked bacon or bacon bits. They're great in instant mashed potatoes, salads, sandwiches, wraps, mac and cheese, and other pasta dishes. The "Fully-cooked" bacon has 126 calories per ounce and "real" bacon bits have 101, but bacon bits are half the price per ounce, at about $7.30 per 1000 calories.
If you like the taste, foil packs of Spam have 101 calories/oz., 12 g of protein/oz., and cost about $7.73 per 1,000 calories.
Lentils and other beans
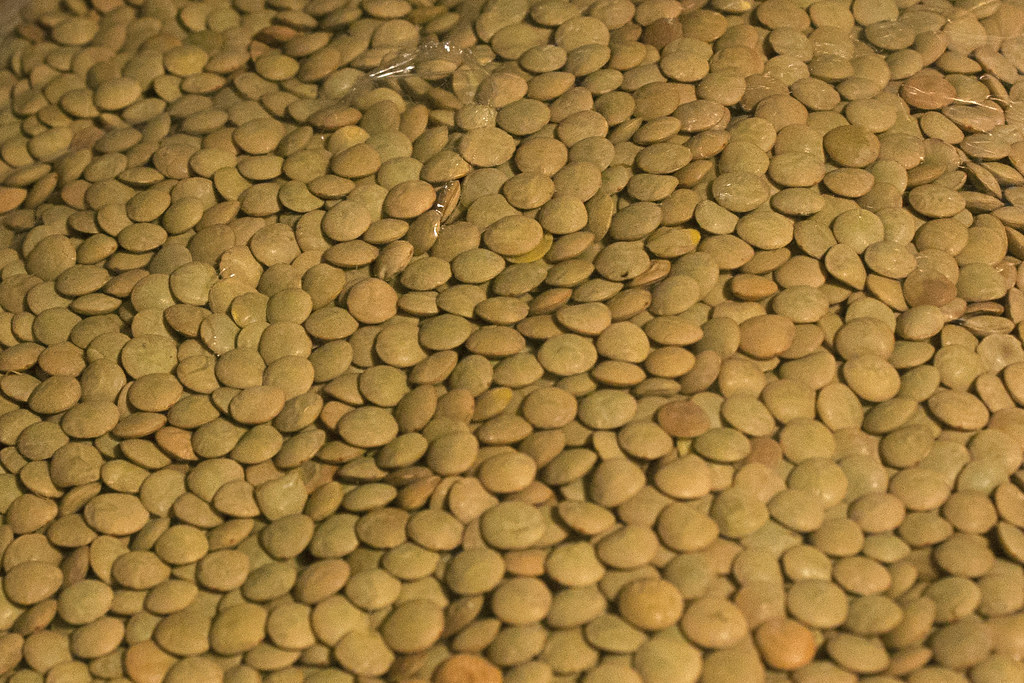
Lentils are not lightweight calories, at only 33 calories per ounce, but they make my list for a lot of reasons. They are the cheapest source of calories, protein, and fiber (as low as 26¢ per 1,000 calories).
They are 1/5th the cost per gram of protein of the next cheapest protein source on my list, whey protein powder. They are not a complete protein, however, but if eaten with whole grains you can create a more complete protein dish. 
Other than being one of the best sources of fiber on this list, lentils are also full of many things thru-hikers may lack in their normal diet, such as, iron, folate, vitamin B1, and several essential amino acids.
Cook time can be reduced by soaking them in a zip-loc bag of water a few hours before cooking, but I haven't found this to be necessary unless I'm trying to conserve fuel. I tend to eat them al dente to reduce cook time as well.
Whey Protein
It may seem expensive, and it is per calorie, but it's one of the cheapest, most versatile, and most convenient protein sources you can buy. It has over 24 grams of protein per ounce. Nothing else on my list even comes close. It's great in protein shakes, oatmeal, cereal, or hot cocoa.
Fruits and Vegetables 
A lot of produce, although heavy calories, will pack out well: potatoes, sweet potatoes, broccoli, onions, cucumbers, squash, garlic, apples, avocados, hot peppers, carrots, and celery, for example. Also, consider picking up a bag of complete ready-made salad for your first night's dinner after a resupply. Keep produce in the center of your pack where it is coolest. 
Pastries
Little Debbie snacks, honey buns, pop-tarts, and donuts may not be the healthiest food choices, but they can be cheap (pop-tarts as low as 88¢ per 1000 calories). They also require no time to prepare and are an excellent comfort food. I've said it before, but don't underestimate the power of comfort foods to improve morale on a long-distance hike. 
And I'll repeat myself again, pair high GI foods like these with foods that are high in unsaturated fat, dietary fiber, and protein to blunt the blood-sugar spike. If you're going to eat them, have them with breakfast or during a mid-day snack break for their immediate source of energy, but not before bed or during periods of inactivity so you can avoid the subsequent drop in blood sugar.
Spices and sauce packets
Soy Sauce, hot sauce, mustard, honey, sugar, salt, pepper, and other restaurant condiment packets are a great way to improve recipes without carrying large quantities. I pick up a few when I'm eating in restaurants in town. You can also purchase single use sized portions of spices in many grocery stores. 
Drink Mixes/Electrolyte replacement
Drink mixes with electrolytes are vital when getting this much physical activity, especially on a hot summer day climbing up mountains. Drink mixes will also make creek or lake water taste better, which helps ensure you'll drink enough. Electrolyte replacement is important enough to consider it part of your first aid kit.

Once again, thanks to Tavis Piattoly for helping me get some of my facts straight in this article. In an upcoming post, I'll use this list in a sample daily meal plan including recipes from the authors of the best-selling backpacking cookbook, "Lip Smackin' Backpacking." Please send me an email with your own recipes, comments, or suggestions, or leave them in the comments below.

Thanks for reading

-RG

Related Articles:
Nutrition for Thru-hikers: An Interview with Sports Dietitian, Tavis Piattoly
Cooking Supplies and How to Make an Alcohol Stove
Grocery Shopping with a Thru-Hiker, Part One
- - - = = = - - -

Tavis Piattoly, MS, RD, LDN is the Sports Dietitian and Nutrition Consultant for the New Orleans Saints, New Orleans Hornets, and the Tulane University Athletic Department where he coordinates nutritional assessments, provides nutrition education, and develops individual meal plans for athletes to improve their health, performance, and recovery. In addition, he consults for numerous high schools athletic programs throughout the state of Louisiana. Futhermore, Tavis worked closely with Roy Jones Jr. and Bernard Hopkins to help them retain their boxing titles and has been working with Lance Berkman since 2011.

He is also the co-founder and Director of Sports Nutrition education for My Sports Dietitian (www.mysportsd.com), an online sports nutrition education company to help High School and College Athletes improve their eating habits to enhance performance, recovery, and health through the guidance of a Licensed Sports Dietitian.

Tavis obtained a Master’s of Science Degree in Exercise Physiology from Louisiana State University and a Bachelors of Science Degree in Nutrition and Dietetics from Louisiana State University. He is a registered and licensed Dietitian/Nutritionist. In addition, he serves on the Louisiana High School Athletic Association Sports Medicine Advisory Board.

Grocery Shopping with a Thru-Hiker, Part 1

(Photo: The wonderfully versatile peanut butter)
When non-backpacking folk ask what I eat on a long trail, many assume I carry a couple months of food on my back or that I fish, hunt, set traps, and forage for edible plants and berries. I would love to maintain that false image of me in their heads, but I've never been a good liar. A month of food would weigh nearly a hundred pounds, hunting and gathering is often prohibited, and there isn't enough time when you need to hike 20 miles a day. The truth is, other than the occasional wild berry bush, my food is foraged from grocery stores and gas stations along the way.

This series on food is about long distance hiking, with the aspiring first-time thru-hiker in mind, but it will still be relevant for any multi-day hike. The main difference is that with long distance hiking, things like budgets, resupplying along the way, limited availability of items in towns, maintaining body weight, and good nutrition are more important factors to consider. On a week-long trip, I don't worry about saving a few dollars or maintaining body weight. Nor do I think as much about proper nutrition, joint inflammation, or getting burnt out on certain foods.

Part two will be a sample long-distance hiker shopping list, but before making a list, here are a few things to consider:

How many calories do you need?

There are too many variables to know the exact number of calories you’ll need on a given day, such as body weight, gender, age, metabolism, pack weight, elevation gain, temperature, and hiking speed. You can, however, get an estimate of what you'll need then work from there.

“To get a rough estimate,” says Tavis Piattoly, MS, RD, LDN, Sports Dietitian and Nutrition Consultant for the New Orleans Saints. “First, determine your estimated basal metabolic rate (or BMR, the rate at which the body uses energy while at rest). For men the formula for your BMR equals:

88.362 + (6.077 x weight in lbs.) + (12.189 x height in inches) - (5.677 x age in years) 

For women, BMR equals:

447.593 + (4.194 x weight in lbs.) + (7.869 x height in inches) - (4.330 x age in years)

That's approximately what you'll burn doing nothing but keeping your vital functions going, such as breathing and keeping warm. Next, add the following number of calories for every hour you are backpacking in a given day:

Body Weight
Pack Weight     
100 lbs. 115 lbs.
130 lbs.
155 lbs.
180 lbs.
205 lbs.
9 lbs.
318 365
413
493
572
651
10 to 20 lbs.
341 392
443
528
613
698
21 to 42 lbs.
363 418
472
563
654
745
Over 42 lbs.
408 470
531
633
735
838

I’m 6 foot, 180 lbs., 35 years old, so my BMR equals 1,861 calories. After a strenuous 10-hour hike, with maybe 2 hours of breaks, my average daily calorie needs would be about 7,000. The calories in the chart above are for strenuous uphill hiking, so the numbers may seem higher than what you normally eat, but this isn't an exact science, rather it’s a guide to get you started. You’ll need to make adjustments as you go. Most of us have plenty of fat stores to get us by until we figure it out, but you will lose about one pound for every 3,500 calorie deficit in your diet. That adds up fast on a long distance hike, so it's important to have a general idea of the calories your body needs.

“In the beginning of your thru-hike," says Tavis "Weigh yourself every 3-7 days, if possible (early morning after going to the restroom). Measure how hungry you are every 2, 3, or 4 hours. If you’re getting hungry in 60-90 minutes after eating a meal, you either didn't eat enough or it caused a spike and crash in your blood sugar, so you would need a more stable carbohydrate: quinoa, beans, whole grain cereals, like Kashi or Shredded Wheat, or whole grain bread - anything rich in fiber.”

Features of the Best Backpacking Foods

The best backpacking foods are:

  • Calorie dense

    Calorie density has less to do with dehydrated food and more to do with fat content. Fat has just over 250 calories per ounce, 225% more than protein and carbohydrates. For comparison, a bag of mixed nuts has about 185 calories per ounce, a dehydrated pasta meal has about 110 per ounce. Dried fruit has about 85. Foil packages of tuna, salmon, and chicken and fresh produce have about 30 calories per ounce.

    With a 6,000-calorie diet, if you ate a very low-fat trail diet of fish and fresh produce, you’d need to carry 90 pounds for a week on the trail. If you choose high-fat calorie-dense foods, you can get that down to about 16 - 19 lbs. Although I've never met a backpacker attempt the former, you can see how food selection can make a huge difference in your pack weight.
     
  • Easy to prepare with minimal cooking supplies

    That way there's no need to carry more than a stove, cook pot, fuel, and spoon. I've gone on many backpacking trips without cooking supplies, but on a long distance hike, the ability to cook will increase your food options and make it easier to have a more healthful varied diet.

    Campfires can save weight by eliminating the need to carry a stove and fuel, but they can't always be relied on due to rain or fire bans. If you're planning for campfires, be sure you have plenty of foods that do not require cooking for those rainy days.
     
  • Highly Nutritious

    With the food limitations of long-distance hiking, namely the lack of refrigeration, access to fresh produce, and the need for calorie dense/high-fat foods, it’s very easy to become deficient in a variety of vitamins and minerals over time. Additionally, it's very important to reduce saturated fat and sugar intake. It's tempting to pack a lot of cheap, high-saturated fat and high-calorie junk foods, but too much can lead to increased inflammation and sluggishness. Constant soreness and lack of energy have sent a lot of would-be thru-hikers home before finishing their goal.
     
  • Non-perishable

    Lack of refrigeration makes it more difficult to eat a healthy varied diet on the trail, and the need for non-perishable foods is obvious. Some perishable foods, however, can last a few hours or days without refrigeration. Hard cheeses like Parmesan and Romano will last for days if kept sealed well. Individually wrapped cheeses, like string cheese, also pack well.

    A lot of produce, although heavy calories, will pack out well: potatoes, sweet potatoes, onions, cucumbers, squashes, garlic, apples, avocados, hot peppers, and carrots, for example. Also, pick up a bag of complete ready-made salad for your first night's dinner after a resupply.

    Bacon, which makes all things better, is available pre-cooked at most grocery stores. Farm-fresh eggs, which have not been previously refrigerated, can keep for several days at or below 68°F. (Once refrigerated in a grocery store, however, eggs should stay refrigerated due to the “sweating” on the shell that happens from the sudden change in temperature. This can lead to bacterial growth.)

    And don't forget the world is your refrigerator when it’s below 40° F. When it’s cold enough outside, your food options open up considerable, like milk, eggs, meats, cheeses, and butter. As with most perishable foods, keep them stored in the center of your pack to keep them a little cooler and avoid body heat and seal them well after opening.
     
  • Appetizing

    It may seem obvious, but on a long distance hike you’ll probably get tired of even your favorite foods eventually. This is the main reason I buy my food along the way and avoid preparing mail drops before a trip and shipping them to myself along the trail. What sounds good before a trip, may make you dread dinner at the end of your day months later. You want to crave the foods you carry. It will help morale and ensure you’re going to eat enough calories to maintain body weight.
     
  • Inexpensive

    Believe it or not, people who hike for several months out of the year (rather than working) are usually on a tight budget. Some of the cheapest calories on my list are: lentils, ramen noodles, whole-wheat pasta, oatmeal, Pop Tarts, peanut butter, and olive oil. All are less than $1 per 1,000 calories and lentils are as cheap as 26¢ per 1,000 calories. For a comparison, Mountain House or other brands of pre-packaged meals, run over $12 per 1,000 calories. Beef jerky costs about the same. Foil packets of tuna and salmon, about $20 per 1,000 calories.

    Hiking with a group can save you a lot of money by allowing you to buy in bulk and separate the food into individual zip-top bags. If you prefer to hike alone, try to find other hikers heading to town around the same time as you. Ask if they want to share the cost of bulk foods and slow down or increase your hiking speed to ensure you get to town the same time as them.

    If you're not with a group, buying in bulk can still save you money without carrying more food weight, if you carry versatile ingredients that can be prepared in multiple ways.
     
  • Versatile

    Buy ingredients that can be prepared in multiple ways and with varying cook times, like pasta, oatmeal, crackers, cheese, and peanut butter. Have some meals that don't need to be cooked at all and save them for nights when you don’t have the time or simply aren't in the mood to cook. This is especially important when you run out of fuel or fire bans or rain prevent you from building a campfire.
     
An example of putting this information to use

I'll have more details in the next post, but as an example, whole-wheat pasta, oatmeal, peanuts, peanut butter, and olive oil fit in all of the above categories. For example, combine two servings each of cooked whole-wheat pasta, crunchy peanut butter, and olive oil, and you have one of my favorite backpacking meals, Peanut Butter Noodles. (Add salt or a packet of soy sauce to taste.) It has 1040 calories (145 per pre-cooked ounce), 96 grams of carbohydrates, 64 g of fat, 30 grams of protein, 14 grams of fiber, and costs just $0.86. That’s not much more per calorie, than even ramen noodles and much healthier too. In other words, with a little creativity, you can eat for a whole day for the cost of one pre-packaged freeze-dried meal.

These ingredients are also versatile and can be used in a number of ways. Swap out the peanut butter for 1/4 cup of Parmesan cheese and instead use the peanut butter in your morning oatmeal. In your oatmeal, mix a couple tablespoons of whey protein, cocoa drink mix (such as Ovaltine), or powdered whole milk to add additional vitamins, nutrients, calories, protein, and fat. You could also save the peanut butter to spread on whole-wheat tortillas for lunch and instead add nuts and/or dried fruit to your oatmeal. The Ovaltine and powdered milk can also be used for cold chocolate milk or hot cocoa, or use them to turn your instant coffee into a mocha.

That is all for now. I will post more food ideas in part two. Thanks for reading!

-RG

Related Articles:
Nutrition for Thru-hikers: An Interview with Sports Dietitian, Tavis Piattoly
Cooking Supplies and How to Make an Alcohol Stove
- - - = = = - - -

Tavis Piattoly, MS, RD, LDN is the Sports Dietitian and Nutrition Consultant for the New Orleans Saints, New Orleans Hornets, and the Tulane University Athletic Department where he coordinates nutritional assessments, provides nutrition education, and develops individual meal plans for athletes to improve their health, performance, and recovery. In addition, he consults for numerous high schools athletic programs throughout the state of Louisiana. Futhermore, Tavis worked closely with Roy Jones Jr. and Bernard Hopkins to help them retain their boxing titles and has been working with Lance Berkman since 2011.

He is also the co-founder and Director of Sports Nutrition education for My Sports Dietitian (www.mysportsd.com), an online sports nutrition education company to help High School and College Athletes improve their eating habits to enhance performance, recovery, and health through the guidance of a Licensed Sports Dietitian.

Tavis obtained a Master’s of Science Degree in Exercise Physiology from Louisiana State University and a Bachelors of Science Degree in Nutrition and Dietetics from Louisiana State University. He is a registered and licensed Dietitian/Nutritionist. In addition, he serves on the Louisiana High School Athletic Association Sports Medicine Advisory Board.

30 Tips for Hitchhiking to Resupply

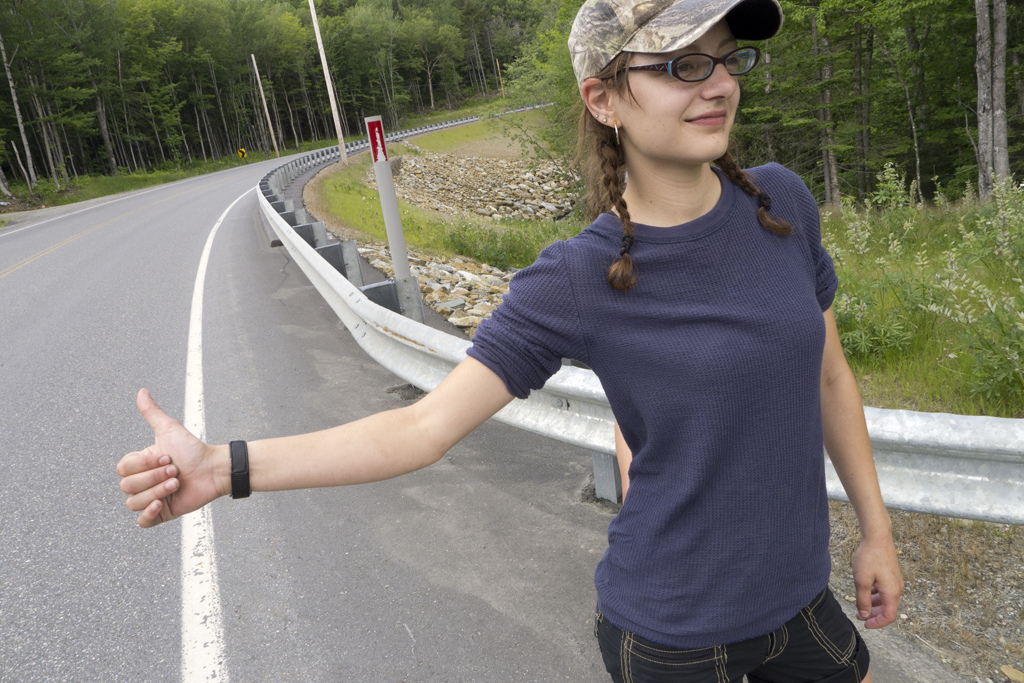
(Photo: Liv hitching in Maine)
On a long enough hike, hitching into town to resupply is almost a necessity and often a major concern for aspiring thru-hikers. The first time I stretched out my arm and put out my thumb, I felt equally nervous and excited.

A couple hundred hitches later, the nervousness dwindled to nothing, but the excitement continues. It's not simply free transportation. Something about it evokes a feeling of uncomplicated freedom. Akin to minimizing possessions to only what you can carry.

My friends and I have gotten many hitches from people who said we were the first hitchhikers they have ever picked up, so it seems we’re doing something right. Not everything here is essential for getting a ride, but they are all of the things I consider. The tips are geared toward the short hitches between trails and towns for resupplying, but most of them apply no matter where you’re hitching.

1. Give room for cars to pull over safely
Look for a spot where someone can easily pull over without issues or in places where it would be illegal to stop. Wide shoulders and turnouts are prime real estate for hitching. This will be the most obvious thing you'll read on this list, but also be sure you're on the side of the road where the traffic is moving in the direction you want to be going.
2. Give time for drivers to see you and brake safely
Stand in a spot where a driver will have a few seconds to see that you’re hitching and have plenty of time to slow down. And of course, enough time to take pity on you. Few people will want to slam on their breaks or turn around to pick you up. It happens occasionally, but don’t make it a requirement.
Standing by a road sign or anything else that a driver might already be looking at, may give them an extra second to notice you.
3. Put your thumb out and pointed up, if in the United States
This might seem obvious, but I mention it because the tradition of putting out a thumb is what we do in America and Europe, but it's not the standard everywhere. If you’re in another country, you’ll want to learn their gesture. For example, in Israel, hitchhikers hold their fist out with their index finger pointing towards the road.
4. Hitch where traffic is slow or stopped
Such as near traffic lights or within eyesight of where people are pulling out of gas stations or parking lots. While waiting for a light or pumping gas they are more likely to notice you. Perhaps the best spot is right before a highway on-ramp.
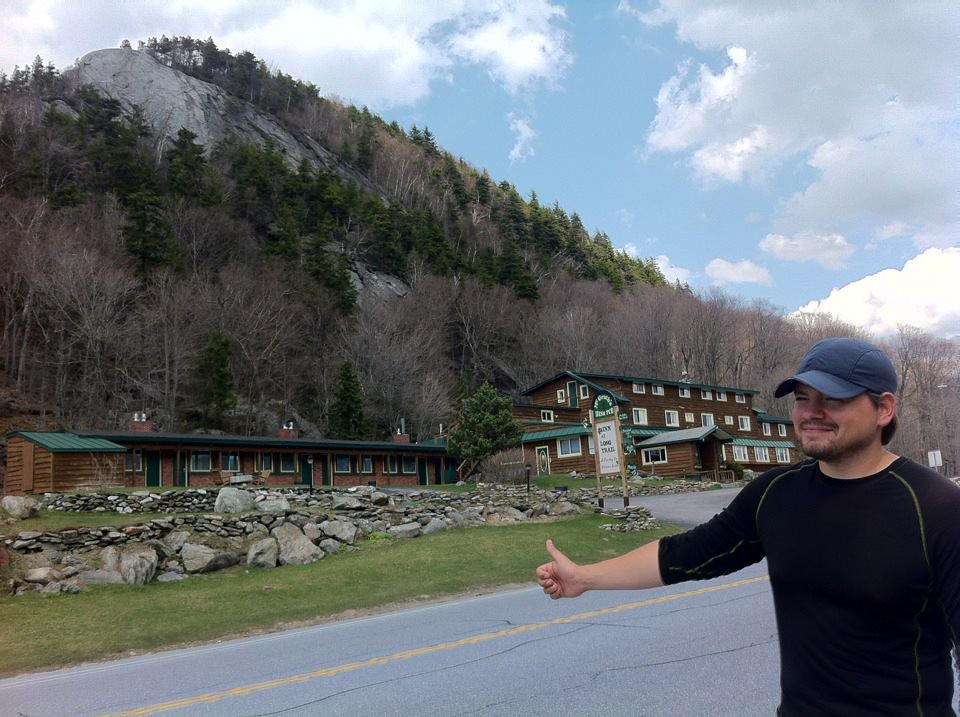
(Photo: Me hitching by the Inn at Long Trail)
5. The Law
The law can seem a little complicated, so I’ll try to simplify it:
Although rarely enforced, hitching is illegal in Nevada, Utah, Idaho, and New Jersey.
It is illegal to hitch on Interstates except in Texas, Oregon, North Dakota, and Missouri. This doesn’t mean you can’t hitch on the road that leads to an Interstate on-ramp though.
Although, most states prohibit standing on the road itself, it is usually okay to hitch from the shoulder. If you're unsure, stand just off to the side of the shoulder. It's safer anyway.
California, Alaska, Hawaii, Washington, Kansas, Wisconsin, Florida, Maine, New York, Rhode Island, and Massachusetts have more complicated laws that you may want to read up on. I’m not going to go into them here, but I will just say if you’re outside city limits in these states it’s usually okay to hitch. Although, failure to read up on these laws could result in a citation. It's rare, but it happens. Just remember that I warned you.
The police may ask for your ID even if you’re not doing anything unlawful. Just let them, even if you don’t technically have to identify yourself when not breaking any laws. They are usually just trying to keep people safe.
Sometimes it’s illegal to hitch on other federally-owned roads other than Interstates, like National Park roads, National Scenic Byways, and National Recreation Areas, but I’ve never had any trouble. A park ranger in Yosemite even once suggested I hitch to a certain trailhead since their buses did not go out that far.
6. Minimize Turns and Simplify Your Route
The less complicated your route, the more likely a person driving by will be heading to your destination. If you’re a few blocks from the first turn, go ahead and walk that distance to eliminate it from the route. The more turns and on-ramps that you eliminate from your route, the better. By all means, stick your thumb out as you walk, but toward that better position.
7. Don’t get dropped off in a bad hitching spot
If you’re going to need multiple hitches to get to where you’re going, don’t get dropped off in the middle of nowhere even if it’s closer to your destination. If they will have to drop you off between towns where there is little to no traffic, thank them for stopping, but wait for the next hitch.
Also, it’s harder to get a hitch from downtown. Traffic will be going in every direction and people aren’t necessarily driving out of town. If someone has to drop you off in a town you’re not staying in, ask to be dropped off at the edge of town instead.
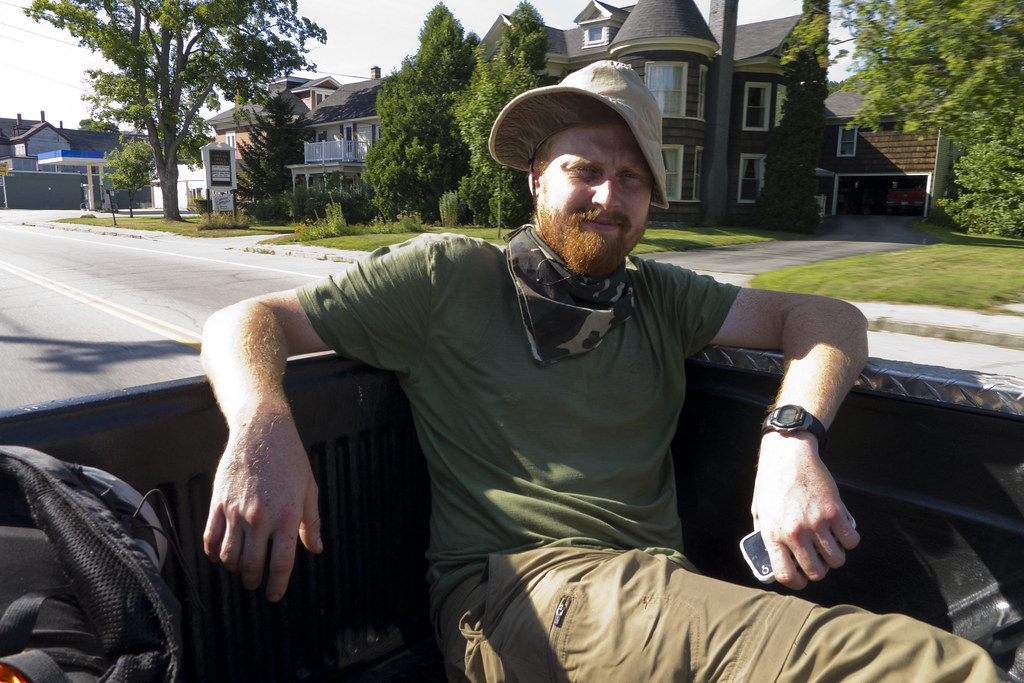
(Photo: Red in the back of a pickup
while hitching in Gorham, NH)
8. Hitch in pairs when possible
This may also mean separating a larger group into pairs. People aren’t just giving you a ride, but your packs as well, which take up a lot of space. Hitchhiking is a numbers game, and if you’re in a big group, you’re going to have fewer vehicles pass that could possibly carry you all.
Consider having all but two standing off to the side where they aren't seen from the road. If someone stops that has the room, ask if they can take you all. Otherwise, leave the rest behind and meet back up in town.
Also, when possible, have one female to each pair. Couples and women are a lot less threatening to motorists. When I was hitching with Sixgun and Liv, there were many times when we'd put our thumbs out and a car would stop almost immediately.
9. Be Happy
If you’re not happy, fake it. People don't want to pick up a stranger who looks angry or dangerous. If you’re with someone else, have a happy conversation while you’re holding out your thumb. Laugh, even if what is said isn’t that funny. Tell jokes if you have to force it. You’ll seem friendlier.
Although, don’t exaggerate your happiness or laughter. I was with another hiker on the AT trying to get a hitch and his over-sized smile and exaggerated attempts at physical humor were just creepy. Nobody stopped.
10. Don’t have a knife sheathed on your belt
If you want to have one in your pocket for safety, that’s fine, although 99.9999% of people are stopping to help a fellow human, not harm them. Anyway, they are usually more afraid of you than you are of them, so put the knife out of sight.
11. Make Eye Contact
Eye contact can really increase your chances of getting a ride. If someone makes that simple connection with you, I think it adds a little bit of guilt or pity to their quick decision making. In this scenario, guilt and pity are your friends.
Of course don’t stare at them in a creepy way, but give them a friendly smile. If walking, turn around and walk backwards with your thumb out when a car is coming, so you can still make that eye contact.
12. Take off your sunglasses
Let them see your non-threatening face. If your face is just naturally threatening, I don’t know what to tell you.
13. Don't Smoke
A lot of people don't want cigarette smoke in their cars. Smoking can definitely reduce the percentage of cars that will pick you up. And they will already have your hiker odor to deal with. If you need to smoke, ask after you're on the move if they mind.
14. People Sometimes Come Back
If the speed of the car makes it obvious they are not going to stop, smile and wave anyway like you’re thanking them for the consideration. Show them this common courtesy and sometimes they will turn around and come back for you. Guilt and pity sometimes takes a second to brew.
15. Look as clean as possible.
If someone thinks they’re going to have to get their car’s interior detailed after driving you three miles, they’re probably not going to stop. And if they do pick you up, actually being clean may make them tolerate taking you further. In other words, do whatever you can to freshen up.
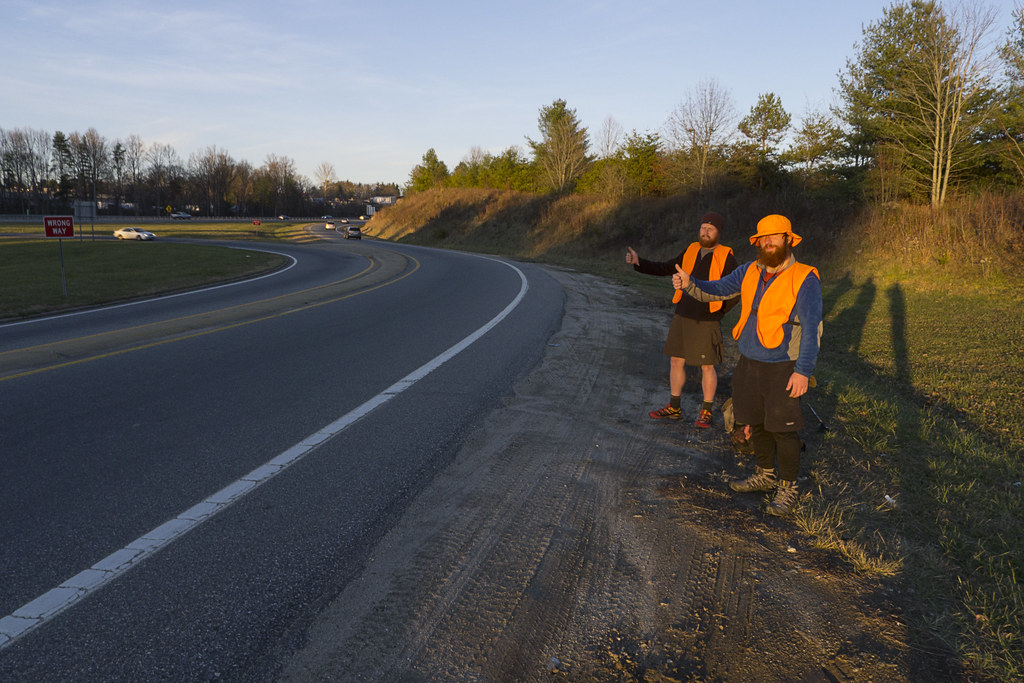
(Photo: Red and Cocoa Toe hitching from Asheville, NC
back to the Appalachian Trail.)
16. Wear something bright
When you’re buying a shirt or bandana for your hike, consider the brightest ones possible. They could help you get noticed when hitching.
17. Talk to people near trailheads
If you know you’re going to try to hitch at the next trailhead, parking area, or road, start talking to day-hikers that you meet on the trail. You don’t need to ask them for a ride, but later, when they see you standing by the road with your thumb out, they will often pick you up. Even just asking them for the time or commenting on what a beautiful day it is can be enough.
18. Talk to people in town
The same thing applies in town. While you’re in grocery stores, convenience stores, or restaurants, talk to people. Some business owners frown on you soliciting a ride from their customers, but you don’t necessarily have to. If you’re being friendly and talking to people, they’ll often pick you up when they see you hitching later. Just make sure they see you, hitch in eyesight of the people pulling out of the parking lot. If you see someone that you had a conversation with, wave to them so they know it's you.
19. Don’t bother hitching on the side of the road at night
Instead, go to bars, restaurants, or well-lit gas stations and meet people. Again, business owners don’t want you walking up to customers to ask for a ride and most people don’t like it either. Start conversations first and mention where you’re headed. They'll see your packs, they know you're travelling. Often they will offer the ride and think it was their idea the whole time. 
Besides, standing on the side of the road in the dark could be dangerous. 
20. Ask people about public transit
Sometimes I feel weird asking people for a ride, especially on a business's property, so I resort to a more passive indirect way of doing it. Sometimes I’ll ask the employees of the business or the locals if they know of any public transit services in the area and tell them where I’m headed. Often they’ll just offer you a ride. Remember, it’s always good to find ways to make the ride seem like their idea.
21. Stand and Pace to get noticed
But don't walk away from a prime hitching spot. Only walk while hitching if you're moving to a better place. I've walked toward town while hitching while other hikers stayed back to hitch and they ended up passing me. Something you realize after walking in the woods for hundreds of miles is that cars are incredibly efficient at moving people around.
22. Keep your backpack on or in plain sight
If people can see your pack or trekking poles, and you’re near a trail, they will often know your just a hiker needing to resupply in town. This means you probably aren’t going far and probably aren't there to murder anyone.
23. Make Signs
I'm still not sure if signs really help, but it's something to consider. One time on the Long Trail, Red and I made one. I asked the guy, “So did the sign help out at all?”
“Actually,” he said. “I didn’t even notice the sign. The first thing I noticed was the kilt.” Red hikes in a kilt. When he bought it, I was certain we’d never get another ride again, but I was proven wrong many times.
If you’re already carrying a colorful bandana, use that instead of cardboard. It doesn’t add weight to your pack, it will stand out, and if you use cardboard people may just assume you’re "willing to work for food" instead of looking for a ride.
When making a sign, make it as simple as possible. This ensures it's easier for a driver to read and it will be reusable. It can be as simple as the letter of the direction you’re going, for example on a north/south running trail, you’ll probably only need an E on one side and a W on the other. You could also write something even more generic and reusable like, “Hiker to Town,” on one side of a bandana and “Hiker to Trailhead” on the other.
If you get too specific and write your actual destination on a sign, not only is it not reusable, but if the destination is further away or in a direction the driver isn't going, they may not bother to stop at all. And you really want them to stop. If they have already made the effort to stop, they are more likely to take you where you’re going or at least get you part of the way there.
24. Consider the time of day when you’ll get to the road
Obviously, you don’t want to get to the road after dark, but get there at least an hour before dark in case you don’t get a ride right away. Think about how many miles you have to the road and how much time you’ll need in town. If you want to get back to the trail before dark, leave enough time to shop and get two hitches. Usually two or three hours is plenty unless you're in the middle of nowhere.
Also, remember that a lot more people go on day-hikes on weekends, so you are more likely to see cars parked at trailheads and so more likely to get a ride.
25. Sometimes going in the wrong direction will get you to your destination quicker
If you’re in a bad spot and you can’t get a ride in the right direction. Try to also get a ride to a better hitching spot in the other direction.
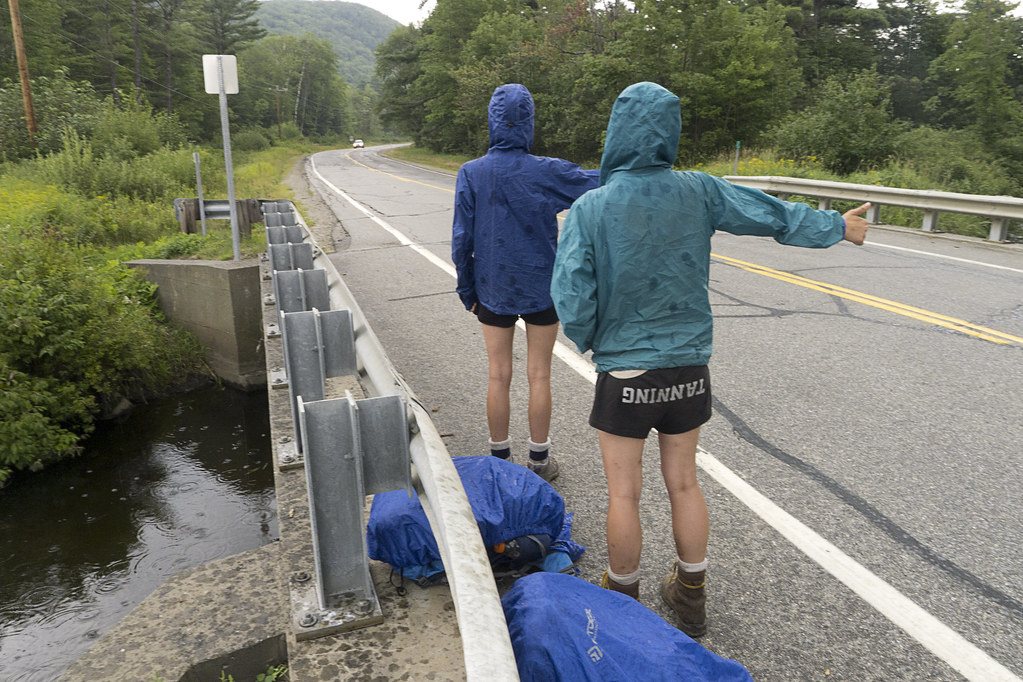
(Photo: Sixgun and Liv hitching in the rain)
26. When all else fails, just look as pathetic as possible
Being rained on helps. So does taking off your coat and looking cold. Sometimes desperate times call for desperate measures.

Tips for after someone has taken the bait

27. Tell them the shortest distance you’re willing to go on the hitch
For example, when someone asks where you’re headed, say something like, “Well ultimately, I need to get to _______, but if you can take me to _______ that would be great!” That way they won’t feel like they’re stuck with a smelly hiker for a long time, but if they like you, they’ll usually take you further. Actually, I think everybody except two people took me the full distance even if it wasn't on their way, but in their defense both of them were expected to appear in court.
28. Be leery of putting your pack in someone’s trunk
They might just pull away with all your gear when you get out. Either on accident or on purpose. Just imagine being dropped off by a trailhead and helplessly watching all your gear roll away. Instead, put your pack on your lap, or if you're in the backseat set it right next to you. If you’re hiking with someone else, have a rule that one person stays in the car until the other has pulled the packs out of the trunk.

Tips for when you’re in the car

29. Have a good conversation
Don’t just sit there quietly the whole time. That’s weird and they will be less likely to take you that extra distance. Ask them where they are from. Be happy. Tell them about your travels. If they enjoy your company, they are more willing to take you the extra mile or pick you up again if they see you hitching back to the trail.
Tell them interesting stories, but try to get them to talk about themselves. Not only are some of these people really interesting, but people like talking about their lives. If they are enjoying the conversation, they will usually drive you further.
I’ve had many people go out of their way to take me where I needed to go. After finishing the John Muir Trail, a driver drove me two hours out of his way to take me back to my car in the Yosemite Valley (four hours round trip). We had a great conversation. Not only that, but I’ve had people drive around to look for me later to take me back to the trailhead.
Never talk about anything even remotely controversial. This should be a given, but if the driver brings up the topic, just smile and nod or try to change the subject. I know some people can’t help but argue, but you have to fight the impulse if you want them to take you further or pick you up again later. Or just agree with them, if doing so doesn't kill something dear inside of you.
30. Be courteous
Apologize for the hiker smell and thank them for the ride. These people are doing you a huge favor and all you’re offering is your stench. Make sure they know how grateful you are for their kindness. When people think you like them or appreciate them in anyway, they will like you almost 100% of the time. I’ve had people wait for me to finish shopping and drive me back to the trail. People are just amazing sometimes. Make sure they know that.
In Conclusion 

There will be exceptions to all these tips. They are simply things that may help increase your chances of getting to where you need to go.

Hitching isn’t without risk, of course, but it’s not as dangerous as most people believe. As with everything, firsthand experience reduces your fear by making you more aware of reality.

People often say, “I wouldn’t hitch in this day and age.” Those people need to stop watching TV. The news is to reality what reality shows are to reality. Get out and see the world as it really is. Believe it or not there are fewer acts of violence today than ever before. The number of people willing to injure or murder a stranger with his thumb out on the side of the road has not gone up, in fact, it has gone down.

Actually, come to think of it, people have picked us up because they were afraid if they didn't a crazy person might. So maybe a little bit of fear in the population is good for hitchhikers.

Take precautions, but don't let a fear of hitchhiking keep you from attempting a thru-hike  Besides, you may find that many of your best stories of the long hike are your hitchhiking stories.

Creative Commons License
A Backpacker's Life List by Ryan Grayson is licensed under a Creative Commons Attribution-NonCommercial-NoDerivs 3.0 Unported License.   

Photo: Rainbow at Yellowstone Falls

I took this photo in 2012 in Yellowstone National Park.

You can purchase prints of my photos  in my Etsy store. Sales will be used to fund a replacement for my broken camera before my Pacific Crest Trail hike, so orders are greatly appreciated!

THE STORY BEHIND THE PHOTO

I slept in my car, so I could wake up before sunrise to get a specific picture. On my first Yellowstone visit in 2004, I tried to get a photo of the falls, but it didn't turn out very well. I wanted to try again.

I wasn't the only person who lugged a camera and tripod up to the view of the lower falls in "The Grand Canyon of the Yellowstone." A row of photographers were already there quietly watching the sunlight melt down the canyon's yellow rock.

I did have the oldest crappiest equipment though. I felt like a kid from the Mighty Ducks with a worn-out jersey and hockey stick held together with duct tape, just trying to compete against the spoiled rich kids with their expensive new gear.

I still wasn't happy with the pictures I was getting, but I heard that from a certain angle, the sun and the mist from the falls produces a rainbow around 9:30, so I searched for a better place to set my tripod.

In the end it was worth waking up cold and groggy in my car. I'm much happier with the picture this time. There is just something about devoting an entire morning to getting a specific photo that makes me love this one even more. There are hours of great memories packed into this fraction of a second.
  
Creative Commons License
A Backpacker's Life List by Ryan Grayson is licensed under a Creative Commons Attribution-NonCommercial-NoDerivs 3.0 Unported License.   

Q&A: Should I Buy Hiking Shoes or Boots?

(Photo: My Keen Boots after 900 miles on the AT)
“I had a nightmare last night,” Red said. “I bought boots instead of hiking shoes and didn't realize until I was on a trail.”

I laughed as few people could. “So did you bolt out of sleep screaming while lying on sweat-soaked sheets?” 

The nightmare was sort of my fault. Earlier, I had been replying to a reader’s question about footwear and I asked for his opinion.

“I just woke up confused, thinking, did I actually buy boots?” he said. “Why would I do something that foolish?”

This great question comes from a reader named Heather. I like this question because when buying your first set of gear, certain items seem like a given. Football players need cleats, basketball players need high-tops, and hikers need sturdy leather hiking boots, right?

What footwear do you prefer on the trail?

My quick answer is that unless you are bushwhacking through rough terrain, slogging through bogs, hiking in deep snow or very cold weather, or there are other safety concerns, go with shoes. Specifically shoes designed for trail use that are:
  • Lightweight
  • Breathable
  • One size bigger than your actual foot size and
  • Have a sturdy sole that is slightly wider than your foot and not too elevated
  • Have a spacious toe box
Since I have a hard time keeping my answers that succinct, I’ll tell you why in detail. These are my opinions based on my own experiences, but others may disagree. Gear choices are personal and everyone has their reasons for doing what they do. It is usually helpful, however, to learn why backpackers do what they do, or why they don’t. So, here is why I prefer hiking shoes, or trail runners, to boots in most situations. 

Reason #1: Shoes Are Lighter

When you put on a good pair of boots, I admit you do feel strong, like you could bulldoze through any terrain unscathed. On the other hand, a good pair of trail runners makes you feel light and fast, which is what I want. If I were doing a lot of bushwhacking or hiking through miles of cacti, perhaps I’d want a high-top leather boot, but I rarely find myself in that situation as I generally stick to designated trails.

Reason #2: Shoes Dry Quickly

When thick leather boots or Gortex boots get wet, they stay wet for way too long. Long enough to cause foot problems. I've given up on the idea that you can keep your feet dry. Whether it’s precipitation or perspiration, water will get in eventually. When it does, you don’t want your feet staying wet for very long. Soggy feet are much more prone to blisters and chafing. Hiking shoes made with breathable synthetic materials, or mesh, which will dry much more quickly. 

Having an extra pair of dry socks is also important. When putting on a dry pair, I hang the wet socks on the outside of my pack with safety pins to dry while I hike. At the end of the day, I keep any damp socks in my sleeping bag, so my body heat will dry them out overnight. 

Reason #3: Shoes Don’t Need To Be Broken-in

On a long enough hike, you’ll have to stop for new shoes. In my experience, until new boots are broken in, I'm more susceptible to hot spots and blisters. A good pair of trail runners, on the other hand, are usually comfortable out of the box. 

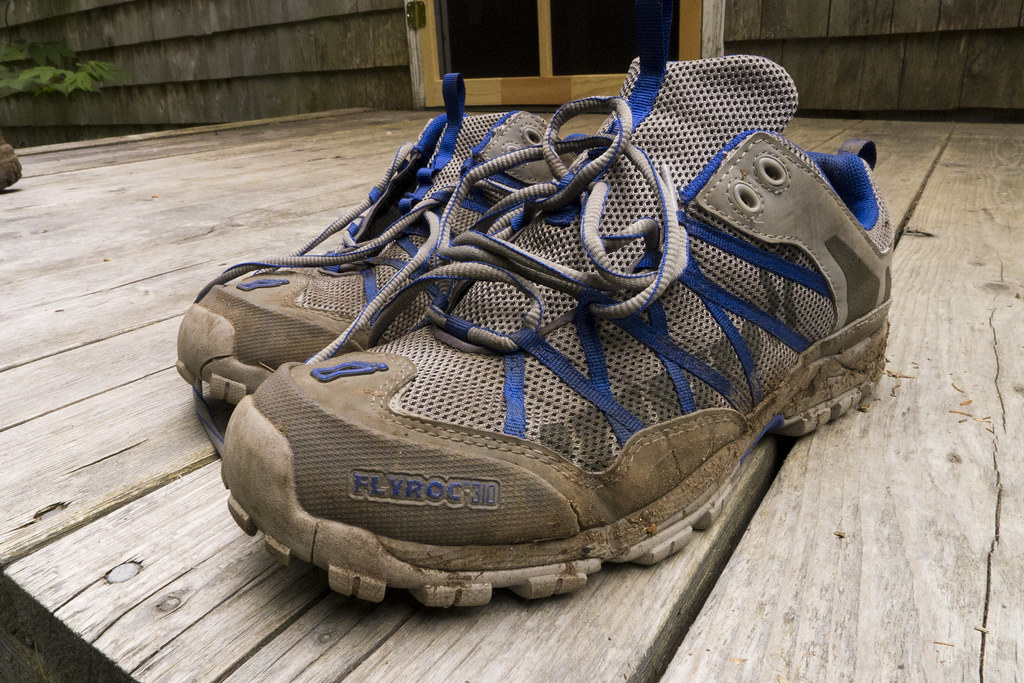
(Photo: My "$780" pair of shoes)
Soles and Insoles

My first 300-400 miles on the Appalachian Trail, I hiked in a pair of Inov-8 trail runners. I could roll them up like a pill bug with little resistance from the sole. They only cost about $80, but about $700 in medical bills.

The problem was the flimsy sole. As a barefoot runner, I believed the less my shoes unnaturally constrained my foot the better. I still believe there may be some truth to that, but it isn’t natural to carry 30 lbs. on your back and hike on rough terrain for months. I learned the expensive way the importance of sturdy soles.

(Photo: My rugged barefoot runner feet are blister-proof)
A sturdier sole and more ridged insole would have prevented that particular injury. Superfeet, Soles, or similar brand of insole can provide a lot more protection. My Superfeet insoles cost $40, but I wore them for 2,700 miles and they probably would have prevented the injury.

Ankle Support

It may seem like high-top boots offer more ankle support, but I’m skeptical about that. Besides, my nonprofessional opinion is that the sole has a lot more to do with ankle protection than the high-top collar.

For example, ankle sprains are much easier with a narrow sole and they are much more severe if the sole is too thick. A wider base will help prevent your ankle from turning and the higher your foot is elevated the higher your risk of injury.

Try on a pair of shoes and sort of roll your foot side to side. Do the shoes roll easily? Do they feel like you could easily twist your ankle in them? Is there a threshold where when you turn your ankle the shoe wants to suddenly snap to the side? If so, try another pair.

(Photo: My Salomons, My Personal Favorite)
Traction

This is another important quality in a sole. Trail shoes need good traction, especially with those prone to falling like me. My Salomons have a deep tread on the bottom that grip rocks and roots very well, even when they're wet.

Actually, I can't recall falling since I purchased my Salomons. Tell anyone who has hiked with me long enough and they would gasp in disbelief.


To conclude, in my experience, you want a sole that is:
  • Sturdy, so can't be easily rolled like a pill bug
  • A little wider than your foot
  • Not too thick or elevated
  • Has good traction


Find a shoe that fits properly then buy one size larger than normal

It's normal for feet to widen after backpacking for a while and they tend to swell after hiking long distances. Due to this, I've learned to buy a full size larger than I need.

Make sure your foot doesn't slide around too much in the shoe. This will lead to hot spots and blisters. A properly fitted insole with a deeper heel cup will help prevent this.

I have slightly wider feet than normal, so much so that the first hole I get in most shoes will be right next to my pinkie toes. Therefore, I prefer a wider toe box. Along with some rubber on the front, the extra room in the toe box will also protect your toes when you kick rocks and roots. And you will, many many times.

Try on multiple pairs and brands, A Plug For Zappos.com

Try on several brands. Many people swear by their pair of Merrells, but the two pair of Merrels I tried destroyed my feet, one pair had me limping in less than 5 miles. They just don’t work for me. I love my Salomons, but they may not fit other feet as well.

Before hiking the Appalachian Trail, I ordered about ten pair of shoes on Zappos.com. I kept my favorite four, and then returned the others. Zappos has free 1-2 day shipping both ways, competitive prices, a large selection of hiking shoes, and a 365-day return policy. This allowed me to have extra pairs of shoes at my sister’s house in case I needed her to send me a new pair. When I finished the trail six months later, I followed their incredibly simple return process and got my money back on the unused pairs.

Possible Benefits of Boots

High-top boots tied close to the ankle may keep out some debris, but I don’t find debris to be too much of a problem. It really depends on the terrain. Actually, Red told me he had more issues with debris getting in his boots than in his trail runners.

Either way, we both find that the low collar of a shoe makes it much easier to scoop out the debris with your finger without taking the shoe off, unlike high-top boots. Also, when your shoes need to be taken off to dump out debris, my Salomons with their zip cord style laces, are easy to take on and off without even sitting down. Cleaning out boots is a longer process.

(Photo: Dirty Girl Gaiters)
If you do have issues with debris, consider purchasing something like Dirty Girl Gaiters or just tie bandanas around your ankles to keep debris out.

In my mind, the only good reason to buy boots for multi-day backpacking is if you will be hiking in deep snow, waterlogged bog or marsh, doing a lot of bushwhacking, or hiking in atypical or extreme environments. For example, in very rough terrain, high-top boots may protect your ankle from scratches and bumps, especially that bony protrusion on the outside of your ankle. 

Durability

It may be true that a quality heavy boot will last longer, but that hasn't been my experience. I got about 900 miles out of both my Salomon trail runners and my last pair of heavy mid-high boots. Even if they didn't last as long, I want to be hiking those miles on happy healthy feet.

Other Considerations

Camp shoes

Good trail runners are so comfortable that I don’t see the need for camp shoes. Which reduces some weight and bulk in your pack. The only exception is if I’m going to be fording rivers or streams, I might carry a pair of lightweight Crocs.

Stream crossing

On a warm sunny day, you may not even need to remove a breathable pair of trail runners to cross a stream. Many of them will dry after only 15-30 minute of hiking. I do recommend removing your socks and insoles before crossing, though. When you put them back on, they will draw some of the moisture out of the shoe and allow everything to dry much faster than if everything is saturated completely. 

Socks

Don't be alarmed by the cost of a good pair of socks (usually $15-20 per pair). My favorites are the Darn Tough Vermont brand. Not only did my first pair last from New Hampshire to Tennessee on the A.T. (until accidentally setting them on fire when drying them out by a campfire), but Darn Tough replaced them.

I walked into the Outdoor 76 outfitter in Franklin, North Carolina and saw a sign that said the Darn Tough brand was "Unconditionally Guaranteed". I jokingly said, "Unconditional? What if you were to accidentally set them on fire?"

To my surprise he said, "Yeah, bring 'em in."

I pulled the smelly socks from my pack, he held out an empty plastic bag with his nose turned to the side, and I dropped them in. He quickly tied the bag shut like they were radioactive then let me take a free pair off the shelf. I suspect that other outfitters will tell me to send them back to the manufacturer to get the replacement, but after that I became a Darn Tough Vermont man for life!

Sock Liners

I don't usually use sock liners, but they have been essential a few times when hiking in rain or snow all day. They can cut back on chafing and protect your softer water-logged skin from blisters. I use toe sock liners to add more protection between my toes.

Final Thoughts

I've seen people hiking in boots who had infected blisters and toenails falling off. There's just no need for that. If you are getting a lot of blisters, hot spots, or having other foot issues, don't believe that it just comes with the territory. Do what works for you, but if your footwear isn't working, change as soon as possible.

Similarly while hiking, if you start to feel a hot spot on your foot, stop immediately and try to fix the problem. You may need to clean debris out of your shoes, put on dry socks, stick a piece of duct tape inside your shoe where your foot is rubbing, or put a bandage on a potential blister spot. Failing to do so right away may lead to a bad time on the trail.

Your feet are your only vehicles out there, they will take you to some of the most amazing places in the world and the best experiences of your life. Treat them accordingly.

Thanks for the question Heather! As you know, I love talking about this, so keep the questions coming! If anyone else has a question or comment, you can use the links at the top right of this page to contact me.

Read more about foot care for backpackers in my interview with the president of the American Association of Podiatric Sports Medicine, Paul Langer: http://ryangrayson.blogspot.com.es/2014/03/footcare-for-backpackers-part-1.html


Creative Commons License
A Backpacker's Life List by Ryan Grayson is licensed under a Creative Commons Attribution-NonCommercial-NoDerivs 3.0 Unported License.   

Photo: Grinnell Lake

Grinnell Lake, Glacier National Park

I took these photos in 2012 in Glacier National Park.

THE STORY BEHIND THE PHOTO...

In the heart of Glacier National Park, beyond the waterfall and over the ridge, is Grinnell Glacier. While slowly migrating and freezing and thawing, it grinds against the rock and generates silt-sized particles called glacial flour. As the glacier melts, this glacial flour gets suspended in the water then flows over the falls and into Grinnell Lake, turning what would have been an ordinary mountain lake into this turquoise gem tucked away in the mountains.


Homesickness

(Photo: Red heading to a shelter beyond the cave)
“Hey Red, do you remember that day on the Long Trail when we hiked into Brandon, Vermont?” Red had called to talk about backpacking again, a kind of weekly therapy for being back in the real world. “I was thinking about that today. We woke up freezing and then it rained on us all day.”

“It rained almost every day on that trip,” he said.

“True, that rain was relentless. I don't think we had two days in a row without rain on that trip," I said. "We hiked seventeen miles of muddy trail to the road then decided to hitch to the McDonald's in Brandon, so we could be warm and dry for a change.”

“Except, nobody picked us up,” he said.

“Yeah, so we ended up road-walking nine more miles to town," I said. "And then by the time we got to the McDonald’s they were just about ready to close. There wasn't even enough time to get dry before we were forced back outside to walk up and down the road to find a place to sleep. On the outskirts of town, we saw a strip of trees cut out of a hillside for a row of power lines, so we climbed up there to setup camp."

“Yeah, I remember that," he said.

"That was kind of a shitty day," I said.

"It was kind of shitty wasn't it,” he said, but I could hear his smile.

“I'm mentioning it because when I thought about it today, I got very nostalgic. I miss it," I said. "Even the shitty days, I miss."

"So, as sort of an experiment, I thought about some really great days before backpacking. Memories of childhood, of trips, of friends. Memories of laughing so hard that the room goes silent because nobody can catch their breath. You know those laughs?” I said. “By every measurement, they were great days. But they didn't give me the same feeling. I guess I’d call the feeling homesickness, but I've never actually felt homesick before.”

“So you’re saying the worst day on the trail is better than the best day off the trail?” he said, summing it up much more succinctly.

“Exactly, but it's more than that," I said. "I even feel nostalgic for that night we slept on the front porch of that restaurant in Manchester Center to get out of the pouring rain. You were like, 'Hey, the sign says they don’t open for breakfast! I guarantee nobody will come in before 10!'”

"Yeah," he laughed, "And they didn't, did they?"

“No, but that was a shitty night too. I felt weird about unpacking my gear and getting into my sleeping bag, because I wanted to be able to make a run for it if I had to. God, I froze my ass off that night,” I said. “I think I got about two hours of sleep.”

"Nah, we were fine," he said. "If anybody saw us, they would have just told us to leave."

"Yeah, my attitude about that changed eventually," I said. "By the time we slept on that Big Lots loading dock in Morrisville, I wasn't too worried about getting caught. Actually, I slept like a baby that night."

(Photo: The Canadian/Vermont Border)
And on the conversation went for hours. It became instantly clear that Red was suffering from the same sort of homesickness. The phone calls became more frequent and soon the conversations went from reminiscing about past hikes to planning the next.

As of today, that plan is to leave in March of 2014. Actually, for the first month, we deliberately have no plan other than to slowly hitch our way to Campo, California, a small town on the Mexican border. From there, we'll hike north along the Pacific Crest Trail through the Mojave Desert then over the crest of the Sierra Nevada and Cascade Mountain Ranges. Five months and 2,663 miles later, we’ll cross over the Canadian border.

In the meantime, I'm working two jobs seven days a week to save money. The PCT is fully funded, but I have other big trips in mind after that, so I'll continue to work as much as possible to make those happen as well.

People have asked me how I'm able to afford to take so much time off of work to backpack. "Are you a self-made millionaire or something?" someone asked. That made me laugh. Even if every dime I've ever spent were returned to me, I still wouldn't be a millionaire. I don’t think it really occurs to most people how little money you actually need to live on the trails.

What could you afford to do if you had no mortgage, no student loans, and no credit card debt? Where could you afford to go if you had zero appetite for the latest gadgets, or newer cars, or expensive clothes? What if you had no rent, no electric bill, no furnace that needs replacing? No car payment, auto insurance, or vehicle maintenance or upkeep. What if you had no desire for a bigger TV or a more deluxe cable package? What if you had no need to contribute to a vacation fund and no reason to retire?

You might be able to spend most of your life doing what you love instead of just working toward retirement. What would I do with my retirement anyway? Do like the retired men I met on trails, who waited until retirement to go backpacking?

Creative Commons License
A Backpacker's Life List by Ryan Grayson is licensed under a Creative Commons Attribution-NonCommercial-NoDerivs 3.0 Unported License.   

Photo: Splake and the Presidential Range


I took this photo in 2011 in New Hampshire's White Mountains.

THE STORY BEHIND THE PHOTO...

In the Presidential Range of New Hampshire's White Mountains, we stopped to savor this view. Actually, we didn't stop for the view as much as the view stopped us.

If it were exactly two months before, you would have found me at a desk staring at a computer screen. The cubicle walls surrounding me had been replaced by mountain views. Views that forced me to wonder why I wasted so much of my life slaving away. I guess it just seemed like the responsible thing to do at the time. I realize now how decidedly irresponsible that was.

My phone beeped in my pocket. At this elevation, it managed to find a strong enough signal to receive a text from a friend back in the real world.

"Ahh, why can't it be Saturday?" the message said.

I replied back, "It isn't Saturday? Funny, it definitely feels like Saturday."
  
  
Creative Commons License
A Backpacker's Life List by Ryan Grayson is licensed under a Creative Commons Attribution-NonCommercial-NoDerivs 3.0 Unported License.   

Photo: Kayaking at Salamonie


I took this photo in 2009 at Salamonie Lake in North Central Indiana. You can order prints in my Etsy store. Use coupon code 5OFF2013 and receive $5 off any purchase of $15 or more.

THE STORY BEHIND THE PHOTO...

I set an alarm so I’d wake up a couple hours before sunrise. Between the silhouettes of trees, the lake’s black surface sparkled under a starry sky. I switched on a lantern and rolled out of my hammock. 

At the edge of my campsite was an eroding hillside that sloped into the lake. Barefooted and with a lantern held out in front of me, I climbed down the crumbling dirt to the water’s edge. My kayak bobbed slowly on the waves, bumping into the fallen tree trunk where I had it secured with rope. 

Years before it became the primary focus in my life, this was one way I satisfied my need for adventure, short camping trips fifteen miles from home. 

I climbed into my kayak, scooted away from the shore, and paddled toward an island in the middle of the lake. When I was close enough, I fastened the paddle to the top of the boat and slid forward into the hull, so I could lie on my back for a better angle on the stars. 

I couldn't help but doze in and out of sleep. For a time, the only sound was water lapping against the boat. Then the sun came. 

This moment was the main reason I was on the water so early. A few weeks before, I drove out to the lake at three in the morning to paddle around in the dark. Moments before daybreak, I heard a lot of commotion coming from a small island, so I paddled closer. It seemed every bird in the county decided to rendezvous here that morning. Soon there was so much chirping from so many species of birds that it ceased to sound like chirping, like when a clap becomes an applause.

I’m not sure why they all flocked to this place, but it wasn't only birds. After the sun peaked over the horizon, two river otters surfaced only a few feet from my kayak. One swam straight toward me so fast I thought he might try to leap into my boat to either lick my face or rip it off. I had zero river otter experience, was this aggression, curiosity, or playfulness? I was so excited to take their photo that I momentarily forgot how to operate my camera. I snapped a couple shots of unidentifiable brown blurs then they were gone. I did manage to gain my composure enough to take this photo, which I like well enough, but I'd love to see a river otter in the shot. 

After the sun was fully above the horizon, the birds quieted down, but I saw two deer on a peninsula jutting out into the lake, so I paddled closer. While one grazed the other suddenly ran toward the water and leaped in with a big splash. It swam like a Golden Retriever toward Monument Island, a nature preserve in the middle of the lake. I paddled as fast as I could to coast along beside her, but my presence scared her off course. I wasn't sure how long deer could swim and I wasn't prepared to save a kicking and drowning deer with my kayak, so I backed off then paddled to her other side to steer her back toward the island. 

Then I saw another brown mammal swimming along the shore. I paddle toward it quickly hoping to have another chance to get my river otter picture. It was a beaver. I took a few unimpressive pictures. Soon the surge in wildlife withdrew and the lake would go back to its normal self. Full of motor boats and skiers, fisherman and loud radios blaring from pontoons. But I felt like I learned one of the lake's great secrets. And so, like the crowd of birds who packed themselves together on every available branch on that little island; I came back to this place at this same time every chance I got.
  
  
Creative Commons License
A Backpacker's Life List by Ryan Grayson is licensed under a Creative Commons Attribution-NonCommercial-NoDerivs 3.0 Unported License.   

Photo: Bee at Devil's Tower


THE STORY BEHIND THE PHOTO...

I hiked all day around Devil's Tower National Monument, in Wyoming, to find a better angle to take its picture. I took dozens of photos, but didn't love any of them. I decided I needed to be by the river, which required climbing a fence and trespassing. Many prairie dog heads popped out of the ground to keep a close watch on me. After a few photos, I still wasn't in love with any. Then this bee started flying around me, so I increased the aperture, sped up the shutter speed and took its picture instead. The bee is still a bit blurry, but I like it anyway.
  
Creative Commons License
A Backpacker's Life List by Ryan Grayson is licensed under a Creative Commons Attribution-NonCommercial-NoDerivs 3.0 Unported License.   

Photography: The Rocks at Ryan Mountain


I took this photo in March 2012 in Joshua Tree National park. You can support my blog by ordering prints of this or other photos in my Etsy store. Use coupon code 5OFF2013 and receive $5 off any purchase of $15 or more.

THE STORY BEHIND THE PHOTO...

After we climbed about halfway up Ryan Mountain in Joshua Tree National Park, my friend Liv pointed down to this huge rock and said, "I'm going to climb on top of that when we get down."

While traveling across the country from national park to national park, it amazed me the places she would climb without the safety of ropes and harnesses. Sometimes I would hear strangers whispering things like, "look at that girl over there, she's crazy," or "you'll never see me doing that."

After leaving the Ryan Mountain summit, she beat me to the bottom, but I couldn't find her anywhere. I waited by the car for a little while then walked around to look for her. I started to wonder if she took a wrong turn. Then I heard a familiar whistle.

Liv and I met on the Appalachian Trail. When we couldn't find each other, we'd whistle back and forth until we honed in on each other's location. So, I whistled back. She whistled again. It was coming from the top of this giant rock. Suddenly, I remembered her saying she said she was going to climb on top of it. I looked up and there she was. She's a woman of her word.   
  
Creative Commons License
A Backpacker's Life List by Ryan Grayson is licensed under a Creative Commons Attribution-NonCommercial-NoDerivs 3.0 Unported License.   

Photography: Tendril at Indiana Dunes


I took this photo in Indiana Dunes National Lakeshore in 2010. You can support my blog by ordering a print in my Etsy store. Use coupon code 5OFF2013 and receive $5 off any purchase of $15 or more.

THE STORY BEHIND THE PHOTO...

While traveling in the Pacific Northwest, after I told people I was from Indiana, they acted as though their immense soaring views must be utterly mind-blowing to a flatlander hayseed like myself. It almost solicited a feeling of Midwesterner pride in me. Although they were right, of course.

I've long held romantic ideas of the west. As a kid, traveling west seemed like travelling to another world. They had mountains, geysers, and wildlife that didn't exist in my small patch of Earth. My world existed in a place where the views through the windshield were largely determined by the current height of the corn.

Sometimes I think my appreciation for nature and romantic view of the west wouldn't exist if not for my Midwestern roots. Might I have grown up thinking mountain views were ordinary? Would they have the same power over me? This picture, however, reminds me that my love of nature goes deeper than that. I look at this photo with the same sense of awe as any grand mountain view.

I spotted this tendril grabbing onto a branch for support while hiking through Indiana Dunes National Lakeshore. I tend to forget that plants aren't stationary. In fact, they are rarely still. They simply live by a different clock than we do.

No matter where I live, a major part of me will always live somewhere out west, but beauty in nature is everywhere. You just have to stop and look.


Creative Commons License
A Backpacker's Life List by Ryan Grayson is licensed under a Creative Commons Attribution-NonCommercial-NoDerivs 3.0 Unported License.   

Photography: Deer at Mokowanis Lake


This is Mokowanis Lake in Glacier National Park. I took this photo in August 2012. You can support my blog by ordering prints in my Etsy store. Use coupon code 5OFF2013 and receive $5 off any purchase of $15 or more.

THE STORY BEHIND THE PHOTO...

To access Mokowanis Lake you must get off the main loop and stroll down a quiet spur trail, so it was a peaceful, less frequented, spot to set up camp.

The distant sound of a waterfall gave a constant background of white noise while I sat by that unbelievable turquoise lake for hours reading a book. Occasionally, I saw a deer grazing on foliage or sipping the lake water. It seemed as approachable and unafraid of people as a stray Labrador Retriever. It even wagged its white tail.

After the sun set, I retreated to my tent. I was still reading after dark under headlamp light when something moved outside my tent. I slowly poked my head out to see what it was. It was just the deer. I zipped the tent shut and went back to my book. Then I heard my trekking poles clack against a log. I stuck my head back out and saw the deer with one of the handle straps in his mouth sucking on the accumulated salty sweat.

“Hey! Stop that!” I yelled. Its eyes shifted over to me and it paused for a moment as if contemplating its next move. Suddenly, it grabbed the pole's handle in its teeth and took off into the woods.

“I paid $80 for those you son of a bitch!” I yelled while shoving my bare feet into my shoes. She didn't care though, what’s $80 to a deer? Chump change is what. I ran into the woods after it, leaping over logs and trampling through leaves. After a short chase, she stopped with the pole hanging from her mouth. She looked at me with that long dumb deer face.

“Drop the pole, you stupid deer!” I yelled and the pole dropped to its feet.

“What? I ain’t got anything,” its expression seemed to say. “Nah, nah, man. That was that other deer.”

For a moment, we stared each other down like it was high noon in Dodge City. Suddenly, she bolted into the woods leaving my saliva-drenched trekking pole on the ground.

I walked back to my tent with my pole in hand, victorious.
  
  
Creative Commons License
A Backpacker's Life List by Ryan Grayson is licensed under a Creative Commons Attribution-NonCommercial-NoDerivs 3.0 Unported License.   

Photography: Bleeding Heart


This wasn't actually taken from a trail like my other photos, but I liked it so wanted to include it here. I took it in my old backyard before leaving for the Appalachian Trail. This may surprise you, but I used to have a house before I started all this.

You can support my blog by ordering a print of this photo in my Etsy store. Use coupon code 5OFF2013 and receive $5 off any purchase of $15 or more.

THE STORY BEHIND THE PHOTO...

There isn't much of a story actually. The woman who lived in the house before me had the two-acre property looking  like a city park. There were several species of trees, a creek, and a wide variety of wild flowers. The first year I lived in the house, I never knew what flowers might pop up next. This one was my favorite.

The lack of a story for this photo is the biggest endorsement I can give for getting out and seeing the world. Living for the anecdote is a great way to ensure you'll live an adventurous and fulfilling life. 
  
  
Creative Commons License
A Backpacker's Life List by Ryan Grayson is licensed under a
Creative Commons Attribution-NonCommercial-NoDerivs 3.0 Unported License.
  

The Before Interview with Victor Maisano, 2013 Appalachian Trail Thru-Hiker

Earlier today, Victor Maisano officially began his thru-hike of the Appalachian Trail (you can follow him and his crew at BackpackingAT.com). 

If you're reading this you probably know I've been answering some of his questions about the trail. Before he left I turned the tables and asked him a few. I thought it would be interesting to ask them before and after to see if, and how, his answers have changed. 

The first few questions, however, I asked because I like knowing what motivates others to take on such a challenge. Are they an adventurer discontented by a cubical life? Do they just want to challenge themselves?  Did they conceive the endeavor when things in life seemed to be falling apart or when everything finally came together? 

Hundreds of people head to the Appalachian Trail with a unique story and personal motivation. I love seeing how all their stories converge.

RG: When did you first hear about the Appalachian Trail?

VM: I believe I first learned about the Appalachian Trail in Boy Scouts. There is a fifty-miler badge I always wanted to get, but never had the chance to earn.

RG: When did you start dreaming of doing it? Or what finally inspired you to take this on?

VM: Oddly enough when I was in Costa Rica. Even though I was living the Caribbean dream and saving turtles 24/7, the water always seemed to be clearer in the other pond. Throughout my thought process of "what is next" after volunteering at a Sea Turtle Conservatory, I knew I was not ready to head back to a "normal" life back in the corporate world full time. So looking to challenge myself physically and mentally the Appalachian Trail came easily to mind. My mind was fully set after skimming a couple of articles online and bouncing around previous AT thru-hikers blogs. I would imagine myself in their shoes/pictures!

RG: What are you most looking forward to?

VM: Meeting great people, seeing random animals (other than the ones you find in suburbia) and attempting my wilderness survival skills from time to time.

RG: What do you hope to get out of this experience?

VM: New perspective from this hiking community and learn all that I can from the experience that I would not have from reading about it.

RG: What was your first big adventure? 

VM: I would like to think my first big adventure was when I headed to Vietnam for 2 months with my older (adopted Vietnamese) Brother when I was 15ish. Sleeping on dirt floors, eating interesting meals (including dog) and being the only white person in these small villages was certainly an eye opener for what the vast opportunities the world has.

RG: There are a lot of unknowns that you wonder about when planning a hike like this. What are you biggest concerns?

VM: To be honest it's power. I plan to be very social media savvy and fear the amount I want to update will not correspond with amount of juice I am bringing - granted I am bringing solar panels through the green tunnel. Other than that it's my lack of Knives. At the moment I am bringing a smaller sized serrated knife. Seeing as He-Man and Leonardo were able to protect themselves from all sorts of enemies, I figured that's what I need. However I know that Skeletor nor the Shredder will be anywhere near the trail. 

RG: What is your current pack weight?

VM: Yikes sensitive topic. I think right now it's 45ish lbs.

RG: I agree it can be a sensitive question. It's often followed by someone with an ultralight pack telling you you're doing something wrong. I only ask because I want to see if, and how much, it changes by the time we do this interview again. So, what is your favorite gear item right now?

VM: To be honest it's my Osprey 65L Backpack. Never before in my life had I had a backpack that of a quality nature. This pack feels like I am giving my little nephew a horsey back ride and he's holding on tight!

RG: How are you preparing (physically, or mentally)?

VM: Physically I am not - I am solely relying on my youth to start me off. I know this not the smartest idea, but I feel my body is very adaptable. Plus I won't complain even if was having a hard time.

Mentally - I have been trying to imagine myself on the trail and going through the various scenarios. Reading other peoples blogs and just speaking with previous section and through hikers has been great as well!

RG: Yeah, physically the best way to prepare is to backpack before heading out, which can seem a bit redundant if you're not trying to break a speed record. Have you backpacked before? What's the longest you've ever hiked?

VM: I have backpacked 2 sections of AT Before. Both in/near the Smoky Mountains, with a small group of friends for 50 miles over 4 days.

RG: Do you have more adventures in mind after this one?

VM: Next adventure is TBD. I would not mind switching back and forth between water and land based adventures. My mind has been definitely wandering, but my bank account says I need a job BADLY. Perhaps I can combine the two?

RG: Combining the two is a dream of all wanderers, but the good news is many find a way. And the Appalachian Trail can make anyone realize how little income and possessions they really need, which will get you halfway there.

Last question, do you have a trail name yet or do you prefer the tradition of letting it happen on the trail? Some people prefer to go into it with a name already chosen to avoid a bad name. For example, for most of my hike I was called Nancy Drew, but not everyone will be so lucky.

VM: I do not have a trail name. I would prefer the traditional route. However I have a feeling with my personality and friends, this will be very random and most likely not reflect me. But I'll go with it.

RG: I'm sure we'll find out very soon what it will be on your blog at BackpackingAT.com. Thanks for your time Victor and good luck out there! 

  
Creative Commons License

Q&A: Bugs and Other Pests on the Appalachian Trail

Victor asks for tips in dealing with pests and other natives of the Appalachian Trail, such as Ticks, Flies, Mice, Poison Oak, Poison Ivy, and any others not on his radar. I’m going to break his question up in parts.

First, let me just remind you that Victor's hike begins this Thursday (March 28th), join me in following his progress at BackpackingAT.com.

VM: From what I hear, knowledge is power. Is it true that learning how to prevent visitors is half the battle, or is it inevitable?

RG: Yes and yes. There are ways to reduce potential issues with the bugs and wildlife, but it comes with the territory. There are different guidelines for different pests that I’ll go into below.

Ticks

VM: Do you have any useful hints for removing ticks? Is it true a drop of turpentine will make the ticks dig themselves out?

RG: Good question. Ticks are the worst. I'd honestly rather see a black bear on the trail (actually I love seeing black bears, so that's a bad example). I only saw two ticks crawling on me while hiking the AT, but I also met two hikers who contracted Lyme Disease, so it's good to know a few things about them before heading out.

There are several myths about tick prevention and removal. Using heat or covering the tick with anything in order to coax it back out can only make the problem worse. It can actually cause them to regurgitate more saliva (and potentially more pathogens) into your bloodstream.

The hypostome, i.e. mouth parts, that they burrow into your skin, looks similar to a tiny barbed harpoon. Also, some ticks, like the Lyme-Disease-spreading deer tick, secrete a cement-like substance to keep themselves securely attached to your skin while feeding. In other words, they can't back out quickly even if they wanted to. The longer the tick is attached, the higher your risk of infection, so the goal is to remove the tick as soon as possible.

The best way to remove a tick

The best way is with tweezers. Some ticks, like the Deer Tick, can be as tiny as a poppy seed, so you’ll need tweezers that can grab something that small. Grab the tick as close to your skin as possible and slowly pull it straight out. Clean the skin around the bite with alcohol. If the hypostome (mouthparts) remain stuck in your skin, don’t worry about it. Doctors aren't concerned about it, so I'm not either. Also, when the hypostome breaks it may even send germs and saliva further back into the ticks body and saliva glands.

Lyme Disease

The biggest concern with ticks on the Appalachian Trail is Lyme Disease. There are 30,000 to 40,000 cases in the United States annually and about three out of four are reported in ten of the states along the Appalachian Trail.

Here they are in order of highest cases per capita: Vermont, New Hampshire, Maine, Connecticut, New Jersey, Pennsylvania, Massachusetts, Maryland, New York, and Virginia.

If you experience any symptoms like a rash or fever, consult your doctor and let them know you've been bitten.

Preventing Ticks

Chances are you'll hike the entire Appalachian Trail without having a tick burrow into you, but with a few precautions, you can reduce your risk of getting Lyme Disease to nearly zero.

Do a daily tick check

Full disclosure, the longer I went without seeing a tick the less frequently I would do a tick check. Eventually, I only checked after hiking through bushy areas with tall grass or loose dry leaves on the ground. My laziness aside, daily checks are by far the best way to prevent the spread of Lyme Disease. It generally takes at least 24-48 hours for a tick to transmit the disease, so if you're doing daily checks, it's unlikely you'll get it.

Thorough tick checks are important since their saliva has anesthetic properties. That means you won't feel them burrowing or feeding. Additionally, they are hard to find because some, like the deer tick, are as small as a fleck of dirt, which you'll be covered in most of the time. They also have a tendency to search for places on your body that are hard to see without a mirror... and places your friends will not volunteer to check for you.

Bug Repellent

I'll go into this deeper below, but DEET is still the most effective bug repellent. Nothing really comes close in effectiveness, duration of effectiveness, and cost per ounce. There are a lot of home remedy bug repellent myths out there, but none have been shown to be effective for more than a few minutes, if effective at all. Don't waste your time or risk going without an effective treatment. A 23 to 33% DEET solution is the way to go and it's safe if used properly.

Wear Light Colored Clothing

Even though I didn't have any biting ticks on the Appalachian Trail, I did find a couple crawling on my pant legs. It happened after scouring the woods for firewood in Shenandoah National Park. Since I wore light brown khaki pants they were easy to spot.

Walk in the center of trails

Those minuscule SOBs are hanging onto plants with their little legs outstretched waiting for a blood-filled mammal to walk by. Avoid their reach by walking down the center of the trail whenever possible.

Some months are worse than others

Peak tick season starts in late-April to early-May and lasts all through summer. That doesn't mean you won’t get ticks on you in October, though. Actually, that's when I found them on me in Shenandoah. In other words, they are going to be around during your entire hike, but they will probably be worse Late-May through Early-August.

Signs of Lyme Disease

Check out the Centers for Disease Control's web site for more information, but I'll give you a summary. One of the first signs that you have contracted Lyme Disease, which will normally occur 1 to 2 weeks after infection, is the development of a bullseye-shaped rash around the bite, although sometimes there won't be a rash at all. Lack of energy is another common first symptom, but you'll feel that on your hike either way. Other symptoms include fever, chills, headache, stiff neck, swollen lymph nodes, muscle pain, and joint pain.

If you do have symptoms, see a doctor as soon as possible. The longer you go without treatment, the worse symptoms will get and it can get incredibly nasty. If you find a bullseye-shaped rash or feel symptoms of the flu, get checked. If you do pull a tick off your body save it in a Ziploc bag so it can be tested later if symptoms do appear.

(Photo: I forgot bug spray on a trip in Southern Indiana)
Mosquitoes and Black Flies

Even though, you could hike the entire Appalachian Trail without seeing a tick, mosquitoes may become the bane of your existence. I doubt you'll have much trouble with black flies, since they are worst in Maine from Mid-April through Mid-June.

Prevention

There will be days where this seems like an impossible task. There is no way to keep all mosquitoes at bay, but you can prevent them from driving you crazy.

Bug repellent

As I said previously, the most effective bug sprays on the market contain 23% to 33% DEET. Several studies, and my own personal experience, have shown that a higher concentration is basically just as effective. I also use Permethrin on clothes, but more on that in a bit.

I used to carry a 1 oz. eyedropper of 100% DEET oil, but sprays seem to be more effective. The eyedropper is ultralight, but this is where I'll sacrifice a couple ounces. Your happiness and sanity do have value after all. Many people use the eyedropper method by putting a few drops on the back of their neck, lower legs, wrists, and other strategic places, but it is believed that DEET works by surrounding you in a vapor that disrupts the bug's ability to sense humans and other animals. In my opinion, a few drops here and there just don't seem to create enough of this vapor barrier. Some people attract mosquitoes more than others, though, so my experience may not be the same as someone else's. I draw them in like I'm their mecca.

When using DEET, avoid getting it in your eyes, ears, nose, or on water bottles and food. Also, DEET can dissolve certain plastics, rayon, spandex, and other synthetic fabrics such as the lining in some raincoats. Be careful not to get it on the palms of your hands, so you don't ruin any gear. Since ticks and mosquitoes aren't much of a concern during a rainstorm, wipe any DEET off your skin that may come in contact with the lining of your rain gear before putting it on. A gear expert said DEET was the reason my Marmot raincoat lining was peeling off.

Is DEET safe?

DEET sounds horrible, right? After all, it can breakdown certain plastics and synthetic materials. You’re probably thinking, why would I want to put something like that on my skin?! Well, Vodka, vinegar, and Coca-Cola can dissolve a number of things too, but they won’t harm your skin.

It’s not hard to find someone who believes anything unnatural is going to kill you slowly, but if used properly DEET is safe. Of course, nothing is 100% safe, but don’t forget we are using them to avoid things like Lyme Disease, Rocky Mountain Spotted Fever, and West Nile Virus, which are far worse.

That said, using it properly is not always convenient on a long distance trail. For example, using it properly means you need to wash it off your skin at the end of the day. Since showers are rare on the AT, and since you don’t want to get DEET in the aquatic ecosystem, you’ll need to go at least 200 feet from a water source to rinse it off. Since mosquitoes are only a problem in warm weather, you won't have to worry about rinsing off when it's dangerously cold. Also, rinsing off is a good practice anyway since cleaning up at the end of the day will make you feel, smell, and sleep better.

Another potential concern is that most people aren't using DEET heavily for 5 months in a row, so I'm not sure long-term exposure has been thoroughly tested. It wouldn't surprise me if regular long-term use had some negative health effects, so I try to use it in moderation and sometimes switch to a less effective non-DEET repellent when mosquitoes aren't as bad. I'm not suggesting these non-DEET sprays are healthier, but I feel like it can't hurt to avoid using too much of any one chemical.

Non-DEET Repellents

Permethrin – Prior to hiking in tick or mosquito season, I apply Permethrin to my clothes. This is not to be used on skin, but it can be effective on clothes for weeks even after numerous washes. If you’re in a buggy area, consider reapplying after about six washes. Of course, follow all directions on the bottle.


Lemon Eucalyptus – Don’t let the name fool you, just because something is natural, that doesn't mean it’s 100% safe. All the same safety rules apply with all bug repellents. It won’t damage plastics like DEET, but it also doesn't last as long. I found it to be nearly as effective as DEET-based repellents for about 15-30 minutes then starts to wear off quickly, whereas DEET is effective for five hours or more.
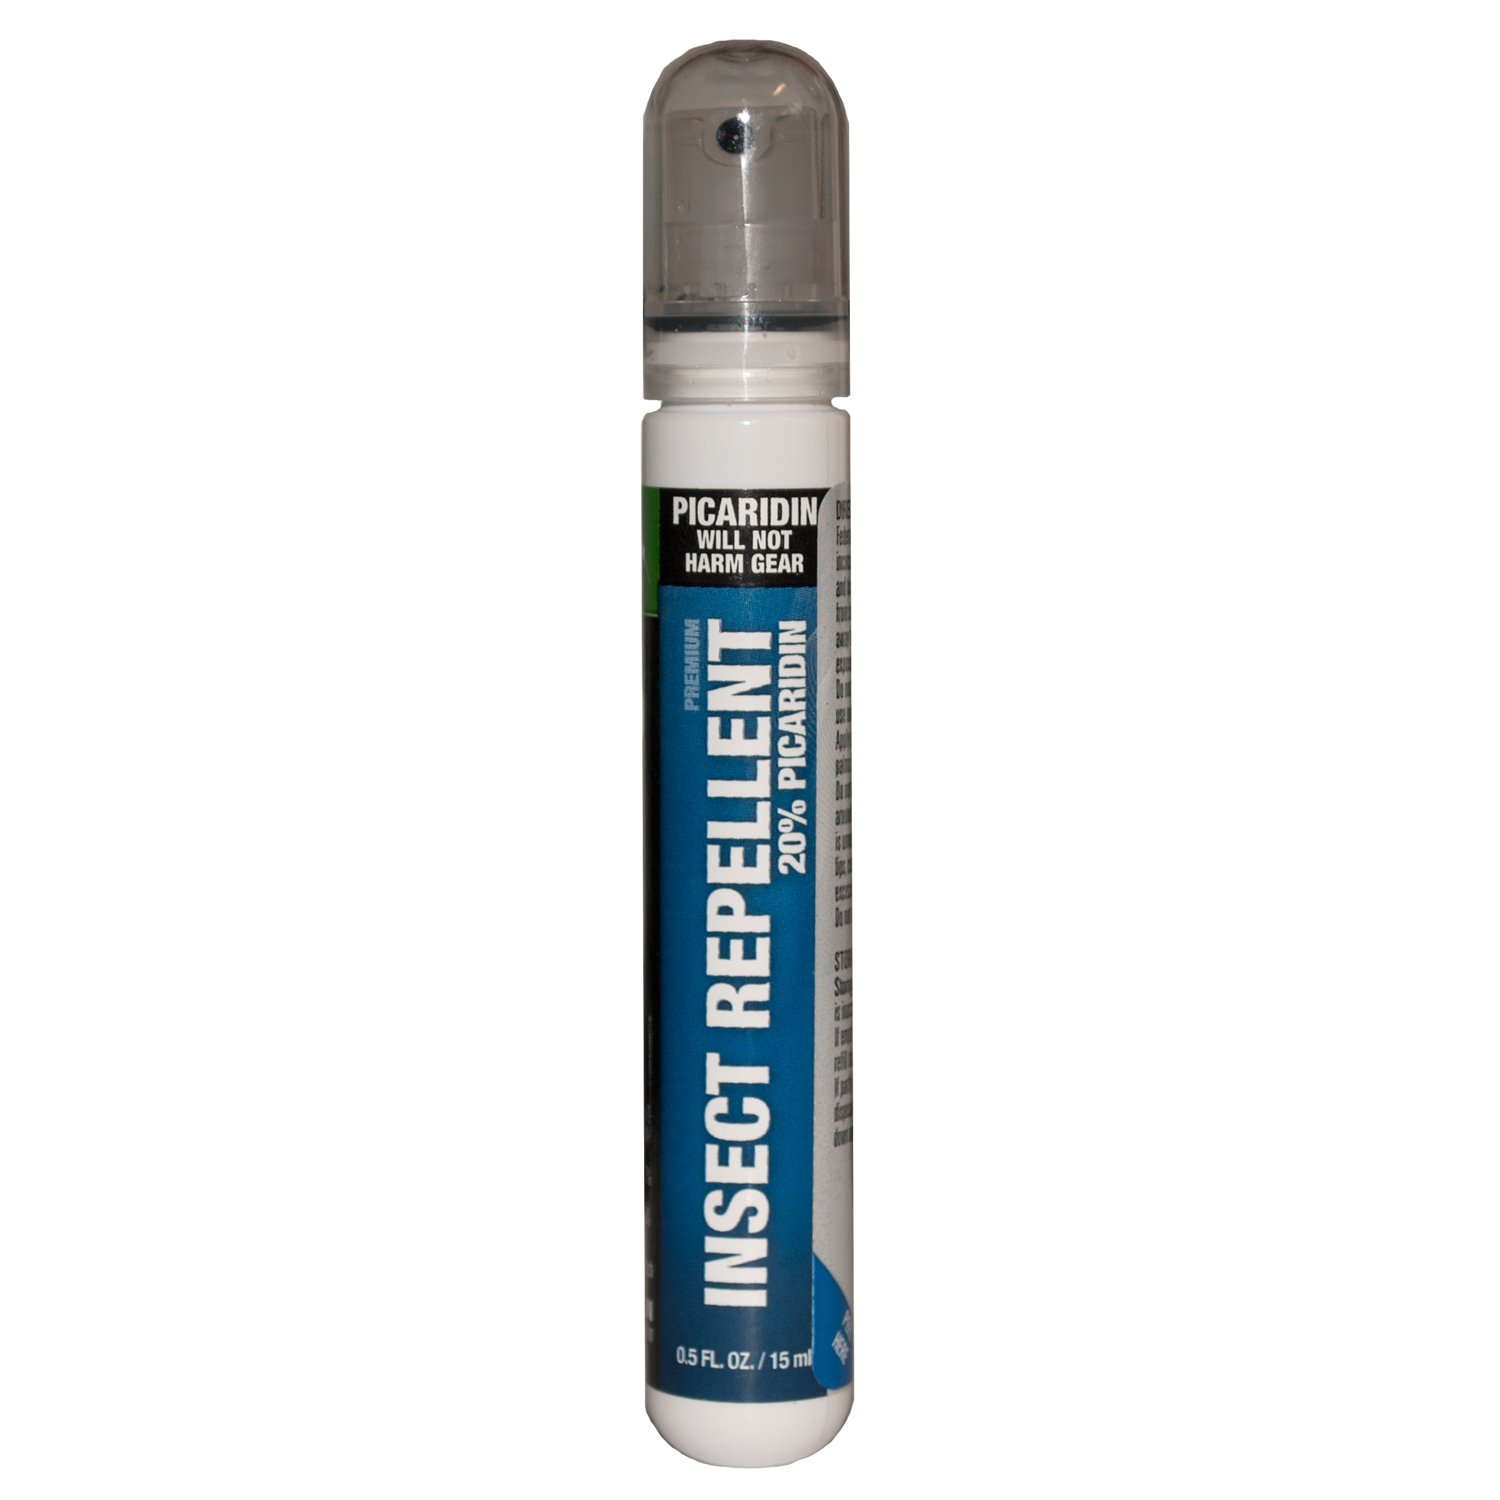
Picaridin is another pesticide that does not damage plastics, but its effectiveness seems to be about the same as Lemon Eucalyptus.

One final tip, apply sunscreens before applying bug sprays.

Home-remedies

I've heard of several home remedies for repelling ticks and mosquitoes, but at best, they only work for a few minutes and are not even that effective to begin with. I've heard of using dryer sheets, Vaporub, vanilla, smoke, garlic, vitamin pills, or other odor-masking items ingested or rubbed onto the skin. One I hear about often is Avon Skin-So-Soft, but it’s effectiveness only lasts about ten minutes whereas DEET can last five hours.

One reason that simply masking your odor doesn't work is that odor is not the only way mosquitoes detect humans. The primary way is from our exhaled carbon dioxide, which they can detect up to 100 feet way. They can also detect sweat, moisture, body heat, and lactic acid.
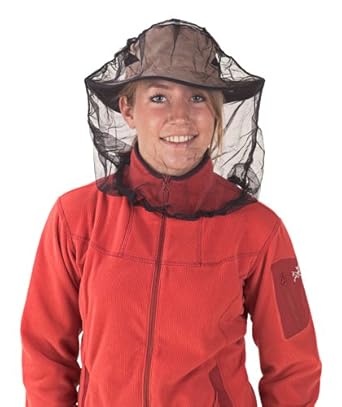
If someone wants to cover themselves in moose dung and spaghetti-os to repeal mosquitoes and ticks, be my guest, but we are talking about preventing horrible diseases and maintaining a certain level of enjoyment and sanity in the outdoors. Until something proves to be as effective and safe as DEET, I’ll keep doing what I’m doing.

Mosquito Netting

This is the only effective non-chemical way to repeal mosquitoes that I'm aware of.

Poisonous Plants

VM: Can poisonous plants keep spreading if contacted with the rest of your gear?

I’m not the best source for this question, because I believe I’m one of the lucky immune few, so I haven’t done a lot of research on the subject.

Nevertheless, the answer is yes. It is possible for the plant oils that cause the allergic reaction, called urushiol, to get on your gear and spread to other people or other parts of your body. You have to come in contact with the urushiol, however, to have the allergic reaction.

Once you have rinsed the affected area of your skin, you’ll no longer be able to spread it. It can stick to gear pretty well though, and may still be able to cause an allergic reaction a year later. Washing the gear with a grease-cutting soap is probably your best bet. Dawn Dish Soap is the cheapest and easiest to find on the trail.

Of course, it’s best to avoid it in the first place. Learn to identify the plants. Remember the old adage, “Leaves of three, leave them be.” That’s a good place to start as leaves on both Poison Ivy and Poison Oak have three leaflets.

Also watch out for any plants with: shiny leaves, hairy leaves or stems (check under the leaf as well), or any plant with red stems, twigs, branches, or red hairy vines. Also avoid any plant that has a milky sap, umbrella-like flower, or pungent smell.

If walking through an overgrown area, wear long sleeves and pants. If you're highly allergic, consider carrying an ivy block barrier.

For more information on this topic, please check out the poison ivy page at the American Academy of Dermatology web site.
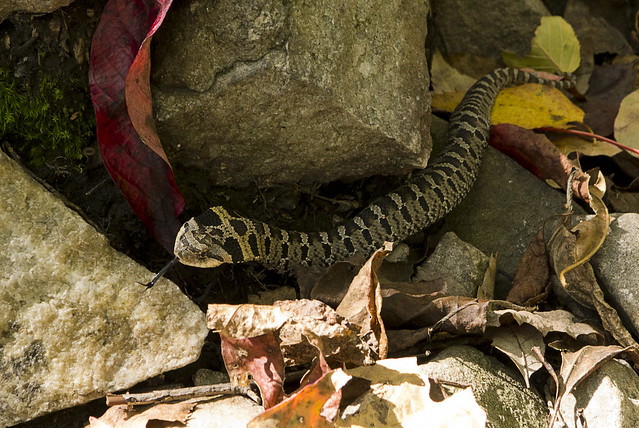
(Photo: Unidentified Snake)
Other Pests

Snakes

I only saw one venomous snake on the Appalachian Trail. I nearly stepped on a Timber Rattler in near Delaware Water Gap. I was on Rattlesnake Mountain at the time, so I guess it shouldn't have been a surprise.

I'm not a snake expert, but you can prevent confrontations by avoiding tall grass, watching your step, and checking before you stick your hand into a crevasse. If you're cowboy camping under the stars, avoid sleeping near their territory: beside a log, in tall grass, or along rock crevasses. Keep your tent zipped up when you're not around.


Shelter Rodents

Other than mosquitoes, the most common annoyance with pests on the trail is the theft of food and the damage done to your gear when they are trying to get to your food. Not just shelter rodents, but bears, porcupines, possums, and raccoons as well. This is preventable though.
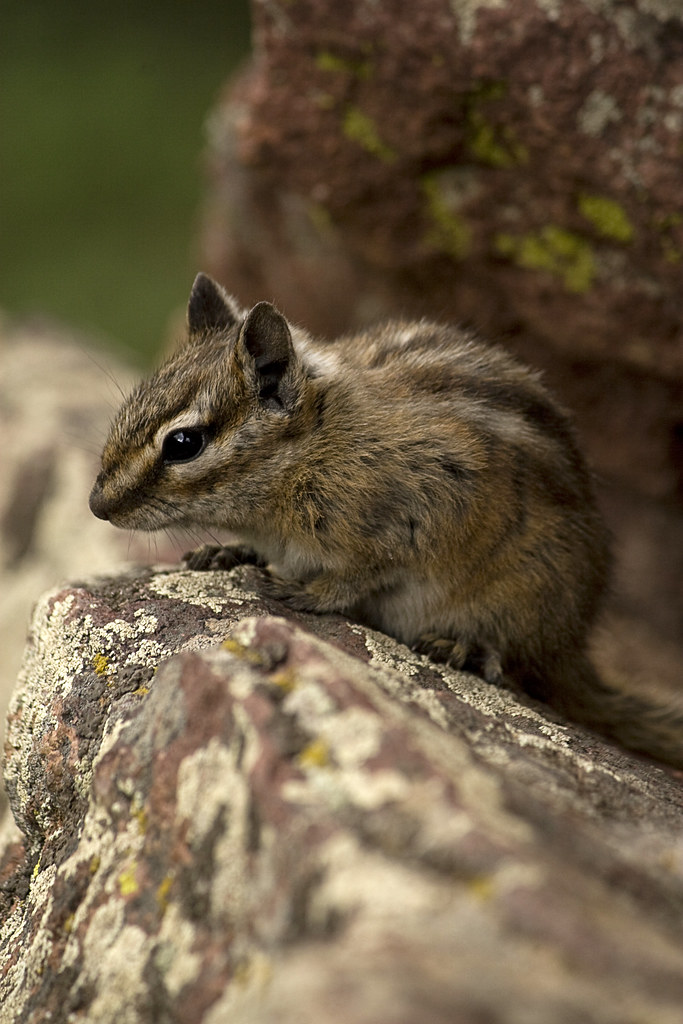
Nearly every shelter will have ropes on the ceiling to hang your food. They'll have something like a tin can halfway up the rope to keep rodents from crawling down to your food bag. Always use these or hang your food in a tree or bear pole.

If you leave your gear behind even for a few minutes, something might come by and chew a hole into your backpack. This happened to me on the Wonderland Trail. If you set your pack down for an extended amount of time, carry your food with you. I use a homemade drawstring backpack for food now, so I can easily carry it with me if I want to leave my gear behind while I go down a side trail or summit a mountain.
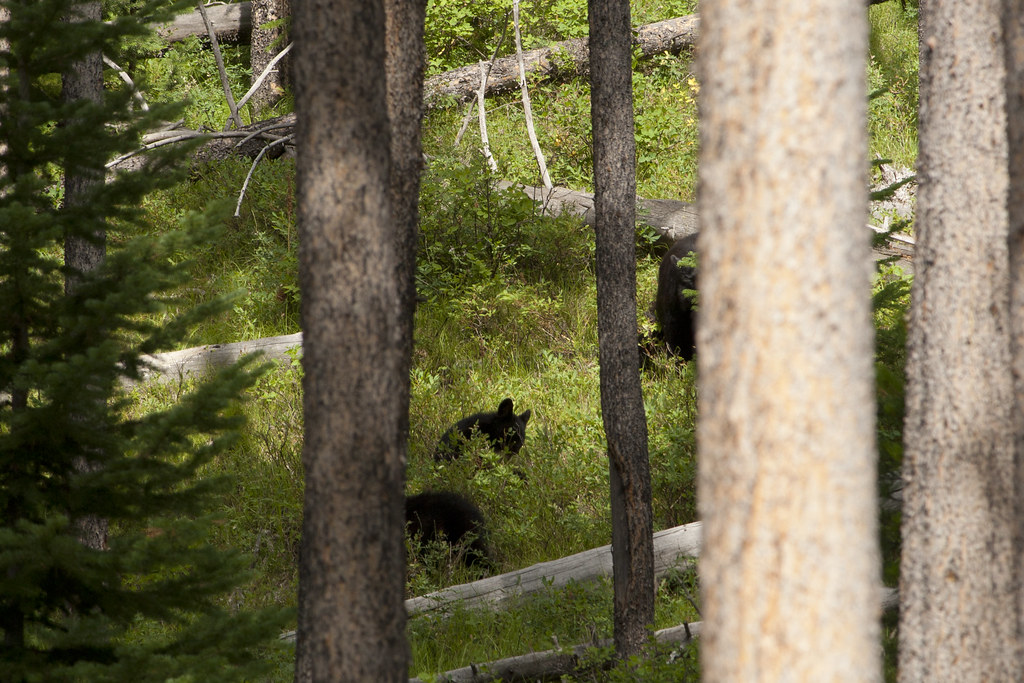
Black Bears

This could be it's own post, but I'll be brief. I don't generally classify a bear as a pest, but I do classify anything that can rip open your pack and eat your food as a pest. To prevent issues, remember these simple rules...

Black Bears (which are the only bears you will encounter on the AT) are very skittish and will generally run away if they hear you coming. Don't surprise them though, or they may react defensively. Before turning a corner, or cresting a hill, make noise by singing or talking. Bear bells or clicking your trekking poles together might have some effect, but are not as effective as the human voice.

When camping in bear country, hang your food and other scented items from a tree or bear pole at least ten feet above the ground. Never cook or store food near your tent and keep a clean camp or shelter.

The highest concentration of bears on the Appalachian Trail is in the Delaware Water Gap area (around the border of New Jersey and Pennsylvania) and Shenandoah National Park, so be extra cautious in those locations.

For more information and what to do if you encounter a Black Bear, check out the National Park Service's bear safety tips.


More Q&As with Victor:

Weather and Morale on the Appalachian Trail
Shelters Vs. Tents on the Appalachian Trail
Knives on the Appalachian Trail
Hiking with Visitors on the Appalachian Trail
Online Mail Drops on the Appalachian Trail
  
Creative Commons License
A Backpacker's Life List by Ryan Grayson is licensed under a Creative Commons Attribution-NonCommercial-NoDerivs 3.0 Unported License.   

Photography: Mount Rainier from the Wonderland Trail


I took this photo in Mount Rainier National Park while hiking the Wonderland Trail in 2012. You can support my blog by ordering a print in my Etsy store. Use coupon code 5OFF2013 and receive $5 off any purchase of $15 or more.

THE STORY BEHIND THE PHOTO...

As I ventured to the north side of the Wonderland loop, it seemed more and more like I hopped into the pages of a children’s illustrated book of fairy tales. A land created by artists, not natural processes. Wildflowers bloomed everywhere and lush green plants and moss grew everywhere else.

At Mystic Lake, my view of Rainier was as close as ever. I got a better feel for how massive it is. I could now see cliffs of ice, several stories high, which formed where immense glaciers cracked and tumbled down the mountain. Eventually, I was close enough to see the thin meandering trails left by mountaineers climbing to its peak.

After setting up camp in a thick pine forest, I leaned against a log, ate dinner, and read a book. Through the trees, I heard pops, bangs, and cracks coming from Rainier. I wondered if the melting glaciers were cracking apart or if the swelled creeks from the melting snow and ice were tossing huge boulders downstream like billiard balls.

Soon, the crack of lightning joined the percussive sounds coming from Rainier. The sky above me still had a lot of blue behind nonthreatening white clouds, but Mount Rainier is so big it has its own weather.

It is definitely one of Earth’s great mountains.

The next morning I walked out of the pines and got this gorgeous open view. I stopped for a photo. An adventurous older man walked by and stopped. After we shared a silent moment staring at Rainier, I asked, "You ever think of hiking to the peak?"

He looked at the mountain reverently as though contemplating it for a bit then exhaled and said, "No."

"I think I do," I said.

Even though I crossed the Wonderland Trail from my life list, I added "Climb to the Top of Mount Rainier." Will this list ever get any shorter? If I don't stop adding to my list of things to do before I die, I don't think I'll ever get around to dying.
  
  
Creative Commons License
A Backpacker's Life List by Ryan Grayson is licensed under a Creative Commons Attribution-NonCommercial-NoDerivs 3.0 Unported License.   

Photography: Chipmunk Near Trail Ridge Road

Rocky Mountain National Park, Backpacking, hiking, camping, nature, photography

I snapped this photo in Rocky Mountain National Park near Trail Ridge Road. Prints of this photo can be purchased in my Etsy store.  Use coupon code 5OFF2013 to receive $5 off any purchase of $15 or more.

THE STORY BEHIND THE PHOTO...
A friend and I took a trip to Rocky Mountain National Park right after they opened Trail Ridge Road, the highest highway in the USA. The road reaches a height of 12,183 feet. At just over 11,000 feet we pulled over at a turnout to stretch our legs and look at the view.

We were high above the treeline and the road had only been cleared for tourists for a couple days, yet dozens of chipmunks still knew right where to go to flash their big glossy eyes at snack-carrying tourists.

I don't feed the animals, as it's rightfully against the park rules, however another motorist did. I saw that it was about to happen, so I got my camera ready. I walked by, reached out, and quickly snapped his photograph.

Little did I know that months later this photo, along with a photo of me, would be on the cover of the Indianapolis Star. It won first place in their 2010 Travel Photo Contest and was feature in numerous sites online. Consequently, this is my most viewed photo to date.

Is it strange that a part of me wishes the chipmunk knew how much people like his picture?
  
Creative Commons License
A Backpacker's Life List by Ryan Grayson is licensed under a Creative Commons Attribution-NonCommercial-NoDerivs 3.0 Unported License.   

Photography: Mountain Goat at Hidden Lake

Mountain Goat at Glacier National Park Hidden Lake, Backpacking, Camping, Hiking, Nature, Photography

My 500th post! Here is another picture from Glacier National Park that you can download for your computer's desktop. Prints of this photo can be purchased in my Etsy store. Use coupon code 5OFF2013 to receive $5 off any purchase of $15 or more.

THE STORY BEHIND THE PHOTO...

In Logan Pass, where snow can drift up to 80 feet high in winter, I pulled off of the Going-to-the-Sun Road to stretch my legs on a 3-mile hike to Hidden Lake. When the lake was in view, the sun was about to tuck in behind the mountains. The color in the sky warmed up a bit and rays of light shone through the clouds and reached between the mountains toward the lake. I setup my tripod for a picture.

While looking through my camera’s eyepiece, I heard hooves on the rocks behind me. A mountain goat stood a few feet away. It stopped to stare at me. Soon it was joined by another goat, then a baby, then suddenly a half dozen were walking all around me. My camera never clicked so much.

The goat in this picture walked away from the crowd and just stared out at the view. After I got the shot, he lay on the ground and stayed there long after all the other goats left. It’s as though he only came out for the view and didn't want to leave until the sun fully set. If that were the case, we had something in common.

  
Creative Commons License
A Backpacker's Life List by Ryan Grayson is licensed under a Creative Commons Attribution-NonCommercial-NoDerivs 3.0 Unported License.