Photography: The Teton Crest


I took this picture in 2012 in Wyoming's Grand Teton National Park.

THE STORY BEHIND THE PHOTO

The Tetons were… well, what word can I use to describe such a place when I’ve already used words like “breathtaking” to describe places that didn’t elicit that feeling-- you know the one-- when you can barely hold in that “eeeeeeee!” sound. A sound I quickly turned into a manlier laugh and wide grin, of course.

That’s the problem with exaggerated hyperbole. Where do you go from breathtaking? To keep the metaphors consistent, I’m left having to tell you that by the time I finished backpacking in the Tetons, I needed a tracheotomy.

It sprinkled a little after taking this picture. A cold rain, which oddly enough, did nothing to dampen my mood. Perhaps because the scattered showers also whipped up the smell of ozone and dirt. Maybe it was the way the lakes reflected those little bits of electric blue sky hiding between the advancing silver storm clouds, or how the rings of water droplets distorted that image. Maybe it was because I was surrounded by thousands of vibrant wildflowers that, even under diffused sun light, brightened the landscape.

I'm sure it was a combination of things. And also, because when I spun around to see the whole panorama, there were mountains in the distance, jagged and majestic. Mountains that continue so far into the horizon that it seemed a drifter like me could walk forever. Or at least long enough to finally learn to stop suppressing that “eeeeeeee!” feeling.
  
Creative Commons License
A Backpacker's Life List by Ryan Grayson is licensed under a Creative Commons Attribution-NonCommercial-NoDerivs 3.0 Unported License.   

Hocking Hills

(Photo: Liv Jumping In Near Lower Falls)
After seeing our old football in her parent's basement that we bought on Route 66 in March 2012, Liv told me she thought it needed to be tossed around again. Unfortunately, with both of us working we couldn't take off on another month-long road trip or hike across the country again. For now, we had to look for something closer to our backyards.

After driving to Liv's house in Kentucky, we set off for Southern Ohio to hike the Hocking Hills section of the Buckeye Trail. We didn't plan much. Not that we ever did. We just picked our destination and got in the car.

(Photo: Liv and Sam at Upper Falls)
"Ah, this just feels right," Liv said after pulling the passenger door shut on my dented-up Honda Civic. We've developed an emotional attachment to the old junker. It carried us all over America without a grumble. Well, maybe one, when its muffler fell off in a ghost town on a pitch-black night in New Mexico. It may not look great, but all of those dents have a story, so we love it like nobody else could.

After I backed the car out of Liv’s driveway, it was March 2012 all over again. Fifteen months may have passed, but they were just a tick on the clock to me now.

Liv checked her road atlas and copy of “1,000 Places to See Before You Die” for anything to see along the way. She wouldn't tell me what she found until we got there, which was fine by me. She could have led me to a tire fire, I was just happy to be on the road with Liv in the passenger seat again. If I ever have the desire to be rich, it will be so I can just do this for the rest of my life.

(Photo: Liv at Serpent Mound)
"Serpent Mound?" I asked after seeing the sign.

"Yep, that's it. You haven't been here before have you?" I hadn't. I take a certain comfort in knowing that no matter how much I see, I'll never see it all. It guarantees a lifetime of adventure.

I had no idea what to expect, but it was exactly what it sounded like. The Fort Ancient culture supposedly built it a thousand years ago on the edge of a 300-million year old asteroid crater overlooking Ohio Brush Creek. Each bend in the snake-like effigy mound pointed toward the position of the sun or moon during the equinoxes and solstices.

Nobody knows for sure exactly who built it or why, but it doesn't matter. Humans did it and a thousand years later other humans were still compelled to care for it. That's enough to make it special.

(Photo: Liv at Cantwell Cliffs)
Even though the 1,300-mile Buckeye Trail passes right through Hocking Hills, they really don't want you parking there to get on it. We drove around the rest of the day, but never found a place to leave the car near the trail that didn't have a sign saying, "No Overnight Parking." We instead did what we've always done when stuck in the middle of nowhere at night without a plan, we found a place to sleep in the car.

Some might say we should have planned, but we made the best of it. We stayed up late with a cooler of beer and tossed the ball around under parking lot lights. It wasn't a desert road in random New Mexico, but it would do.

(Photo: Liv at Cantwell Cliffs)
The following night we’d be joined by Sammy (Sixgun) in Hocking Hills, so the next morning we just drove into park and spent the day hiking around Cantwell Cliffs. What we first saw we didn't expect to find in Southern Ohio, a huge amphitheater-shaped cliff with a long thin waterfall pouring down its center.

I took photos and Liv climbed to a spot behind the falls to sit with the view. Before leaving, she climbed back down to stand under the waterfall and cool off.

“Wait, that picture didn’t turn out right!” I yelled from a rock high above the ground. She didn’t even know I was taking a picture. “Stand under it again real quick!”

(Photo: Liv Under the Falls)
“Hurry, it’s really cold Cam!”

“Come on, let it hit you in the face and pretend you’re enjoying it!”

I snapped my picture. “Did you get it?” she yelled with large drops of water careening toward her face. I gave her a thumbs up. I'm waiting for the day she just flips me off and walks out of frame, but she never does.

(Photo: Liv Climbing)
After we hiked a couple miles, Liv found a rock she needed to climb. I watched nervously with my camera as I always do. It makes me anxious every time, but I know it will bug her if she doesn’t get to the top when she knows she can, as much as it bugs me if I don’t get the picture I want.

We found a campsite and later Sammy and her boyfriend joined us. The Drifters were together on a trail again. We stayed up late doing one of the things we loved to do most while hiking the Appalachian Trail: played cards and drank beer in the woods while making each other laugh all night until finally stumbling to our tents.

(Photo: Liv and Sam Near Rock House)
We didn’t miss anything in Hocking Hills. We hiked every trail and saw every geological feature and waterfall the park has to offer.

(Photo: Sam at Rock House)
Then we drove back to Kentucky, a state I have called home since. I can’t think of a better place to live and work until the next adventure begins.

Actually, that's not fair to say. When you push yourself to do something new, it's all an adventure.

Photography: Paintbrush Canyon


I took this picture in 2012 in Wyoming's Grand Teton National Park. Please visit my store page to purchase prints of my photos. Thank you everyone who has ordered photos, your purchase helps support this blog!

THE STORY BEHIND THE PHOTO

“So you just drove all that way here without any kind of plan?” the ranger at the Grand Teton National Park backcountry registration desk said. The park limits the number of people allowed in the backcountry.

“Well I didn't really know I was coming here when I left home. And I figured if it was full, I’d just go somewhere else and wait.” I said. “I don’t really have anywhere else to be.”

She finally found a route that I could start that afternoon. A route that I had no preconceptions about. How could I?

That's the great thing about under-planning, when you find yourself climbing a ridge to overlook Paintbrush Canyon from 10,000 feet, no expectations can diminish the feeling as you're approaching the mountain pass. There's an excitement in those seconds between not knowing and knowing what you will find on the other side. A feeling radiates from your chest to the tips of your fingers and toes, as though something apart from you stirs inside, an animal that sleeps through routine and lives on surprise. Feed them well.
  
Creative Commons License
A Backpacker's Life List by Ryan Grayson is licensed under a Creative Commons Attribution-NonCommercial-NoDerivs 3.0 Unported License.   

Guide to Night and Low Light Landscape Photography

This is a guest post by Nature Photographer and Cinematographer, Jeremy Evans, www.evansdp.com.
---
Night and Low Light Photography can open doors to lots of exciting photographic opportunities. I always say, “why put the camera away after dark”. Night photography can add a new dimension to your landscape. It can also add a “new look” to popular locations and landscapes.

Equipment:

The three things you need to take quality photos at night are a sturdy tripod, a camera with manual control, and above all patience. You don’t need a top of the line SLR or even a digital camera. I still get as good if not better results using film. If you don’t have a digital camera with manual functions and you want to experiment with night photography there’re many good manual film SLRs you can get used for very cheap. I recommend a Canon A-1 or F-1. They are both fully manual. These can be found used on eBay for under $500.00 The F-1 is better because it does not require a battery to keep the shutter open. The A-1 or any digital camera will eventually lose battery power if you are doing extremely long exposures. There are also many good Point and Shoot (POS) cameras on the market with manual control but most don’t have a “B’ or “Bulb” option thus limiting you to 30 seconds exposures. I recommend the Canon G series POS cameras if you don’t want to use a DSLR.

These techniques apply both to film and digital. The benefits of film over digital are longer exposures and no rendering time. The disadvantage is processing cost and no immediate results to looks at in the field.

Most digital camera sensors produce noise after about 5-10 seconds. Film does not have this problem. With a manual film camera you can leave the shutter open all night and the only problem you have is slight color shifting. When using digital I recommend turning on your “long exposure noise reduction” setting if you have one. This is what your rendering time is. If you don’t have this feature on your DSLR or POS camera then you can remove some of the noise later in Photoshop. Digital cameras will also produce red and blue pixels on long exposures. Some camera’s noise reduction feature will remove this as well. The problem is the rendering time on the newest most advanced camera is still 5-10 minute per image and even longer depending on how long your exposure is. For example I use a Canon 5D Mark II and I have to wait as least 2-5 minutes for it to render a single image. One important note when your camera is rendering is not to power off or change batteries if you fear it will run out. If your camera looses power your image will be lost.

If your camera has a “mirror lock up” feature turn that on too. This will reduce camera vibration when the shutter opens but keep in mind you will have to press the shutter button twice on some cameras, once to lock up the mirror and again to open the shutter.

Techniques in the field:

Now that you know all the technical mumbo jumbo lets go try it! To start off I recommend photographing on a full moon night or at least 3 days before or after a full moon. This will help you see the landscape and get used to the process. By using a red flashlight or headlamp over a traditional light will allow your eyes to fully adjust to the darkness and you will be able to see what you are photographing beforehand. You can also use a flashlight to illuminate objects in the foreground.


The moon is just like the sun. It’s reflected sunlight and it works the same way, you just need more exposure time. The moon’s color temperature is a little warmer than direct sunlight. Daylight is 5600 degrees Kelvin. (56K) I still recommend using daylight balanced film. With digital you can play around with your color temp a little. I like to set mine to 4700K at night. Lower Isis will give you an orange image and higher ones will make the image too blue or green. With film I used Fuji Velvia 100 speed daylight slide film. Set your camera to 100 ISO and shutter to B or Bulb. It helps to have a stopwatch or a remote control with a timer you can set. The remote control or basic cable release will also prevent any camera shaking and blurry images.

The faster the lens you have will shorten your exposure times and in turn reducing your noise with digital. I recommend a lens in the f1.4-f2.8 area. However these lenses are more money. Turn OFF the auto focus on the lens and if it has an image stabilizer feature turn that OFF as well. Otherwise the moving sky will confuse your lens and give you a “ghosting” effect.

I base my exposure times on a table I used in my head that I memorized when I was using only film. Under a bright moon I do 4 min at f4. You can bracket in either direction to adjust your exposure times and maintain the same image quality. For example if you want brighter stars or trails then go to 8 min at f8 or for less trails 2 min at f2.8 or 1 min at f1.4.

If you prefer deeper richer stars in the sky then I suggest photographing on a moonless night. You will even see the Milky Way but your foreground landscape will be dark. When doing this you need to set your ISO around 1600-3200. 800 will work if you have an f1.4-f1.8 lens. On a bright moon night the landscape will be fully exposed just like in the day but give you stars in the sky.

For these deeper moonless night landscapes set your camera to 30-90 seconds and set your lens to the widest aperture you have. Usually 60 seconds at f4 or 2.8 will give you a great night sky. This is where you get the noise and red/blue pixels. If you don’t want star trails then I suggest keeping your exposure under 90 seconds. After that you will start to see star trails. If you want a good star trail photo then drop your ISO down to 100, and expose for at least 2 hours. This is where some digital camera batteries will die. If they don’t die during the exposure time then it might during rendering time. It’s good to have a least 4 camera batteries and use a fresh one for each long exposure. I’ve often used up to 6 batteries in one night. That’s when my Canon F-1 comes in handy, no battery so the shutter will stay open as long as you like.

If you are photographing near a major city or in line of a major flight path I recommend starting after midnight when aviation travel is much less. I can’t tell you how many images were ruined by a passing plane or jet.

Above all have fun and dress warm on those colder nights. It gets pretty cold standing around in the dark for hours and hours.

Many more examples can be seen on my website at www.evansdp.com.

Photography: A Pondering Chipmunk at Bryce Canyon

I took this picture in 2008 in Southern Utah's Bryce Canyon National Park. Please visit my store page to purchase prints of my photos. Thank you everyone who has ordered photos, your purchase helps support this blog!

THE STORY BEHIND THE PHOTO

A chipmunk ponders his life's meaning and insignificance in a world that is but a speck of dust in the vast cosmic ocean, while taking in the silent splendor of Bryce Canyon... I like to think so anyway.

After leaving Zion National Park, the next stop on our hiking tour of the Grand Staircase was Bryce Canyon.

The early settler, Ebenezer Bryce, called it “a helluva place to lose a cow.” He was right, it certainly would be. We wandered through a labyrinth of multi-hued and impossibly thin pillars of rock called hoodoos that fill the canyon floor. Some look as though a stiff breeze could knock them over.

The shadow and color at Bryce change between sunrise and sunset, making it look a little different every hour of the day. And no matter where you point your camera, you capture something wonderful. This meant I had a hard time putting my camera away. I took well over three hundred pictures on this day alone. This was the first one I took in the park and my favorite. The way he seems to be staring out at the view somehow reminds me of how it feels to stand on the edge looking down at such a place. My narrow depth of field blurs the landscape itself, but that was intentional. It's that feeling that matters to me most.
  
Creative Commons License
A Backpacker's Life List by Ryan Grayson is licensed under a Creative Commons Attribution-NonCommercial-NoDerivs 3.0 Unported License.   

Photography: Zion Narrows

I took this picture in 2008 in Southern Utah's Zion National Park. Please visit my store page to purchase prints of my photos. Thank you everyone who has ordered photos, your purchase helps support this blog!

THE STORY BEHIND THE PHOTO

“Some people ask me how such a tiny river can form this big canyon,” the shuttle driver said, displeased with anyone who might speak ill of his beloved river. He spoke in a sort of loud assertive whisper, like Clint Eastwood. 

“It looks small now, but when a storm strikes, flash floods will flow down river hurtling boulders and blasting out log jams. And sometimes the poor souls hiking in the Narrows at the time. It'll hit'cha before you even know it's coming. Trust me. The Virgin River is no pup.”

He stopped and opened the shuttle doors at the Temple of Sinawava. My friend Randy and I got out and walked down a short path that ended at the Virgin River where the walls of the canyon converge into the 16-mile long Zion Narrows. From this point forward, the trail is the river.

We stepped into the 57-degree water. For some of the hike we walked along the sandy shorelines next to the canyon walls, but mostly we sloshed through ankle to knee deep water. We zigzagged back and forth looking for the best place to take our next step, trying our best to avoid slick algae-covered boulders and deep pools that might turn the hike into a swim without warning. Swift currents occasionally made crossing difficult, but there didn't seem to be any threat of flash floods. The sky was as blue as it can be. At least the tiny sliver that we could see hundreds of feet above our heads between the canyon walls.

The narrows are unlike any place I’ve been. The two thousand foot high cliff walls loom over you, coming together as close as thirty feet apart. Water weeps out of red-hued sandstone giving life to hanging gardens of moss, ferns, grasses, and wild flowers. The deeper the water gets the deeper its shade emerald green. As it surges through the narrow spaces between fallen boulders, it turns to white caps that fill the canyon with the hiss and whoosh of flowing water. This is undoubtedly one of the most stunning places on earth.

At a log jam about five miles in I stopped to admire the view and snapped this picture. 

On our way back out, we passed a young family of four. “I wish we could keep going, but it’s getting late," the mother said. "Are we going to miss anything great if we turn around now?”  

“Well, more of this,” I said. 

“So… yes,” Randy added.

I have hiked thousands of miles since this day, but when people ask me which trails are my favorite, more often than not, Zion Narrows still pops in my head first.
  
Creative Commons License
A Backpacker's Life List by Ryan Grayson is licensed under a Creative Commons Attribution-NonCommercial-NoDerivs 3.0 Unported License.   

Nature Photography Tip: Moving Water

(Sometimes There is a Place, photo by Lance McCoy)
I planned to do one post on nature photography, which listed tips from multiple photographers, but some of the tips I have been given deserve their own post. I've decided to make this a new series on the blog. From time to time, I'll post new tips from photographers who specialize in nature and wildlife. I may throw in my own two cents every now and then, but I'm still a student myself, so I'll defer to more experienced photographers whenever possible.

The first tip comes from a photographer whose photos I've enjoyed since I purchased my first SLR camera in 2009, Lance McCoy. And I have to say, his photos just keep getting better and better. Some of my favorites of his are his photographs of moving water. Lance has been gracious enough to give us his tips for taking these serenely beautiful photos.

(A Forest Retreat, photo by Lance McCoy)
First things first, get out and explore the forest to find the perfect setting. With the right light and a slow shutter speed, rivers, creeks, and waterfalls blur into tranquil images that seem to give motion to a motionless photograph.
  • "Cloudy, drizzle, showers, and rain make up the best shooting conditions for any kind of moving water compositions," says Lance. "Have terry cloth wipes and an umbrella available."

    What a great reason to head out on a less than ideal hiking day! With the long shutter speed necessary for these shots, you don't want the scene to be too bright. If it is going to be a cloudless bright day, the next best option is to head out at sunrise or sunset, when the light is less bright.
      
  • "Use a wide-angle lens," Lance says. "I use a Tamron 17-50 f/2.8 on a crop sensor camera, the Canon T2i. There are times when I wish I could shoot wider, but not many."
     
  • "A tripod is a must," he says. This is due to the longer exposure time necessary.
     
  • "Use a polarizer filter, without fail," he says. "It's a must!" A polarizer filter looks like a sunglasses lens for your camera. It will neutralize bright spots in a long exposure photo and reduce reflections from the water.
     
  • "Set your camera and lens to manual mode," he says. If you're a beginner who is intimidated by full manual mode, you can start by shooting in Shutter Priority Mode (i.e. Tv), so the aperture setting will still be automatic. Although, as Lance says, eventually get used to shooting in manual mode for full control of your photos.
     
  • "Use f/9 to f/20 for your long exposures," he says. The higher the number, the smaller the aperture where light enters the camera. When you're shooting long exposure pictures like these, you want to allow less light into the camera.
     
  • "Your shutter speed will vary depending on the light available. Generally speaking, one second or slower is good," he says. Due to the slow shutter speed, use a remote shutter release or set your camera's timer so you don't touch the camera until the picture is complete.
     
  • Use a low ISO setting. The lower the number, the less sensitive your camera's sensor will be to light. This will allow you to use longer shutter speeds and avoid noisy or grainy photos.
     
  • "Use Raw image format," he says, but adds that he still uses JPEG to keep space on his computer. Raw image format will not compress the image in anyway, so you get the maximum quality possible. Also, you'll have more information in the file to work with if you need to correct exposure, white balance, or color temperature in post-production software, such as Photoshop, without a significant reduction in quality.
     
  • "Compose and re-compose on every photograph and really look at a complete scene from all perspectives," he says. "High, low, in the water, side view, etc. Different views and patience will be of great benefit in getting the kind of photographs that will be wall ready!"
      
Point and Shoot Cameras

I wanted to make one final note. Many of my readers are backpackers who only carry a point-and-shoot camera. It will be very difficult to get amazing shots like Lance's with a point-and-shoot, but you can still get a similar effect. 

Point-and-shoot cameras do not have aperture sizes between f/9 and f/20, so use the smallest setting possible, usually f/8 on point-and-shoots. The higher the number, the smaller the aperture size. This will reduce the amount of light entering your lens as much as possible.

Since polarizing filters are generally not available for point-and-shoot cameras, simple hold an SLR polarizer in front of your lens, or try using a sunglasses lens. Depending on the sunglasses this could distort the image, but it's worth a try, because as Lance says, a polarizing filter is a must.

Lance, thanks you so much for your expert advice!
 
The water photographs in Lance's book, "The Olympics, A Place Like No Other" demonstrate the methods he describes above. You can find his book by following this link

Now if you didn't have enough reasons to go explore your local forests, here is one more excuse. Get outdoors and take some photos! If you have put Lance's tips to good use and would like to have a photo featured on this blog post, please send them to ryangrayson@gmail.com!

  
Creative Commons License
A Backpacker's Life List by Ryan Grayson is licensed under a Creative Commons Attribution-NonCommercial-NoDerivs 3.0 Unported License.   -

Photography: Sunset from Lake Monroe

From an old journal I never posted. It was September 2009...

In the middle of the night, sleeping alone in my car next to an old fire tower deep in the Hoosier National Forest, I heard voices. Apparently, I stumbled upon the place local teenagers go to smoke weed and howl at the moon. Whenever I’d fall back asleep, I'd be woken again by a different car and a different group of kids clanging up the metal fire tower steps.

After work earlier that afternoon, I grabbed my gear and drove down to the Charles C. Deam Wilderness, just southeast of Bloomington, Indiana. I arrived late, so I slept in my car rather than look for a campsite in the dark.

Regardless of the teenage potheads, I managed to get a few hours of sleep before sunrise. By seven, I was on the trail. Drops of dew and the rain that never made it to the forest floor collected and dripped from tree leaves. Their collision with other leaves on the way down filled the forest with a constant snap, crackle, and pop. Birds were also out singing and I saw my first Pileated Woodpecker. It hammered a Sycamore Tree until he saw me then flew away yapping.

Whenever I go hiking for the weekend, I wonder why I'm not hiking every weekend. You just get stuck in a routine sometimes. Next thing you know the warm weather is nearly gone and you hate yourself.

I setup camp by Lake Monroe. When the sun started to set, I walked along the beach. I didn't plan on swimming. I didn't even have a change of clothes or a towel, but I was compelled. I slowly lingered out, maneuvering over smooth algae-covered stones. A chill crept up my body as I descended into its depths, acclimating a little bit of skin at a time. By the time the chill reached my chest, the ground was soft and sandy. I pushed off of it and floated onto my back, drifting like a log with my arms and legs splayed out.

I filled my lungs full of air, rolled over, and then plunged headfirst toward the bottom of the murky lake.  I kicked my feet a moment too early and splashed the surface. The water pressed on my ears. Utter silence. I cracked open my eyes, but I could see just as much with them closed.  I imagined the surface of the lake going still, smooth as black volcanic glass. I had disappeared, invisible. Like I never existed. There's an odd comfort in that.

I loved my time in the lake so much that I wanted to get a photo to remember it. I went back to the shore for my camera. Out of the water, my body had to acclimate all over again. When I returned, the water was like a warm bath. I carefully took some photos without getting my camera wet then headed back to camp.

I dropped a match in the kindling I had waiting for my return. A fire roared to life, cracking dry pine needles. I stood next to it until my clothes were dry then retreated to my hammock. Tonight, I'd sleep to cicadas and water lapping against the shore.

There is something life-affirming about time spent alone in nature. Who cared about all the spring and summer weekends I wasted? It no longer matters. I'm here now.

Creative Commons License
A Backpacker's Life List by Ryan Grayson is licensed under a Creative Commons Attribution-NonCommercial-NoDerivs 3.0 Unported License.   

Backpacking Tips and Advice

Treating Water with Bleach Water Filtration Buying a Backpack Backpack Liners
 
Sleeping Bags Clean Clothes in the Backcountry Shelter Vs. Tents on the Appalachian Trail Knives on the
Appalachian Trail
Hiking with Visitors on a
Long-Distance Hike
Online Mail Drops on
Long-Distance Trails
Weather and Morale on
Long-Distance Trails
Bugs and Other Pests on the Appalachian Trail
   
Hiking Shoes Vs. Boots How to Make Your Own
All-Weather Journals
The Best Backpacking Pen Cooking Supplies & How to Make an Alcohol Stove

How to Make a Wicking Alcohol Stove

On a short hike, I usually go without cooking and just eat cold foods. Foods like cereal with powdered milk, one of my favorite backpacking foods if you have enough space in your pack. But I'll go into various backcountry foods on another post later this month.

On a long hike, I bring along my homemade alcohol stove.

Choosing to not cook used to be about saving weight and space in my pack, but now my cooking gear is so light and compact that the ability to cook dehydrated foods offset its weight. That's assuming you'll have a water source nearby, and so don't have to carry extra water for cooking.

After hiking the Appalachian Trail, I lost a tote full of gear. Occasionally, I remember something else that was in the tote that I have lost forever. One of those things is my Zelph's SS Starlyte Alcohol Stove. Rather than spend more money on a new one, even though I really loved that stove, I made one very similar to it out of some garbage. A hobo's got to do what a hobo's got to do, right? A dollar saved is a mile hiked.

There's an infinite number of ways to make an alcohol stove. This may not be the most efficient version, but in ideal conditions it will boil 2 cups of water with 1/2 ounce of fuel in about 7 minutes. Also, it doesn't need to be primed, it can't explode like pressurized stoves, the burning fuel can't spill if tipped over, and it weighs just 15 grams, not including a wind screen. Here's how I made it:
For the alcohol stove, you will need:
  • Two aluminum cans. You could use 12 ounce soda cans, but I prefer a smaller stove, so I used the 7.5 ounce cans.
  • A piece of aluminum screen the size of the diameter of the can
  • A piece of formaldehyde-free fiberglass insulation
  • Something to cut the aluminum. A Dremel tool works great for the next step and a decent pair of scissors will easy cut the thin sides of the can.
S T E P   1

Cut a hole into the bottom of one of the cans as shown. If you'd like, sand down the edges to remove any rough spots.
S T E P   2

Next, you will be cutting the bottoms off of the two cans. To make this easier, use a book and marker as shown on the left, to draw a line. Using a ruler, prepare to draw the line about 3/4" from the bottom of the can.
S T E P   3

Now, spin the cans around the marker to make a line that you will cut along.
S T E P   4

Now cut the bottom off both cans.
S T E P   5

Eventually you're going to fit the two pieces into one another. To make this easier, take the can with the hole that you cut earlier, and bend in the edges as shown on the left. For better accuracy, I drew another line about 1/2" from the bottom.

Now bend in the edges all the way around the can at this second line as shown. Needle-nose pliers make it easier.
S T E P   6

Now cut a round piece of aluminium screen to fit over the hole.
S T E P   7

Stuff this full of fiberglass insulation. The insulation will absorb and wick the alcohol, so it burns evenly. It will also prevent the alcohol from spilling out and setting things on fire after it's lit.

Once on the AT, a friend's alcohol stove tipped over and the flames melted my plastic fork and engulfed my hand. I was able to put it out before any injury, but it made me really appreciate the insulation in my stove.

Of course, you can find a bit of free insulation inside just about any wall or ceiling, but be sure it's formaldehyde-free insulation to prevent potentially harmful fumes.
S T E P   8

Here is the finished top half. I should be a hand model, just look at that.
S T E P   9

Now is a good time to sand off any rough edges on the hole-free bottom half. 
S T E P   1 0

In order to fit the two pieces together more easily, put the top half, with the hole, in the freezer for about 10 minutes. This will shrink the aluminum very slightly.

If you're making this from the trail or on the road, you could use a cold creek or snow. Or maybe stick it in an ice box outside a gas station while you shop.
S T E P   1 1

Warming the top half of the can for about 5 minutes will cause the aluminum to slightly expand. I used a toaster oven set to 150° F.

And if you're on the trail or the road, you can set it in the hot sun for a while, or set it near a campfire.
S T E P   1 2

Now fit the two pieces together. To get a nice tight seal, I used a board and hammer as shown. Once it goes back to room temperature it should be very difficult to pull apart.
S T E P   1 3

I sanded off the rest of the Pepsi paint and I have my finished product.

The stove itself weighs only 8 grams!
S T E P   1 4

But there are a couple more things. You will need a pot stand and some kind of wind screen. I'm working on another pot stand/wind screen, but since it involves just as many steps as the stove and some trigonometry, I'll save it for another post.

Pot stands and wind screens, however, can be made in a number of ways. As shown on the left, a pot stand can be as simple as a piece of hardware cloth formed into a cylinder. This can be unhooked and stored inside my cook pot when not in use.

This weighs 7 grams.
S T E P   1 5

A simple wind screen can be made out of thick aluminum foil, such as the kind used in cheap cookie sheet liners. This one weighs about 10 g.

You could also use aluminum roof flashing or if nothing else build a barrier out of whatever else you have around like rocks or wood. Or dig a hole, whatever you have to do to keep the wind off your flame.


S T E P   1 6

This is an optional step, a lid. If you're pot doesn't come with a lid, you can make one very easily out of aluminum. My craftsmanship is rather poor on this, but I used a piece of aluminum flashing.

I left 3 tabs along the outside that are bent around the lip of the pot so it snaps into place. It does get hot, but a quick flick of one of the tabs pops it right off. I also punched in a few holes to strain pasta and to allow steam to escape. This adds 5 grams, but lids save fuel, so in a way they decrease your weight.

Everything was made to fit inside the pot, so it stores easily and everything is protected.

S T E P   1 7

Just pour in about 1/2 to 1 ounce of denatured alcohol or HEET and light. More on fuel below.

As you can see, the stove burns nice and even.

The fiberglass insulation lasts for months and possibly years with normal usage. In other words, much longer than it will take for me to lose it again.

Be sure to let all the fuel burn off before stowing it away.
  
Fuel

I keep denatured alcohol in an empty soda bottle that is clearly marked, so nobody accidentally drinks it. The quantity needed to boil water depends on temperature, wind, and elevation, but to make it simple, I take about 1 ounce of fuel per meal and usually have more than enough. Denatured alcohol can be purchased in most stores that sell hardware. Many outfitters sell it by the ounce.

If you can't find denatured alcohol in a small resupply town, you can get the yellow bottle of HEET gas line anti-freeze in most gas stations. They come in a 12 ounce bottle, which is a good amount to get you to the next resupply town without carrying too much or wasting any. HEET is usually a little bit cheaper than denatured alcohol, but it doesn't burn as hot, so remember that you'll need a little bit more to boil water.

If buying HEET, make sure to get the yellow bottle, the IsoHEET product in the red bottle can form peroxides, which may explode. And some experts are now saying that an explosion in your face can really put a damper on your backcountry experience.

Cook Pot and Spoon

Finally, just a quick overview of my only other cooking supplies, my pot and spoon. There's no need to carry a whole mess kit on the trail. A cook pot will work as a mug as well. 

A 2 1/2 - 2 3/4 cup pot is ideal because most dehydrated meals require 2 cups of water. I currently use an aluminum pot that weighs 5 oz. and costs anywhere from $6-10. I could spend $35-50 on a 3 oz. titanium pot, but I haven't been able to convince myself it's worth it yet.

I have purchased about every brand of camping spoon or spork you can buy and I have broken or lost all of them, so I often just grab a plastic spoon when I stop for fast food in a resupply town. They are free and weigh about 4 g. 

That is all for now. Watch for more food and nutrition-related articles coming soon.
Creative Commons License

Photography: Devil's Tower


I took this photo in 2012 at Devils Tower National Monument in Northeast Wyoming, USA.

You can purchase prints of my photos in my Etsy store. Orders are greatly appreciated!

THE STORY BEHIND THE PHOTO

The winding road to Devil's Tower was hilly, green, and smelled of pine. It appeared when I was still six miles away, as a lonesome faint blue column soaring out of the ground. I've seen lots of photos, but it’s bigger than the image I carried in my head. You know how when you see a celebrity they always seem shorter in person? Well, imagine meeting Kevin Spacey and he's 1,208 feet tall!

Just accept that that analogy is perfect and continue.

I wondered what pre-scientific people thought when they first saw this strange monolith emerge through the atmosphere from far away. Such an odd thing would surely generate legends. I didn't have to wonder long though; a roadside plaque told me one such legend…

Native American's told of seven little girls being chased onto a low rock by attacking bears. The seven girl's prayers for help were heeded. The rock carried them upward to safety as the claws of the leaping bears left furrowed columns in the sides of the ascending tower. Ultimately, the rock grew so high that the girls reached the sky where they were transformed into the constellation known as the Pleiades.

Definitely an interesting story, but I think science is often better than fiction. In reality, ancient seas ebbed across this part of North America, including all of Wyoming, and split the continent into two. Silt, sand, and other rock fragments got deposited on the sea floor and formed soft sedimentary rock. 50 million years ago, molten rock pushed up through that sedimentary rock a mile and a half below the earth's surface and became a harder igneous rock that cooled and fractured into columns as it crystallized.

As eons passed, erosion more easily stripped away the softer rock around Devil’s Tower, leaving the 1,208-foot column. Knowing how long such a process takes, makes me more passionate about protecting it, and more grateful for our National Parks.

Now, the Pleiades on the other hand, those formed out of seven little girls. They got that part exactly right. Any scientist worth his salt will tell you the exact same thing.
  
Creative Commons License
A Backpacker's Life List by Ryan Grayson is licensed under a Creative Commons Attribution-NonCommercial-NoDerivs 3.0 Unported License.   

30 Tips for Hitchhiking to Resupply

(Photo: Liv hitching in Maine)
On a long enough hike, hitching into town to resupply is almost a necessity and often a major concern for aspiring thru-hikers. The first time I stretched out my arm and put out my thumb, I felt equally nervous and excited.

A couple hundred hitches later, the nervousness dwindled to nothing, but the excitement continues. It's not simply free transportation. Something about it evokes a feeling of uncomplicated freedom. Akin to minimizing possessions to only what you can carry.

My friends and I have gotten many hitches from people who said we were the first hitchhikers they have ever picked up, so it seems we’re doing something right. Not everything here is essential for getting a ride, but they are all of the things I consider. The tips are geared toward the short hitches between trails and towns for resupplying, but most of them apply no matter where you’re hitching.

1. Give room for cars to pull over safely
Look for a spot where someone can easily pull over without issues or in places where it would be illegal to stop. Wide shoulders and turnouts are prime real estate for hitching. This will be the most obvious thing you'll read on this list, but also be sure you're on the side of the road where the traffic is moving in the direction you want to be going.
2. Give time for drivers to see you and brake safely
Stand in a spot where a driver will have a few seconds to see that you’re hitching and have plenty of time to slow down. And of course, enough time to take pity on you. Few people will want to slam on their breaks or turn around to pick you up. It happens occasionally, but don’t make it a requirement.
Standing by a road sign or anything else that a driver might already be looking at, may give them an extra second to notice you.
3. Put your thumb out and pointed up, if in the United States
This might seem obvious, but I mention it because the tradition of putting out a thumb is what we do in America and Europe, but it's not the standard everywhere. If you’re in another country, you’ll want to learn their gesture. For example, in Israel, hitchhikers hold their fist out with their index finger pointing towards the road.
4. Hitch where traffic is slow or stopped
Such as near traffic lights or within eyesight of where people are pulling out of gas stations or parking lots. While waiting for a light or pumping gas they are more likely to notice you. Perhaps the best spot is right before a highway on-ramp.
(Photo: Me hitching by the Inn at Long Trail)
5. The Law
The law can seem a little complicated, so I’ll try to simplify it:
Although rarely enforced, hitching is illegal in Nevada, Utah, Idaho, and New Jersey.
It is illegal to hitch on Interstates except in Texas, Oregon, North Dakota, and Missouri. This doesn’t mean you can’t hitch on the road that leads to an Interstate on-ramp though.
Although, most states prohibit standing on the road itself, it is usually okay to hitch from the shoulder. If you're unsure, stand just off to the side of the shoulder. It's safer anyway.
California, Alaska, Hawaii, Washington, Kansas, Wisconsin, Florida, Maine, New York, Rhode Island, and Massachusetts have more complicated laws that you may want to read up on. I’m not going to go into them here, but I will just say if you’re outside city limits in these states it’s usually okay to hitch. Although, failure to read up on these laws could result in a citation. It's rare, but it happens. Just remember that I warned you.
The police may ask for your ID even if you’re not doing anything unlawful. Just let them, even if you don’t technically have to identify yourself when not breaking any laws. They are usually just trying to keep people safe.
Sometimes it’s illegal to hitch on other federally-owned roads other than Interstates, like National Park roads, National Scenic Byways, and National Recreation Areas, but I’ve never had any trouble. A park ranger in Yosemite even once suggested I hitch to a certain trailhead since their buses did not go out that far.
6. Minimize Turns and Simplify Your Route
The less complicated your route, the more likely a person driving by will be heading to your destination. If you’re a few blocks from the first turn, go ahead and walk that distance to eliminate it from the route. The more turns and on-ramps that you eliminate from your route, the better. By all means, stick your thumb out as you walk, but toward that better position.
7. Don’t get dropped off in a bad hitching spot
If you’re going to need multiple hitches to get to where you’re going, don’t get dropped off in the middle of nowhere even if it’s closer to your destination. If they will have to drop you off between towns where there is little to no traffic, thank them for stopping, but wait for the next hitch.
Also, it’s harder to get a hitch from downtown. Traffic will be going in every direction and people aren’t necessarily driving out of town. If someone has to drop you off in a town you’re not staying in, ask to be dropped off at the edge of town instead.
(Photo: Red in the back of a pickup
while hitching in Gorham, NH)
8. Hitch in pairs when possible
This may also mean separating a larger group into pairs. People aren’t just giving you a ride, but your packs as well, which take up a lot of space. Hitchhiking is a numbers game, and if you’re in a big group, you’re going to have fewer vehicles pass that could possibly carry you all.
Consider having all but two standing off to the side where they aren't seen from the road. If someone stops that has the room, ask if they can take you all. Otherwise, leave the rest behind and meet back up in town.
Also, when possible, have one female to each pair. Couples and women are a lot less threatening to motorists. When I was hitching with Sixgun and Liv, there were many times when we'd put our thumbs out and a car would stop almost immediately.
9. Be Happy
If you’re not happy, fake it. People don't want to pick up a stranger who looks angry or dangerous. If you’re with someone else, have a happy conversation while you’re holding out your thumb. Laugh, even if what is said isn’t that funny. Tell jokes if you have to force it. You’ll seem friendlier.
Although, don’t exaggerate your happiness or laughter. I was with another hiker on the AT trying to get a hitch and his over-sized smile and exaggerated attempts at physical humor were just creepy. Nobody stopped.
10. Don’t have a knife sheathed on your belt
If you want to have one in your pocket for safety, that’s fine, although 99.9999% of people are stopping to help a fellow human, not harm them. Anyway, they are usually more afraid of you than you are of them, so put the knife out of sight.
11. Make Eye Contact
Eye contact can really increase your chances of getting a ride. If someone makes that simple connection with you, I think it adds a little bit of guilt or pity to their quick decision making. In this scenario, guilt and pity are your friends.
Of course don’t stare at them in a creepy way, but give them a friendly smile. If walking, turn around and walk backwards with your thumb out when a car is coming, so you can still make that eye contact.
12. Take off your sunglasses
Let them see your non-threatening face. If your face is just naturally threatening, I don’t know what to tell you.
13. Don't Smoke
A lot of people don't want cigarette smoke in their cars. Smoking can definitely reduce the percentage of cars that will pick you up. And they will already have your hiker odor to deal with. If you need to smoke, ask after you're on the move if they mind.
14. People Sometimes Come Back
If the speed of the car makes it obvious they are not going to stop, smile and wave anyway like you’re thanking them for the consideration. Show them this common courtesy and sometimes they will turn around and come back for you. Guilt and pity sometimes takes a second to brew.
15. Look as clean as possible.
If someone thinks they’re going to have to get their car’s interior detailed after driving you three miles, they’re probably not going to stop. And if they do pick you up, actually being clean may make them tolerate taking you further. In other words, do whatever you can to freshen up.
(Photo: Red and Cocoa Toe hitching from Asheville, NC
back to the Appalachian Trail.)
16. Wear something bright
When you’re buying a shirt or bandana for your hike, consider the brightest ones possible. They could help you get noticed when hitching.
17. Talk to people near trailheads
If you know you’re going to try to hitch at the next trailhead, parking area, or road, start talking to day-hikers that you meet on the trail. You don’t need to ask them for a ride, but later, when they see you standing by the road with your thumb out, they will often pick you up. Even just asking them for the time or commenting on what a beautiful day it is can be enough.
18. Talk to people in town
The same thing applies in town. While you’re in grocery stores, convenience stores, or restaurants, talk to people. Some business owners frown on you soliciting a ride from their customers, but you don’t necessarily have to. If you’re being friendly and talking to people, they’ll often pick you up when they see you hitching later. Just make sure they see you, hitch in eyesight of the people pulling out of the parking lot. If you see someone that you had a conversation with, wave to them so they know it's you.
19. Don’t bother hitching on the side of the road at night
Instead, go to bars, restaurants, or well-lit gas stations and meet people. Again, business owners don’t want you walking up to customers to ask for a ride and most people don’t like it either. Start conversations first and mention where you’re headed. They'll see your packs, they know you're travelling. Often they will offer the ride and think it was their idea the whole time. 
Besides, standing on the side of the road in the dark could be dangerous. 
20. Ask people about public transit
Sometimes I feel weird asking people for a ride, especially on a business's property, so I resort to a more passive indirect way of doing it. Sometimes I’ll ask the employees of the business or the locals if they know of any public transit services in the area and tell them where I’m headed. Often they’ll just offer you a ride. Remember, it’s always good to find ways to make the ride seem like their idea.
21. Stand and Pace to get noticed
But don't walk away from a prime hitching spot. Only walk while hitching if you're moving to a better place. I've walked toward town while hitching while other hikers stayed back to hitch and they ended up passing me. Something you realize after walking in the woods for hundreds of miles is that cars are incredibly efficient at moving people around.
22. Keep your backpack on or in plain sight
If people can see your pack or trekking poles, and you’re near a trail, they will often know your just a hiker needing to resupply in town. This means you probably aren’t going far and probably aren't there to murder anyone.
23. Make Signs
I'm still not sure if signs really help, but it's something to consider. One time on the Long Trail, Red and I made one. I asked the guy, “So did the sign help out at all?”
“Actually,” he said. “I didn’t even notice the sign. The first thing I noticed was the kilt.” Red hikes in a kilt. When he bought it, I was certain we’d never get another ride again, but I was proven wrong many times.
If you’re already carrying a colorful bandana, use that instead of cardboard. It doesn’t add weight to your pack, it will stand out, and if you use cardboard people may just assume you’re "willing to work for food" instead of looking for a ride.
When making a sign, make it as simple as possible. This ensures it's easier for a driver to read and it will be reusable. It can be as simple as the letter of the direction you’re going, for example on a north/south running trail, you’ll probably only need an E on one side and a W on the other. You could also write something even more generic and reusable like, “Hiker to Town,” on one side of a bandana and “Hiker to Trailhead” on the other.
If you get too specific and write your actual destination on a sign, not only is it not reusable, but if the destination is further away or in a direction the driver isn't going, they may not bother to stop at all. And you really want them to stop. If they have already made the effort to stop, they are more likely to take you where you’re going or at least get you part of the way there.
24. Consider the time of day when you’ll get to the road
Obviously, you don’t want to get to the road after dark, but get there at least an hour before dark in case you don’t get a ride right away. Think about how many miles you have to the road and how much time you’ll need in town. If you want to get back to the trail before dark, leave enough time to shop and get two hitches. Usually two or three hours is plenty unless you're in the middle of nowhere.
Also, remember that a lot more people go on day-hikes on weekends, so you are more likely to see cars parked at trailheads and so more likely to get a ride.
25. Sometimes going in the wrong direction will get you to your destination quicker
If you’re in a bad spot and you can’t get a ride in the right direction. Try to also get a ride to a better hitching spot in the other direction.
(Photo: Sixgun and Liv hitching in the rain)
26. When all else fails, just look as pathetic as possible
Being rained on helps. So does taking off your coat and looking cold. Sometimes desperate times call for desperate measures.

Tips for after someone has taken the bait

27. Tell them the shortest distance you’re willing to go on the hitch
For example, when someone asks where you’re headed, say something like, “Well ultimately, I need to get to _______, but if you can take me to _______ that would be great!” That way they won’t feel like they’re stuck with a smelly hiker for a long time, but if they like you, they’ll usually take you further. Actually, I think everybody except two people took me the full distance even if it wasn't on their way, but in their defense both of them were expected to appear in court.
28. Be leery of putting your pack in someone’s trunk
They might just pull away with all your gear when you get out. Either on accident or on purpose. Just imagine being dropped off by a trailhead and helplessly watching all your gear roll away. Instead, put your pack on your lap, or if you're in the backseat set it right next to you. If you’re hiking with someone else, have a rule that one person stays in the car until the other has pulled the packs out of the trunk.

Tips for when you’re in the car

29. Have a good conversation
Don’t just sit there quietly the whole time. That’s weird and they will be less likely to take you that extra distance. Ask them where they are from. Be happy. Tell them about your travels. If they enjoy your company, they are more willing to take you the extra mile or pick you up again if they see you hitching back to the trail.
Tell them interesting stories, but try to get them to talk about themselves. Not only are some of these people really interesting, but people like talking about their lives. If they are enjoying the conversation, they will usually drive you further.
I’ve had many people go out of their way to take me where I needed to go. After finishing the John Muir Trail, a driver drove me two hours out of his way to take me back to my car in the Yosemite Valley (four hours round trip). We had a great conversation. Not only that, but I’ve had people drive around to look for me later to take me back to the trailhead.
Never talk about anything even remotely controversial. This should be a given, but if the driver brings up the topic, just smile and nod or try to change the subject. I know some people can’t help but argue, but you have to fight the impulse if you want them to take you further or pick you up again later. Or just agree with them, if doing so doesn't kill something dear inside of you.
30. Be courteous
Apologize for the hiker smell and thank them for the ride. These people are doing you a huge favor and all you’re offering is your stench. Make sure they know how grateful you are for their kindness. When people think you like them or appreciate them in anyway, they will like you almost 100% of the time. I’ve had people wait for me to finish shopping and drive me back to the trail. People are just amazing sometimes. Make sure they know that.
In Conclusion 

There will be exceptions to all these tips. They are simply things that may help increase your chances of getting to where you need to go.

Hitching isn’t without risk, of course, but it’s not as dangerous as most people believe. As with everything, firsthand experience reduces your fear by making you more aware of reality.

People often say, “I wouldn’t hitch in this day and age.” Those people need to stop watching TV. The news is to reality what reality shows are to reality. Get out and see the world as it really is. Believe it or not there are fewer acts of violence today than ever before. The number of people willing to injure or murder a stranger with his thumb out on the side of the road has not gone up, in fact, it has gone down.

Actually, come to think of it, people have picked us up because they were afraid if they didn't a crazy person might. So maybe a little bit of fear in the population is good for hitchhikers.

Take precautions, but don't let a fear of hitchhiking keep you from attempting a thru-hike  Besides, you may find that many of your best stories of the long hike are your hitchhiking stories.

Creative Commons License
A Backpacker's Life List by Ryan Grayson is licensed under a Creative Commons Attribution-NonCommercial-NoDerivs 3.0 Unported License.   

Photo: Rainbow at Yellowstone Falls

I took this photo in 2012 in Yellowstone National Park.

You can purchase prints of my photos  in my Etsy store. Sales will be used to fund a replacement for my broken camera before my Pacific Crest Trail hike, so orders are greatly appreciated!

THE STORY BEHIND THE PHOTO

I slept in my car, so I could wake up before sunrise to get a specific picture. On my first Yellowstone visit in 2004, I tried to get a photo of the falls, but it didn't turn out very well. I wanted to try again.

I wasn't the only person who lugged a camera and tripod up to the view of the lower falls in "The Grand Canyon of the Yellowstone." A row of photographers were already there quietly watching the sunlight melt down the canyon's yellow rock.

I did have the oldest crappiest equipment though. I felt like a kid from the Mighty Ducks with a worn-out jersey and hockey stick held together with duct tape, just trying to compete against the spoiled rich kids with their expensive new gear.

I still wasn't happy with the pictures I was getting, but I heard that from a certain angle, the sun and the mist from the falls produces a rainbow around 9:30, so I searched for a better place to set my tripod.

In the end it was worth waking up cold and groggy in my car. I'm much happier with the picture this time. There is just something about devoting an entire morning to getting a specific photo that makes me love this one even more. There are hours of great memories packed into this fraction of a second.
  
Creative Commons License
A Backpacker's Life List by Ryan Grayson is licensed under a Creative Commons Attribution-NonCommercial-NoDerivs 3.0 Unported License.   

Q&A: Should I Buy Hiking Shoes or Boots?

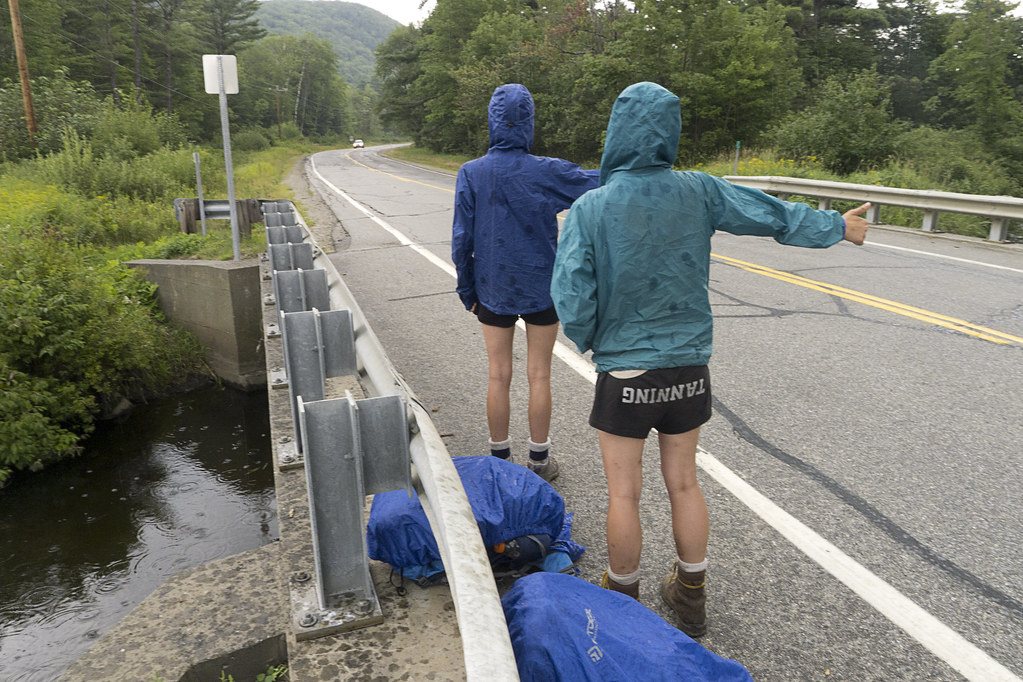
(Photo: My Keen Boots after 900 miles on the AT)
“I had a nightmare last night,” Red said. “I bought boots instead of hiking shoes and didn't realize until I was on a trail.”

I laughed as few people could. “So did you bolt out of sleep screaming while lying on sweat-soaked sheets?” 

The nightmare was sort of my fault. Earlier, I had been replying to a reader’s question about footwear and I asked for his opinion.

“I just woke up confused, thinking, did I actually buy boots?” he said. “Why would I do something that foolish?”

This great question comes from a reader named Heather. I like this question because when buying your first set of gear, certain items seem like a given. Football players need cleats, basketball players need high-tops, and hikers need sturdy leather hiking boots, right?

What footwear do you prefer on the trail?

My quick answer is that unless you are bushwhacking through rough terrain, slogging through bogs, hiking in deep snow or very cold weather, or there are other safety concerns, go with shoes. Specifically shoes designed for trail use that are:
  • Lightweight
  • Breathable
  • One size bigger than your actual foot size and
  • Have a sturdy sole that is slightly wider than your foot and not too elevated
  • Have a spacious toe box
Since I have a hard time keeping my answers that succinct, I’ll tell you why in detail. These are my opinions based on my own experiences, but others may disagree. Gear choices are personal and everyone has their reasons for doing what they do. It is usually helpful, however, to learn why backpackers do what they do, or why they don’t. So, here is why I prefer hiking shoes, or trail runners, to boots in most situations. 

Reason #1: Shoes Are Lighter

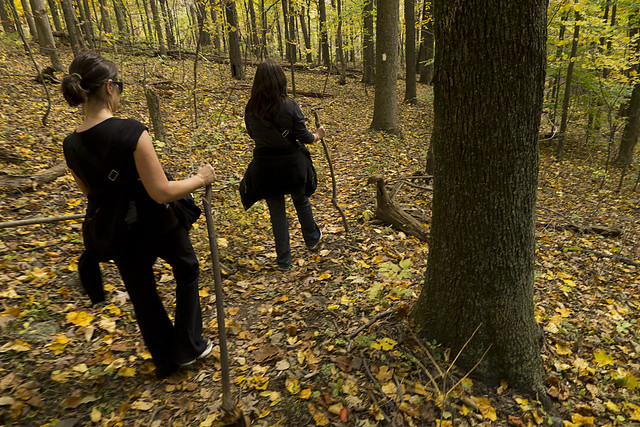
When you put on a good pair of boots, I admit you do feel strong, like you could bulldoze through any terrain unscathed. On the other hand, a good pair of trail runners makes you feel light and fast, which is what I want. If I were doing a lot of bushwhacking or hiking through miles of cacti, perhaps I’d want a high-top leather boot, but I rarely find myself in that situation as I generally stick to designated trails.

Reason #2: Shoes Dry Quickly

When thick leather boots or Gortex boots get wet, they stay wet for way too long. Long enough to cause foot problems. I've given up on the idea that you can keep your feet dry. Whether it’s precipitation or perspiration, water will get in eventually. When it does, you don’t want your feet staying wet for very long. Soggy feet are much more prone to blisters and chafing. Hiking shoes made with breathable synthetic materials, or mesh, which will dry much more quickly. 

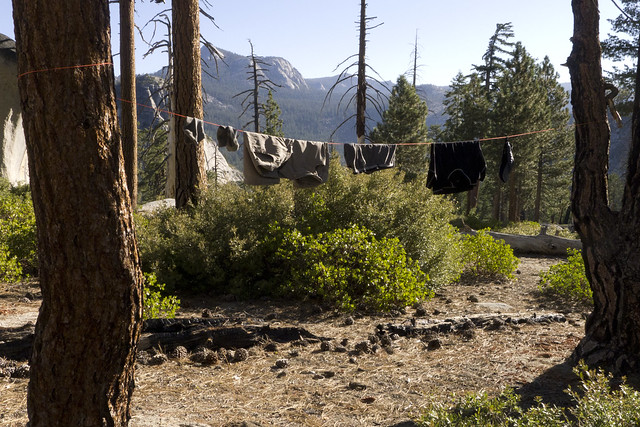
Having an extra pair of dry socks is also important. When putting on a dry pair, I hang the wet socks on the outside of my pack with safety pins to dry while I hike. At the end of the day, I keep any damp socks in my sleeping bag, so my body heat will dry them out overnight. 

Reason #3: Shoes Don’t Need To Be Broken-in

On a long enough hike, you’ll have to stop for new shoes. In my experience, until new boots are broken in, I'm more susceptible to hot spots and blisters. A good pair of trail runners, on the other hand, are usually comfortable out of the box. 

(Photo: My "$780" pair of shoes)
Soles and Insoles

My first 300-400 miles on the Appalachian Trail, I hiked in a pair of Inov-8 trail runners. I could roll them up like a pill bug with little resistance from the sole. They only cost about $80, but about $700 in medical bills.

The problem was the flimsy sole. As a barefoot runner, I believed the less my shoes unnaturally constrained my foot the better. I still believe there may be some truth to that, but it isn’t natural to carry 30 lbs. on your back and hike on rough terrain for months. I learned the expensive way the importance of sturdy soles.

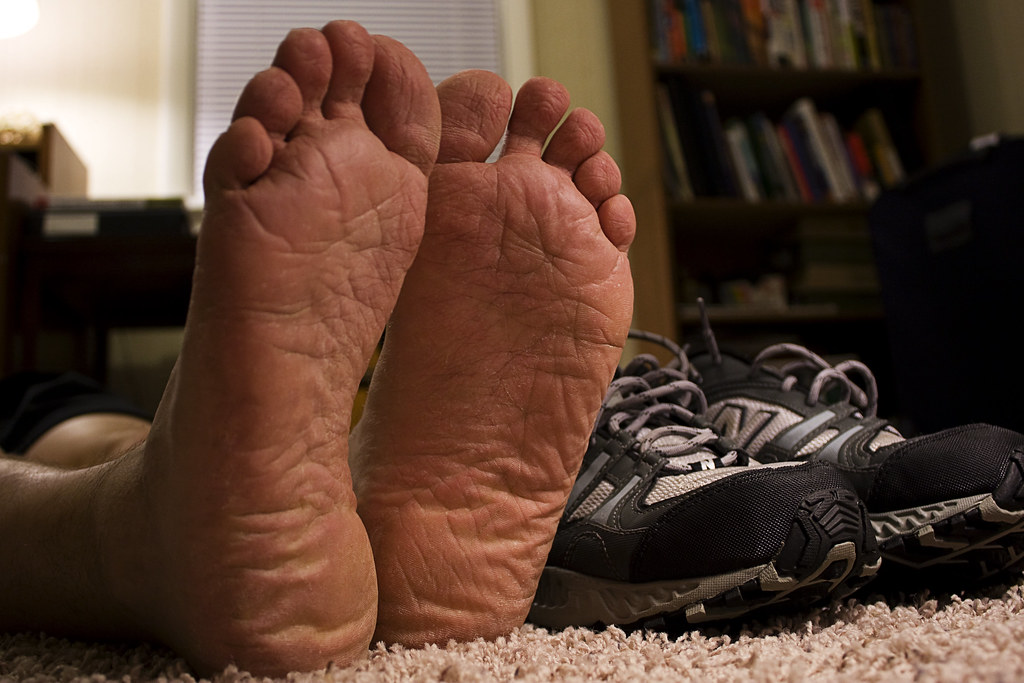
(Photo: My rugged barefoot runner feet are blister-proof)
A sturdier sole and more ridged insole would have prevented that particular injury. Superfeet, Soles, or similar brand of insole can provide a lot more protection. My Superfeet insoles cost $40, but I wore them for 2,700 miles and they probably would have prevented the injury.

Ankle Support

It may seem like high-top boots offer more ankle support, but I’m skeptical about that. Besides, my nonprofessional opinion is that the sole has a lot more to do with ankle protection than the high-top collar.

For example, ankle sprains are much easier with a narrow sole and they are much more severe if the sole is too thick. A wider base will help prevent your ankle from turning and the higher your foot is elevated the higher your risk of injury.

Try on a pair of shoes and sort of roll your foot side to side. Do the shoes roll easily? Do they feel like you could easily twist your ankle in them? Is there a threshold where when you turn your ankle the shoe wants to suddenly snap to the side? If so, try another pair.

(Photo: My Salomons, My Personal Favorite)
Traction

This is another important quality in a sole. Trail shoes need good traction, especially with those prone to falling like me. My Salomons have a deep tread on the bottom that grip rocks and roots very well, even when they're wet.

Actually, I can't recall falling since I purchased my Salomons. Tell anyone who has hiked with me long enough and they would gasp in disbelief.


To conclude, in my experience, you want a sole that is:
  • Sturdy, so can't be easily rolled like a pill bug
  • A little wider than your foot
  • Not too thick or elevated
  • Has good traction


Find a shoe that fits properly then buy one size larger than normal

It's normal for feet to widen after backpacking for a while and they tend to swell after hiking long distances. Due to this, I've learned to buy a full size larger than I need.

Make sure your foot doesn't slide around too much in the shoe. This will lead to hot spots and blisters. A properly fitted insole with a deeper heel cup will help prevent this.

I have slightly wider feet than normal, so much so that the first hole I get in most shoes will be right next to my pinkie toes. Therefore, I prefer a wider toe box. Along with some rubber on the front, the extra room in the toe box will also protect your toes when you kick rocks and roots. And you will, many many times.

Try on multiple pairs and brands, A Plug For Zappos.com

Try on several brands. Many people swear by their pair of Merrells, but the two pair of Merrels I tried destroyed my feet, one pair had me limping in less than 5 miles. They just don’t work for me. I love my Salomons, but they may not fit other feet as well.

Before hiking the Appalachian Trail, I ordered about ten pair of shoes on Zappos.com. I kept my favorite four, and then returned the others. Zappos has free 1-2 day shipping both ways, competitive prices, a large selection of hiking shoes, and a 365-day return policy. This allowed me to have extra pairs of shoes at my sister’s house in case I needed her to send me a new pair. When I finished the trail six months later, I followed their incredibly simple return process and got my money back on the unused pairs.

Possible Benefits of Boots

High-top boots tied close to the ankle may keep out some debris, but I don’t find debris to be too much of a problem. It really depends on the terrain. Actually, Red told me he had more issues with debris getting in his boots than in his trail runners.

Either way, we both find that the low collar of a shoe makes it much easier to scoop out the debris with your finger without taking the shoe off, unlike high-top boots. Also, when your shoes need to be taken off to dump out debris, my Salomons with their zip cord style laces, are easy to take on and off without even sitting down. Cleaning out boots is a longer process.

(Photo: Dirty Girl Gaiters)
If you do have issues with debris, consider purchasing something like Dirty Girl Gaiters or just tie bandanas around your ankles to keep debris out.

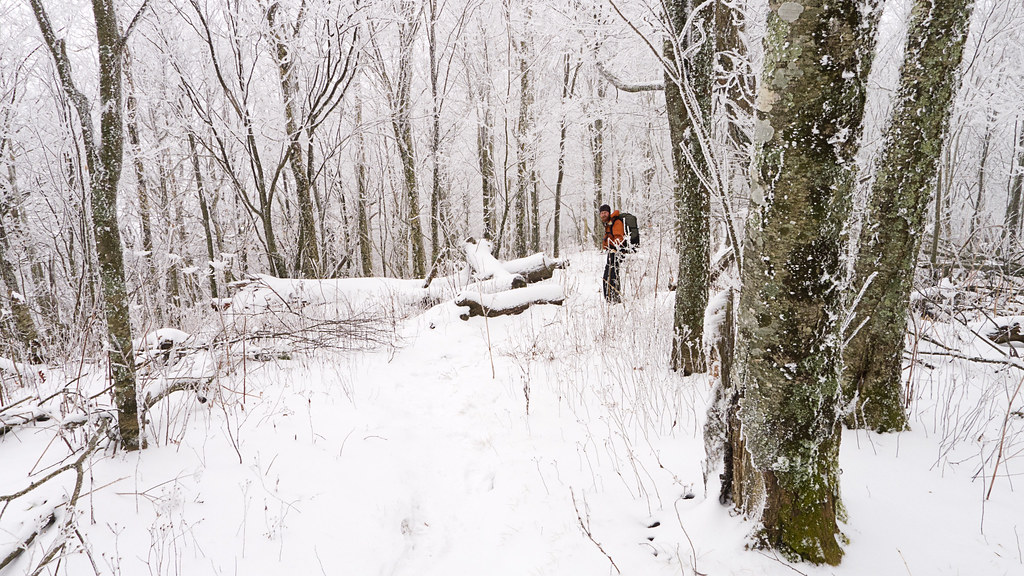
In my mind, the only good reason to buy boots for multi-day backpacking is if you will be hiking in deep snow, waterlogged bog or marsh, doing a lot of bushwhacking, or hiking in atypical or extreme environments. For example, in very rough terrain, high-top boots may protect your ankle from scratches and bumps, especially that bony protrusion on the outside of your ankle. 

Durability

It may be true that a quality heavy boot will last longer, but that hasn't been my experience. I got about 900 miles out of both my Salomon trail runners and my last pair of heavy mid-high boots. Even if they didn't last as long, I want to be hiking those miles on happy healthy feet.

Other Considerations

Camp shoes

Good trail runners are so comfortable that I don’t see the need for camp shoes. Which reduces some weight and bulk in your pack. The only exception is if I’m going to be fording rivers or streams, I might carry a pair of lightweight Crocs.

Stream crossing

On a warm sunny day, you may not even need to remove a breathable pair of trail runners to cross a stream. Many of them will dry after only 15-30 minute of hiking. I do recommend removing your socks and insoles before crossing, though. When you put them back on, they will draw some of the moisture out of the shoe and allow everything to dry much faster than if everything is saturated completely. 

Socks

Don't be alarmed by the cost of a good pair of socks (usually $15-20 per pair). My favorites are the Darn Tough Vermont brand. Not only did my first pair last from New Hampshire to Tennessee on the A.T. (until accidentally setting them on fire when drying them out by a campfire), but Darn Tough replaced them.

I walked into the Outdoor 76 outfitter in Franklin, North Carolina and saw a sign that said the Darn Tough brand was "Unconditionally Guaranteed". I jokingly said, "Unconditional? What if you were to accidentally set them on fire?"

To my surprise he said, "Yeah, bring 'em in."

I pulled the smelly socks from my pack, he held out an empty plastic bag with his nose turned to the side, and I dropped them in. He quickly tied the bag shut like they were radioactive then let me take a free pair off the shelf. I suspect that other outfitters will tell me to send them back to the manufacturer to get the replacement, but after that I became a Darn Tough Vermont man for life!
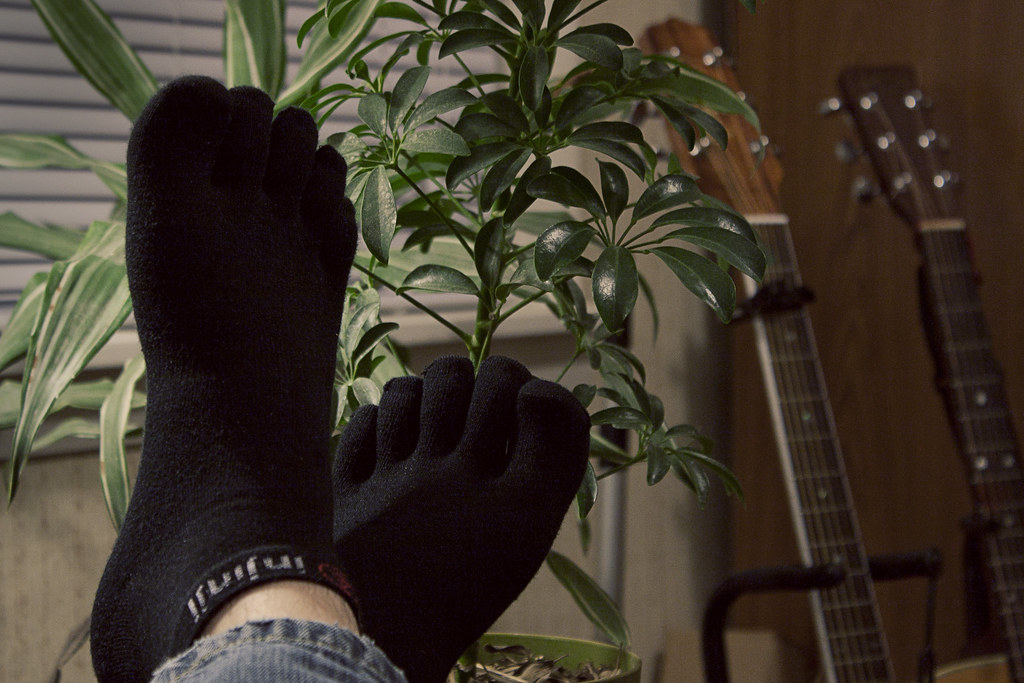
Sock Liners

I don't usually use sock liners, but they have been essential a few times when hiking in rain or snow all day. They can cut back on chafing and protect your softer water-logged skin from blisters. I use toe sock liners to add more protection between my toes.

Final Thoughts

I've seen people hiking in boots who had infected blisters and toenails falling off. There's just no need for that. If you are getting a lot of blisters, hot spots, or having other foot issues, don't believe that it just comes with the territory. Do what works for you, but if your footwear isn't working, change as soon as possible.

Similarly while hiking, if you start to feel a hot spot on your foot, stop immediately and try to fix the problem. You may need to clean debris out of your shoes, put on dry socks, stick a piece of duct tape inside your shoe where your foot is rubbing, or put a bandage on a potential blister spot. Failing to do so right away may lead to a bad time on the trail.

Your feet are your only vehicles out there, they will take you to some of the most amazing places in the world and the best experiences of your life. Treat them accordingly.

Thanks for the question Heather! As you know, I love talking about this, so keep the questions coming! If anyone else has a question or comment, you can use the links at the top right of this page to contact me.

Read more about foot care for backpackers in my interview with the president of the American Association of Podiatric Sports Medicine, Paul Langer: http://ryangrayson.blogspot.com.es/2014/03/footcare-for-backpackers-part-1.html


Creative Commons License
A Backpacker's Life List by Ryan Grayson is licensed under a Creative Commons Attribution-NonCommercial-NoDerivs 3.0 Unported License.   

Photo: Grinnell Lake

Grinnell Lake, Glacier National Park

I took these photos in 2012 in Glacier National Park.

THE STORY BEHIND THE PHOTO...

In the heart of Glacier National Park, beyond the waterfall and over the ridge, is Grinnell Glacier. While slowly migrating and freezing and thawing, it grinds against the rock and generates silt-sized particles called glacial flour. As the glacier melts, this glacial flour gets suspended in the water then flows over the falls and into Grinnell Lake, turning what would have been an ordinary mountain lake into this turquoise gem tucked away in the mountains.


Homesickness

(Photo: Red heading to a shelter beyond the cave)
“Hey Red, do you remember that day on the Long Trail when we hiked into Brandon, Vermont?” Red had called to talk about backpacking again, a kind of weekly therapy for being back in the real world. “I was thinking about that today. We woke up freezing and then it rained on us all day.”

“It rained almost every day on that trip,” he said.

“True, that rain was relentless. I don't think we had two days in a row without rain on that trip," I said. "We hiked seventeen miles of muddy trail to the road then decided to hitch to the McDonald's in Brandon, so we could be warm and dry for a change.”

“Except, nobody picked us up,” he said.

“Yeah, so we ended up road-walking nine more miles to town," I said. "And then by the time we got to the McDonald’s they were just about ready to close. There wasn't even enough time to get dry before we were forced back outside to walk up and down the road to find a place to sleep. On the outskirts of town, we saw a strip of trees cut out of a hillside for a row of power lines, so we climbed up there to setup camp."

“Yeah, I remember that," he said.

"That was kind of a shitty day," I said.

"It was kind of shitty wasn't it,” he said, but I could hear his smile.

“I'm mentioning it because when I thought about it today, I got very nostalgic. I miss it," I said. "Even the shitty days, I miss."

"So, as sort of an experiment, I thought about some really great days before backpacking. Memories of childhood, of trips, of friends. Memories of laughing so hard that the room goes silent because nobody can catch their breath. You know those laughs?” I said. “By every measurement, they were great days. But they didn't give me the same feeling. I guess I’d call the feeling homesickness, but I've never actually felt homesick before.”

“So you’re saying the worst day on the trail is better than the best day off the trail?” he said, summing it up much more succinctly.

“Exactly, but it's more than that," I said. "I even feel nostalgic for that night we slept on the front porch of that restaurant in Manchester Center to get out of the pouring rain. You were like, 'Hey, the sign says they don’t open for breakfast! I guarantee nobody will come in before 10!'”

"Yeah," he laughed, "And they didn't, did they?"

“No, but that was a shitty night too. I felt weird about unpacking my gear and getting into my sleeping bag, because I wanted to be able to make a run for it if I had to. God, I froze my ass off that night,” I said. “I think I got about two hours of sleep.”

"Nah, we were fine," he said. "If anybody saw us, they would have just told us to leave."

"Yeah, my attitude about that changed eventually," I said. "By the time we slept on that Big Lots loading dock in Morrisville, I wasn't too worried about getting caught. Actually, I slept like a baby that night."

(Photo: The Canadian/Vermont Border)
And on the conversation went for hours. It became instantly clear that Red was suffering from the same sort of homesickness. The phone calls became more frequent and soon the conversations went from reminiscing about past hikes to planning the next.

As of today, that plan is to leave in March of 2014. Actually, for the first month, we deliberately have no plan other than to slowly hitch our way to Campo, California, a small town on the Mexican border. From there, we'll hike north along the Pacific Crest Trail through the Mojave Desert then over the crest of the Sierra Nevada and Cascade Mountain Ranges. Five months and 2,663 miles later, we’ll cross over the Canadian border.

In the meantime, I'm working two jobs seven days a week to save money. The PCT is fully funded, but I have other big trips in mind after that, so I'll continue to work as much as possible to make those happen as well.

People have asked me how I'm able to afford to take so much time off of work to backpack. "Are you a self-made millionaire or something?" someone asked. That made me laugh. Even if every dime I've ever spent were returned to me, I still wouldn't be a millionaire. I don’t think it really occurs to most people how little money you actually need to live on the trails.

What could you afford to do if you had no mortgage, no student loans, and no credit card debt? Where could you afford to go if you had zero appetite for the latest gadgets, or newer cars, or expensive clothes? What if you had no rent, no electric bill, no furnace that needs replacing? No car payment, auto insurance, or vehicle maintenance or upkeep. What if you had no desire for a bigger TV or a more deluxe cable package? What if you had no need to contribute to a vacation fund and no reason to retire?

You might be able to spend most of your life doing what you love instead of just working toward retirement. What would I do with my retirement anyway? Do like the retired men I met on trails, who waited until retirement to go backpacking?

Creative Commons License
A Backpacker's Life List by Ryan Grayson is licensed under a Creative Commons Attribution-NonCommercial-NoDerivs 3.0 Unported License.   

Photo: Splake and the Presidential Range


I took this photo in 2011 in New Hampshire's White Mountains.

THE STORY BEHIND THE PHOTO...

In the Presidential Range of New Hampshire's White Mountains, we stopped to savor this view. Actually, we didn't stop for the view as much as the view stopped us.

If it were exactly two months before, you would have found me at a desk staring at a computer screen. The cubicle walls surrounding me had been replaced by mountain views. Views that forced me to wonder why I wasted so much of my life slaving away. I guess it just seemed like the responsible thing to do at the time. I realize now how decidedly irresponsible that was.

My phone beeped in my pocket. At this elevation, it managed to find a strong enough signal to receive a text from a friend back in the real world.

"Ahh, why can't it be Saturday?" the message said.

I replied back, "It isn't Saturday? Funny, it definitely feels like Saturday."
  
  
Creative Commons License
A Backpacker's Life List by Ryan Grayson is licensed under a Creative Commons Attribution-NonCommercial-NoDerivs 3.0 Unported License.   

Photo: Kayaking at Salamonie


I took this photo in 2009 at Salamonie Lake in North Central Indiana. You can order prints in my Etsy store. Use coupon code 5OFF2013 and receive $5 off any purchase of $15 or more.

THE STORY BEHIND THE PHOTO...

I set an alarm so I’d wake up a couple hours before sunrise. Between the silhouettes of trees, the lake’s black surface sparkled under a starry sky. I switched on a lantern and rolled out of my hammock. 

At the edge of my campsite was an eroding hillside that sloped into the lake. Barefooted and with a lantern held out in front of me, I climbed down the crumbling dirt to the water’s edge. My kayak bobbed slowly on the waves, bumping into the fallen tree trunk where I had it secured with rope. 

Years before it became the primary focus in my life, this was one way I satisfied my need for adventure, short camping trips fifteen miles from home. 

I climbed into my kayak, scooted away from the shore, and paddled toward an island in the middle of the lake. When I was close enough, I fastened the paddle to the top of the boat and slid forward into the hull, so I could lie on my back for a better angle on the stars. 

I couldn't help but doze in and out of sleep. For a time, the only sound was water lapping against the boat. Then the sun came. 

This moment was the main reason I was on the water so early. A few weeks before, I drove out to the lake at three in the morning to paddle around in the dark. Moments before daybreak, I heard a lot of commotion coming from a small island, so I paddled closer. It seemed every bird in the county decided to rendezvous here that morning. Soon there was so much chirping from so many species of birds that it ceased to sound like chirping, like when a clap becomes an applause.

I’m not sure why they all flocked to this place, but it wasn't only birds. After the sun peaked over the horizon, two river otters surfaced only a few feet from my kayak. One swam straight toward me so fast I thought he might try to leap into my boat to either lick my face or rip it off. I had zero river otter experience, was this aggression, curiosity, or playfulness? I was so excited to take their photo that I momentarily forgot how to operate my camera. I snapped a couple shots of unidentifiable brown blurs then they were gone. I did manage to gain my composure enough to take this photo, which I like well enough, but I'd love to see a river otter in the shot. 

After the sun was fully above the horizon, the birds quieted down, but I saw two deer on a peninsula jutting out into the lake, so I paddled closer. While one grazed the other suddenly ran toward the water and leaped in with a big splash. It swam like a Golden Retriever toward Monument Island, a nature preserve in the middle of the lake. I paddled as fast as I could to coast along beside her, but my presence scared her off course. I wasn't sure how long deer could swim and I wasn't prepared to save a kicking and drowning deer with my kayak, so I backed off then paddled to her other side to steer her back toward the island. 

Then I saw another brown mammal swimming along the shore. I paddle toward it quickly hoping to have another chance to get my river otter picture. It was a beaver. I took a few unimpressive pictures. Soon the surge in wildlife withdrew and the lake would go back to its normal self. Full of motor boats and skiers, fisherman and loud radios blaring from pontoons. But I felt like I learned one of the lake's great secrets. And so, like the crowd of birds who packed themselves together on every available branch on that little island; I came back to this place at this same time every chance I got.
  
  
Creative Commons License
A Backpacker's Life List by Ryan Grayson is licensed under a Creative Commons Attribution-NonCommercial-NoDerivs 3.0 Unported License.   

Photo: Bee at Devil's Tower


THE STORY BEHIND THE PHOTO...

I hiked all day around Devil's Tower National Monument, in Wyoming, to find a better angle to take its picture. I took dozens of photos, but didn't love any of them. I decided I needed to be by the river, which required climbing a fence and trespassing. Many prairie dog heads popped out of the ground to keep a close watch on me. After a few photos, I still wasn't in love with any. Then this bee started flying around me, so I increased the aperture, sped up the shutter speed and took its picture instead. The bee is still a bit blurry, but I like it anyway.
  
Creative Commons License
A Backpacker's Life List by Ryan Grayson is licensed under a Creative Commons Attribution-NonCommercial-NoDerivs 3.0 Unported License.   

Photography: The Rocks at Ryan Mountain


I took this photo in March 2012 in Joshua Tree National park. You can support my blog by ordering prints of this or other photos in my Etsy store. Use coupon code 5OFF2013 and receive $5 off any purchase of $15 or more.

THE STORY BEHIND THE PHOTO...

After we climbed about halfway up Ryan Mountain in Joshua Tree National Park, my friend Liv pointed down to this huge rock and said, "I'm going to climb on top of that when we get down."

While traveling across the country from national park to national park, it amazed me the places she would climb without the safety of ropes and harnesses. Sometimes I would hear strangers whispering things like, "look at that girl over there, she's crazy," or "you'll never see me doing that."

After leaving the Ryan Mountain summit, she beat me to the bottom, but I couldn't find her anywhere. I waited by the car for a little while then walked around to look for her. I started to wonder if she took a wrong turn. Then I heard a familiar whistle.

Liv and I met on the Appalachian Trail. When we couldn't find each other, we'd whistle back and forth until we honed in on each other's location. So, I whistled back. She whistled again. It was coming from the top of this giant rock. Suddenly, I remembered her saying she said she was going to climb on top of it. I looked up and there she was. She's a woman of her word.   
  
Creative Commons License
A Backpacker's Life List by Ryan Grayson is licensed under a Creative Commons Attribution-NonCommercial-NoDerivs 3.0 Unported License.