Re-post of My Journal From Isle Royale, Part 2

Ride on the Isle Royale Queen IV
Click here for part one

The next morning my two alarm clocks annoyed me as instructed at precisely 6:30. After hitting snooze on both, followed by nine more minutes of blissful sleep, I rolled out of bed squinting and stumbled into the hot pink shower. I was soon clean and ready to go.

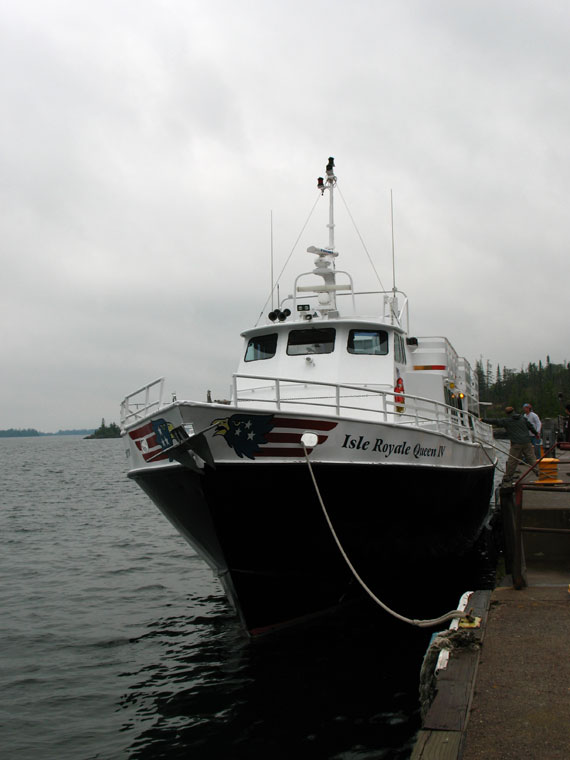
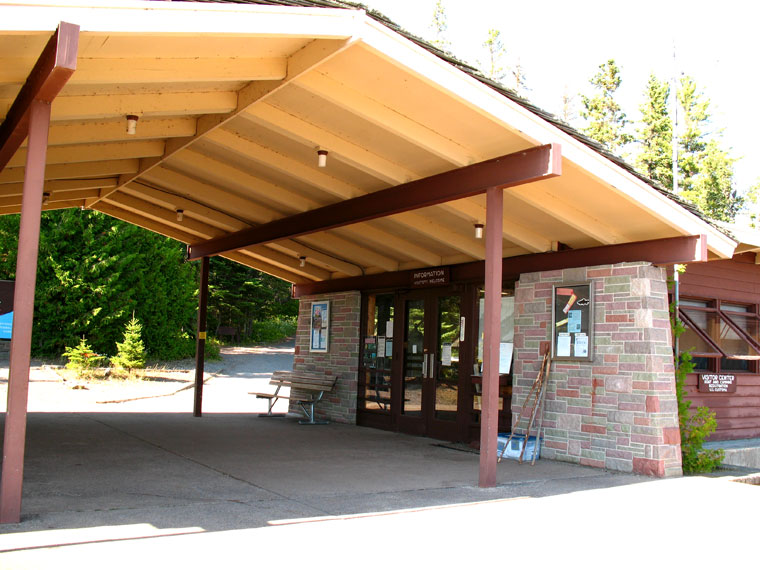
When I arrived, there were a dozen people already waiting under an awning, shielding them from the morning rain. I got my ticket and loaded my pack onto the boat. As I waited under the awning myself, I checked out the other backpacker's gear, eavesdropped on stories about their previous trips to the island, and watched the workers load several kayaks onto the ship.

Once allowed to board I sat by the window at a table with four comfy blue seats. I knew the boat would be close to full and wouldn’t be able to keep my own table. I was ok with that, since most people were backpackers, I figured I’d get to meet someone that had common interests. Instead, however, a couple of about 18-20 years old asked if they could have the seats across from me. The girl painted in make-up seemed more interested in how she looked than the other rough looking backpackers on the boat. Her boyfriend constantly yawned and rubbed his eyes. We didn’t exchange a word after “mind if we join you” and they soon fell asleep.

The boat was a couple minutes from leaving. What is this diamond shaped thing in my pocket I wondered, a keychain? My goldfish memory eventually kicked in and I realized I had forgotten to drop the key off at the motel front desk. I told a girl who worked on the boat the situation, pointed to the motel, and asked how much time I had.

“Hah, none.” she said. “But if you hurry you can make it.” The engines started to rev up. The thirty seconds to drop it off and get back turned out to be a blessing in disguise. I could now scurry past my sleepy shipmates unobserved and onto the stern’s deck outside, where I would spend most of the 3 ½-hour trip.

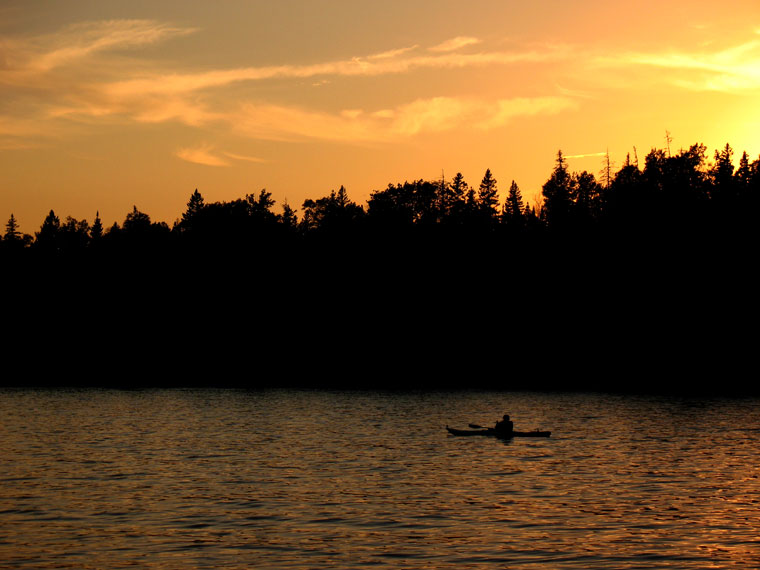
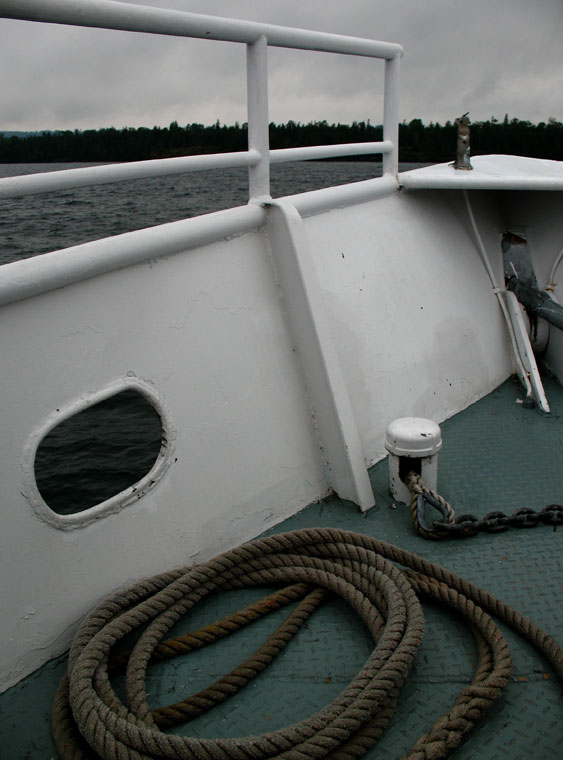
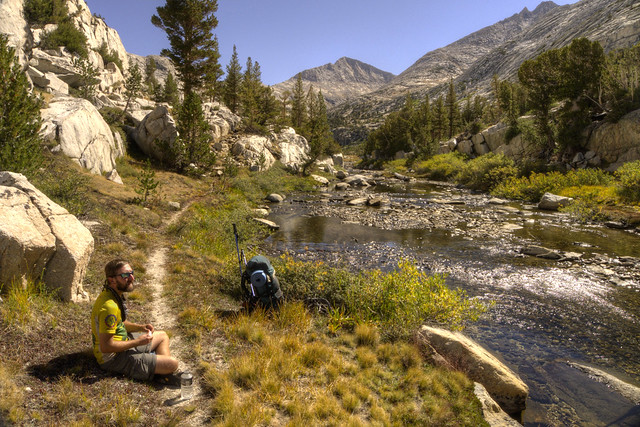
I leaned against the railing looking out over the side. Michigan disappeared. The horizon and Lake Superior was all I could see in any direction. It was cold. Every so often a chilly mist sprayed from windblown white-capped waves. I staggered to the snack bar, trying to walk on a surface that rolled and swayed, and bought a cup of hot cranberry apple cider to warm up. I moved onto the bow of the ship I stared at the horizon waiting for an island to emerge.

The voice of the captain occasionally bellowed out of a speaker to tell us some information about Isle Royale. He tells us this year is the 50th anniversary of a moose/wolf study on the island. The populations of moose and wolves fluctuate like a teeter totter. As the predator wolf population goes up, the moose prey population goes down. With the food source low, the wolf population goes down until the moose population is back up, then repeats indefinitely. That is a simplification but you get the idea.

He says there are 23 wolves in four packs and 650 moose on the island; a low number for Isle Royale but still almost ensures I’d see one. I’m not sure why I like this animal, but I think it just conjures up images of the Alaskan wilderness and boreal forests that I love so much.

He tells us the story of a moose that ventured into a campsite, which drew the attention of excited backpackers. Wolves came into the camp and attacked it. The moose tried to flee by jumping in the lake, but drowned. The wolves pulled the body back into camp to began devouring it in front of, I assume, horrified, disgusted, or fascinated backpackers.

Since it was disturbing people, and the wolves would be feasting there for a while, they evacuated the area. A week later, the pack finally finished their meal and, umm, lived happily ever after?

I looked around at the other passengers and confirmed that they had similar, “what the hell?” looks on their faces that I had. I’m not sure of his point to the story, but he seemed to enjoy telling it. I’ve read several times that wolves are not a threat to humans. After his story, I started to question my sources.

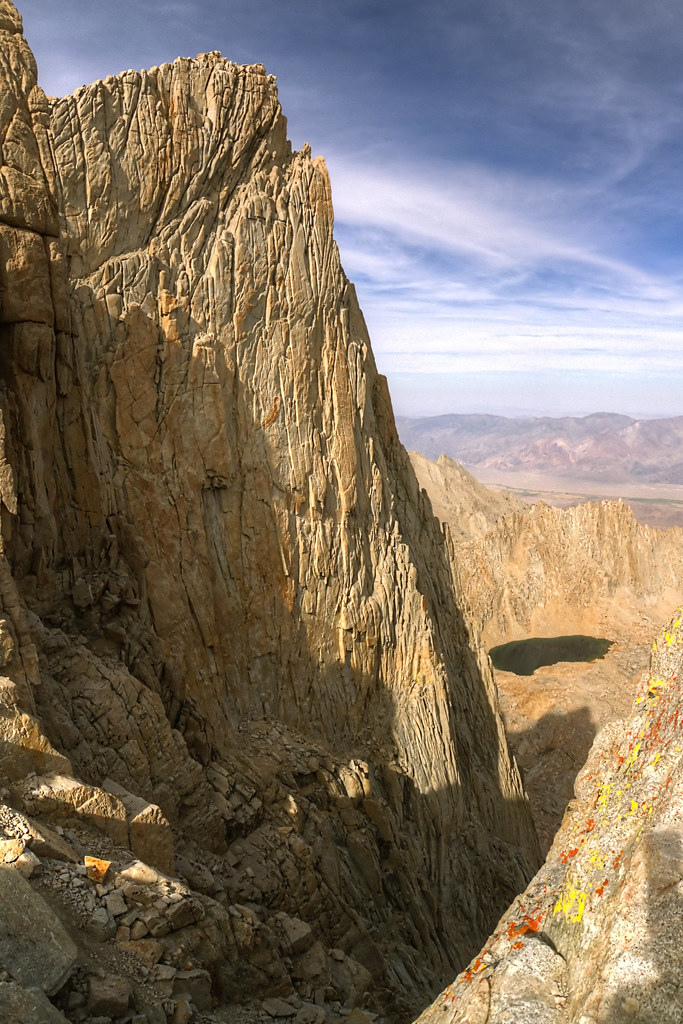
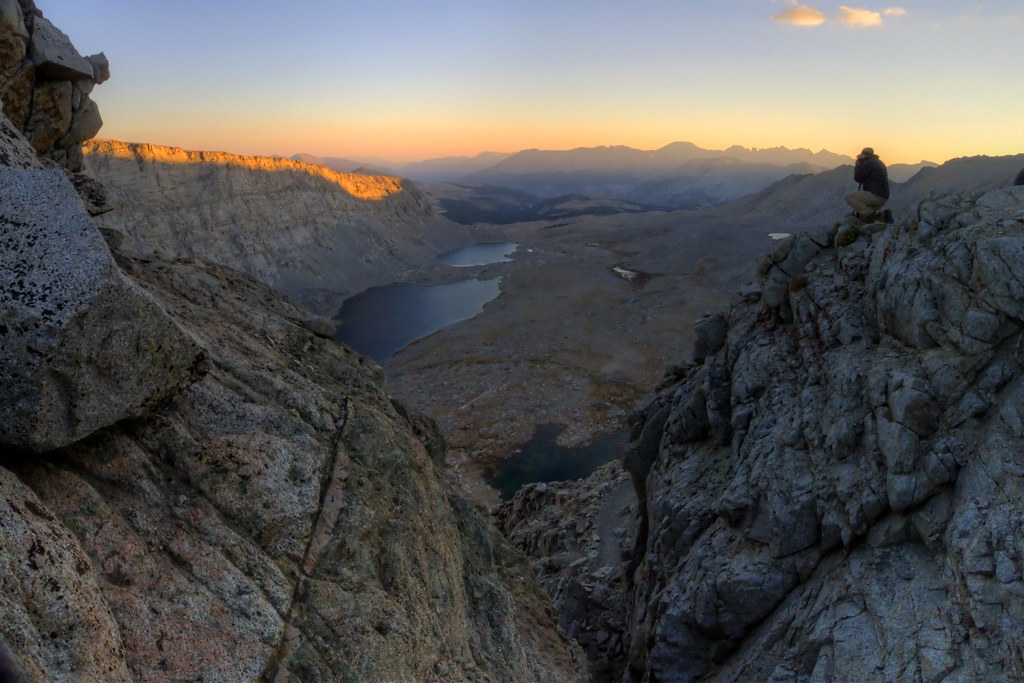
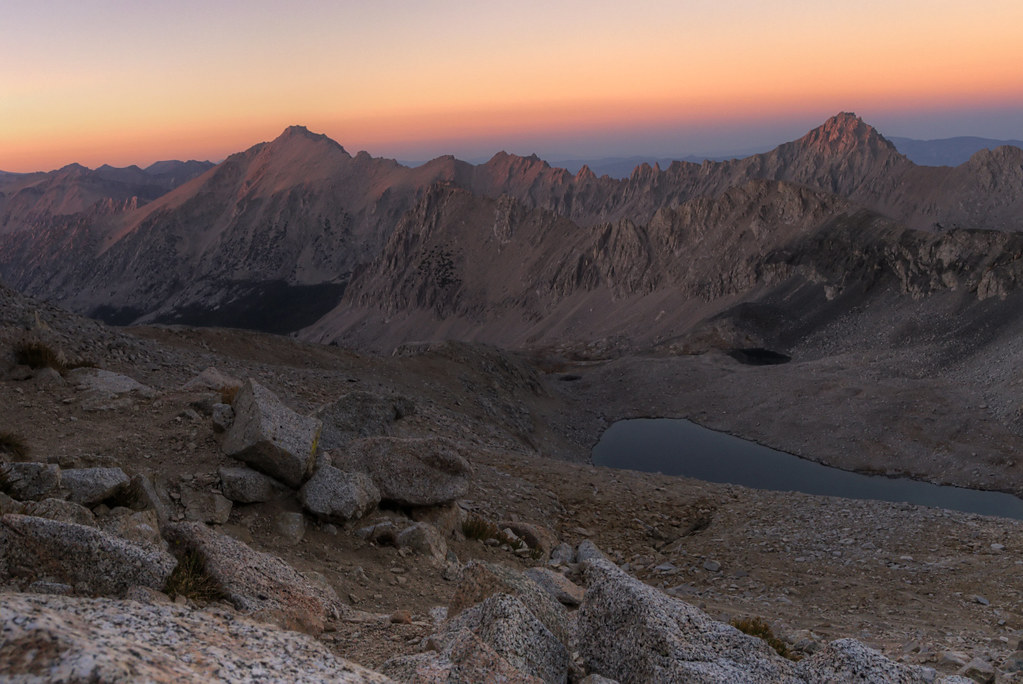
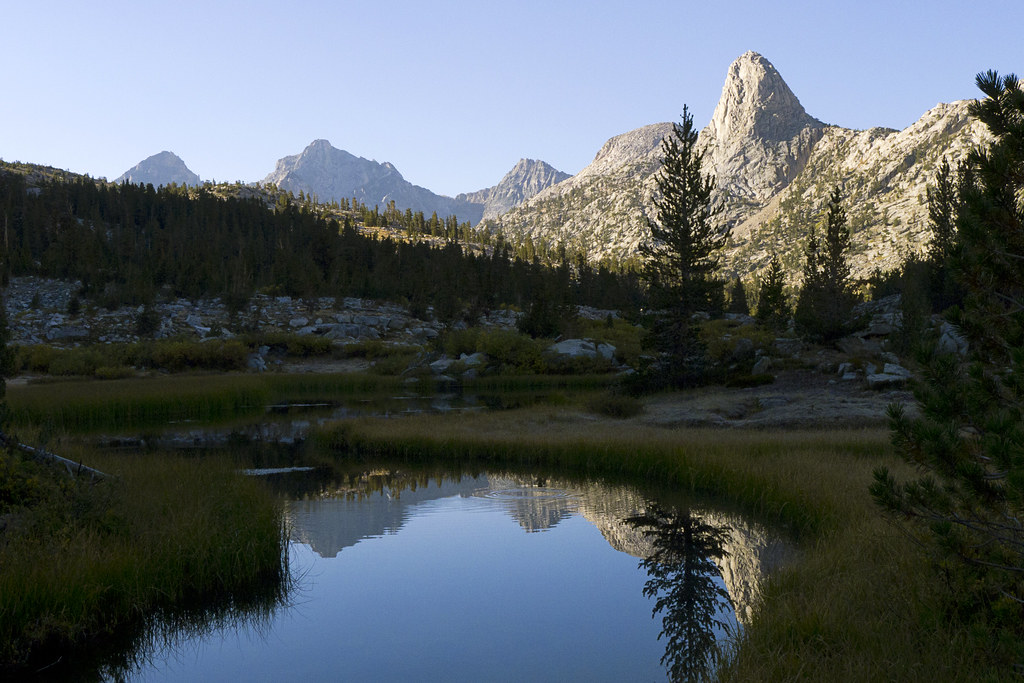
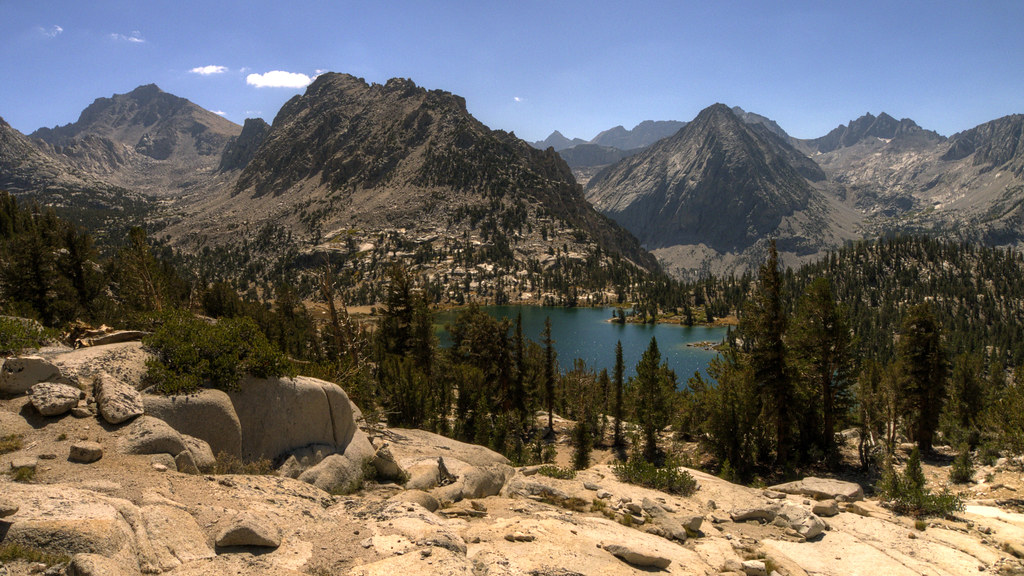
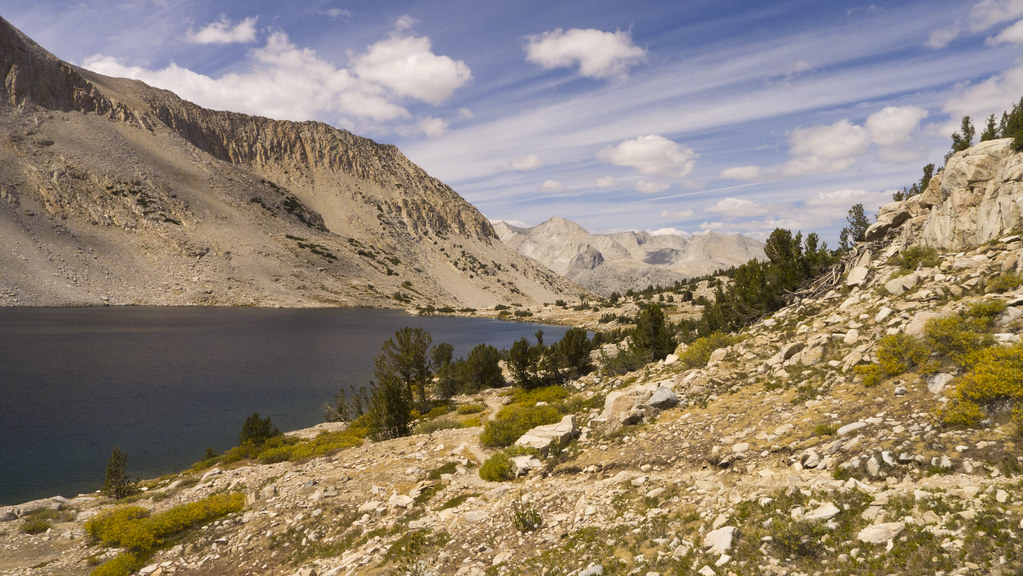
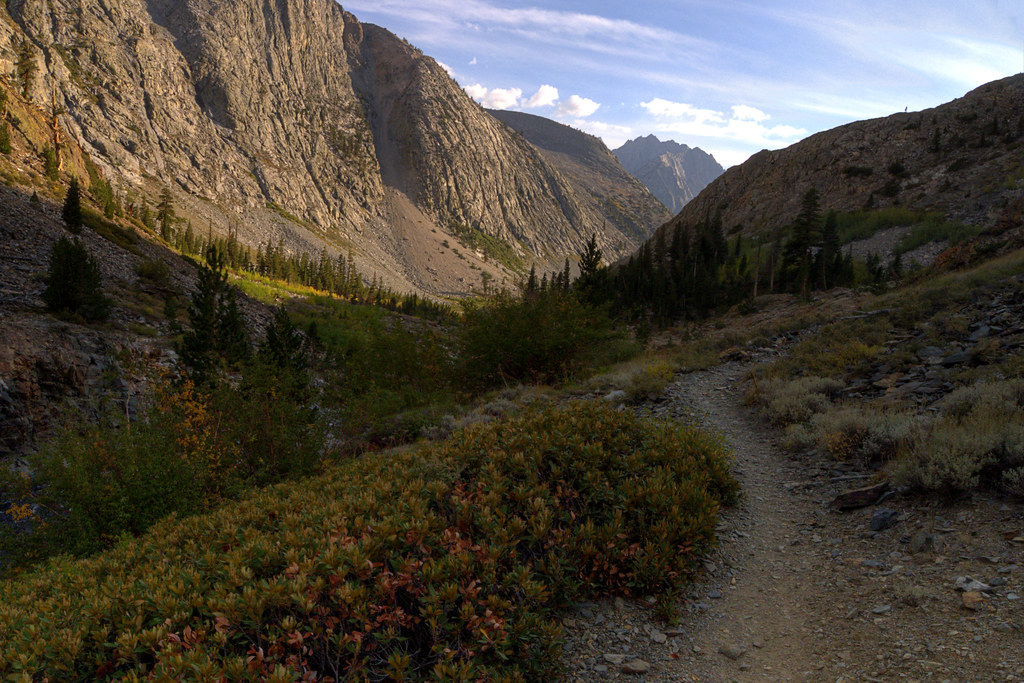
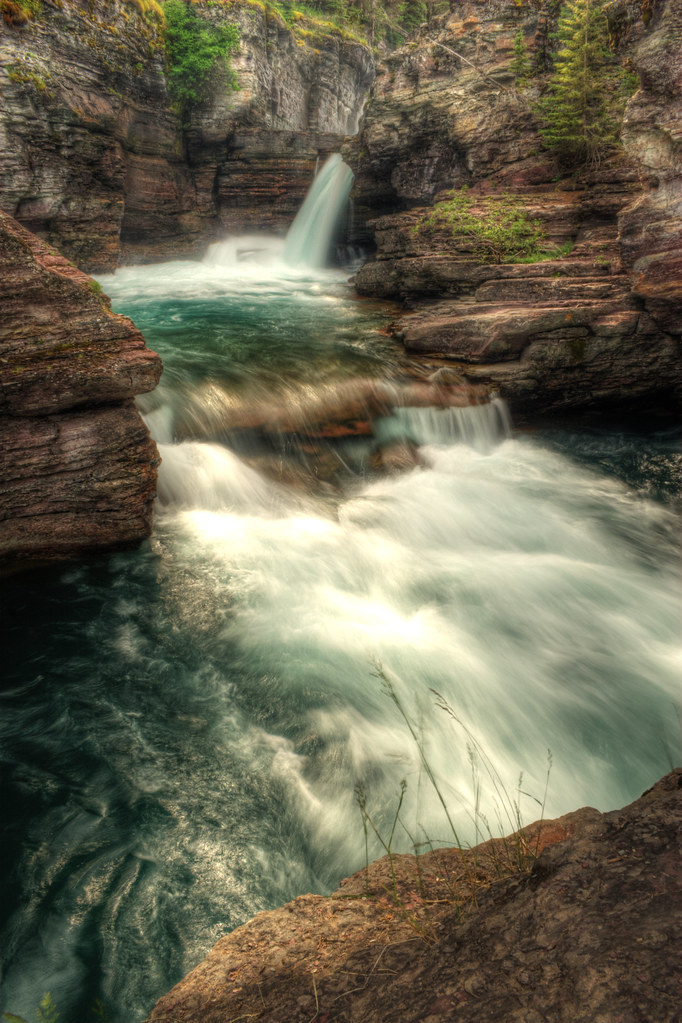
Finally, Isle Royale appeared in the distance. Waves crashed on its rocky shore painted with bright orange lichens. The forest looks like those you expect to see north of the Canadian border, with conifers like white spruce and balsam fir and younger deciduous trees like birch and aspen. There is a good reason for this. Isle Royale is just barely at the southern tip of the Boreal forest, rarely seen in the lower 48, which covers millions of acres in Alaska and Canada.

There was a quick orientation and registration with Ranger Marcia before heading into the wilderness. I could tell she had a love affair with this place. I imagined that she would occasionally head off into the woods alone, during off-hours, and eat edible plants and berries along the trails. I pictured her finding a rock to sit on, with a good view, while writing poetry about how she feels connected to nature, complete with metaphors that give the island human-like traits. She was my kind of person.

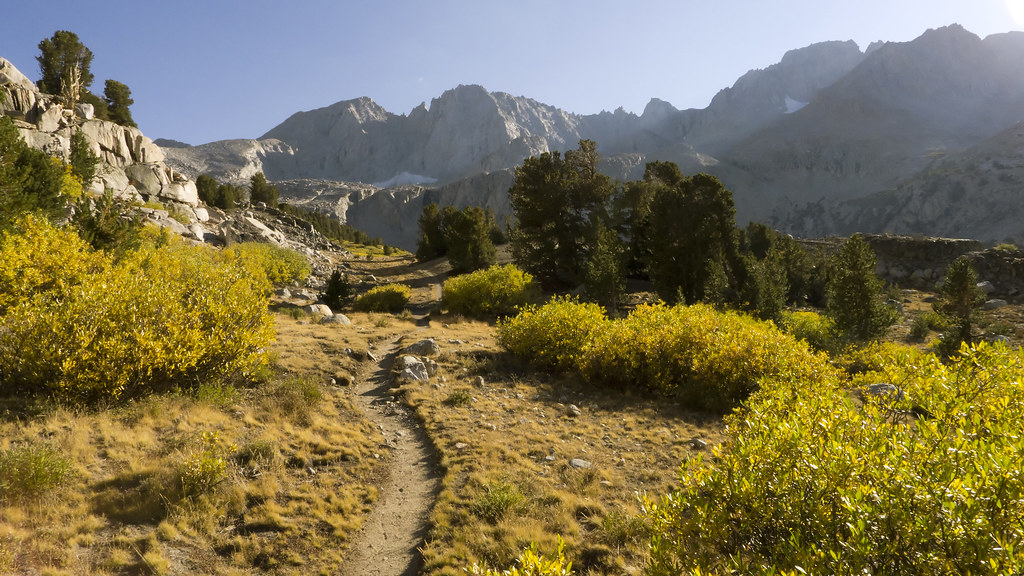
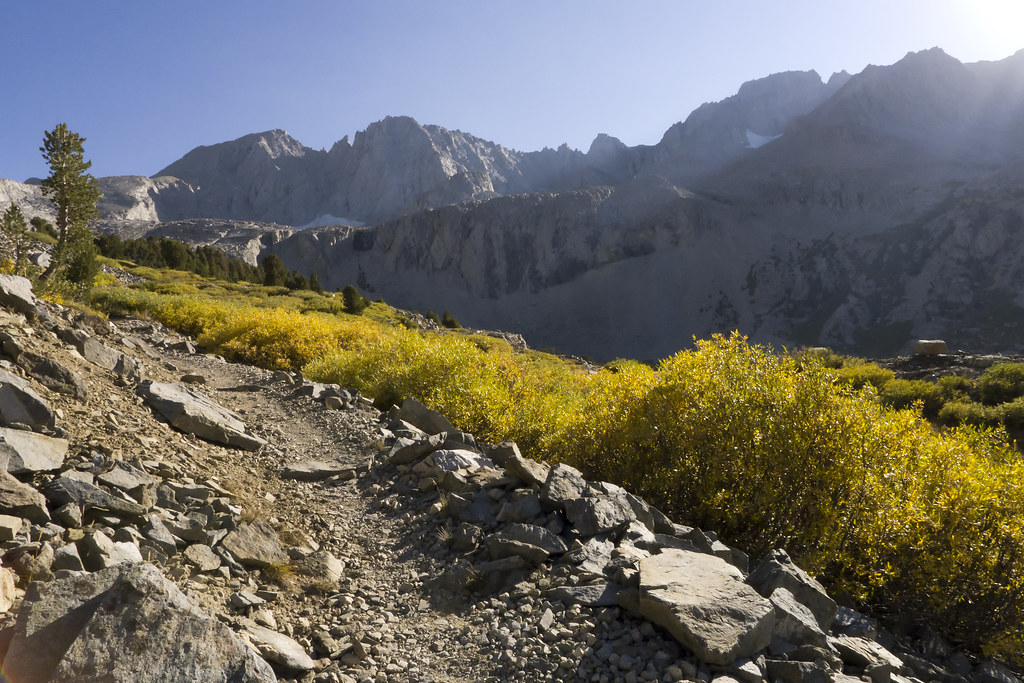
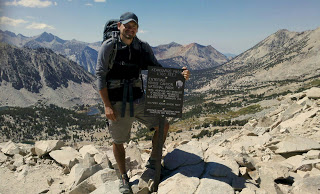
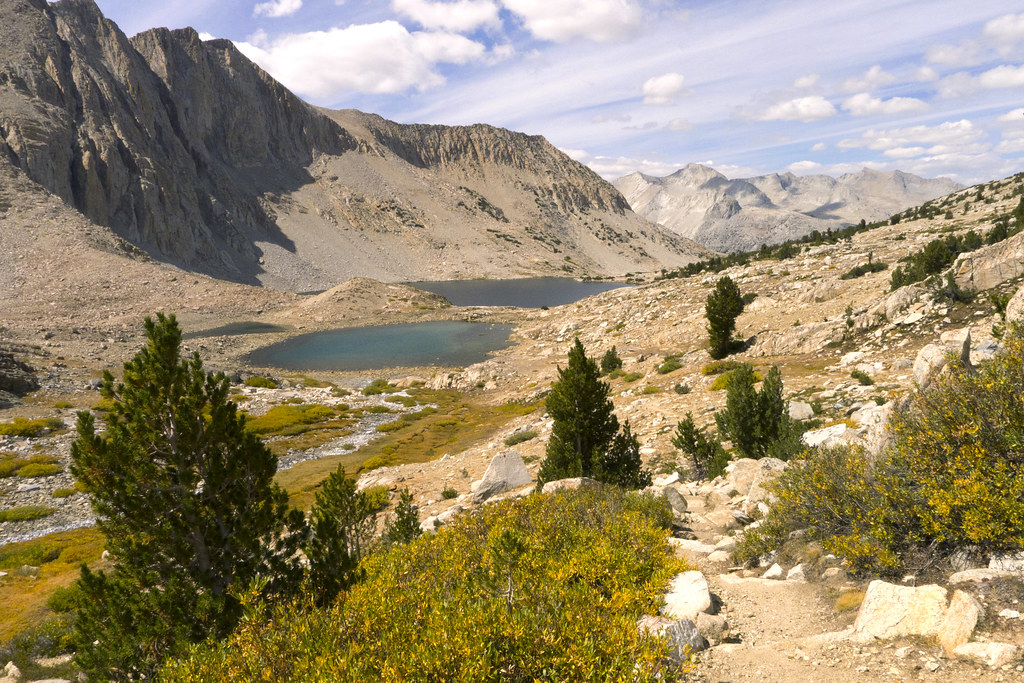
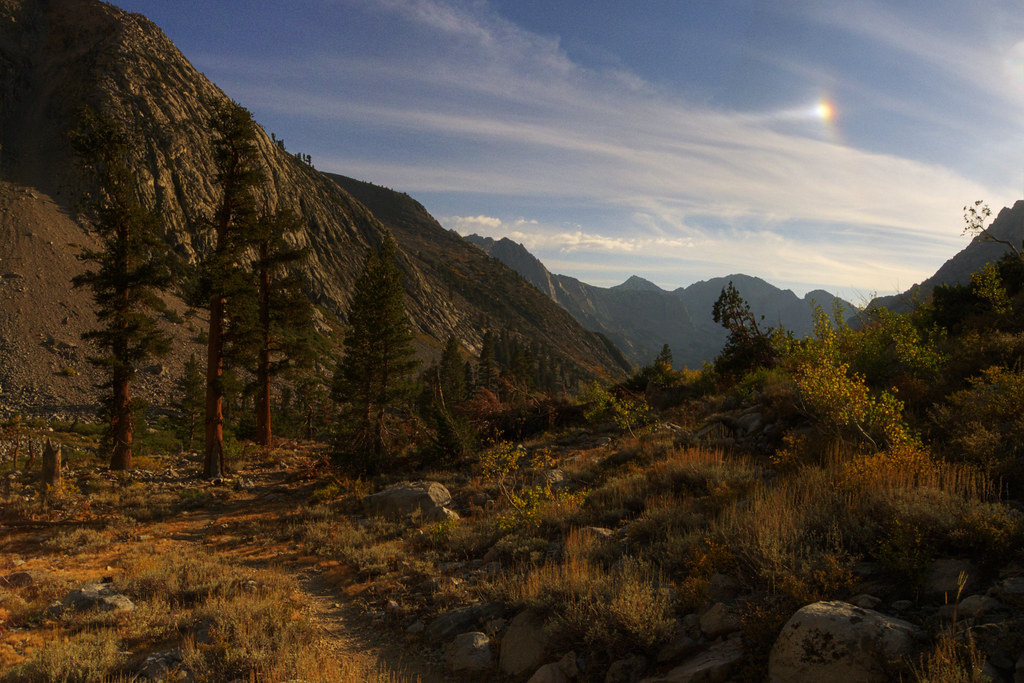
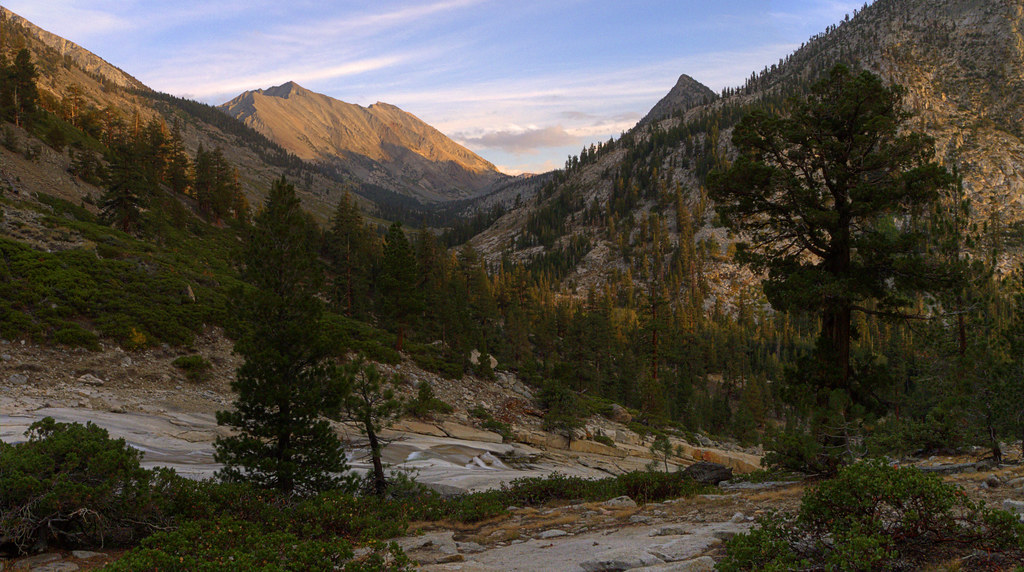
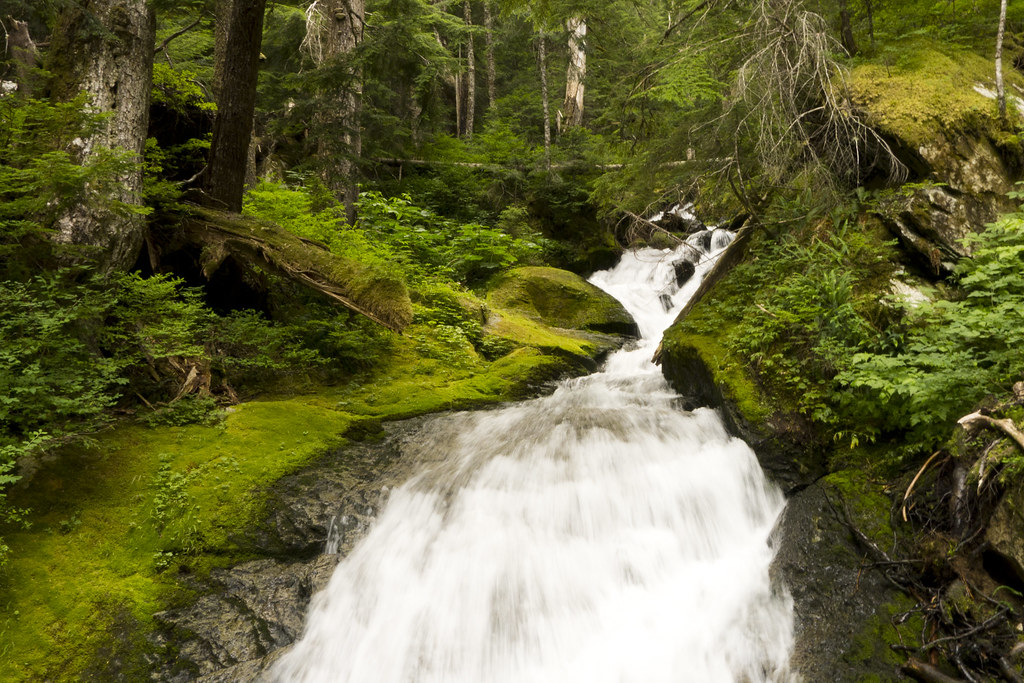
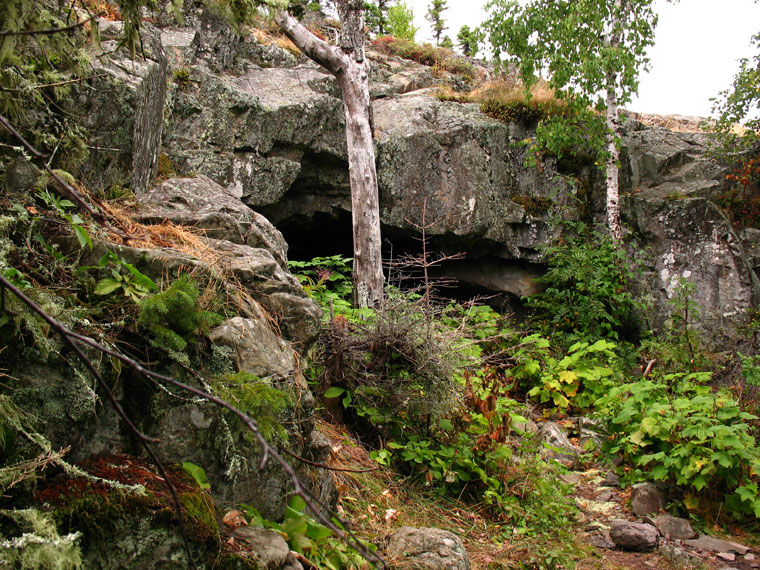
I decide to head to Daisy Farm campground just over seven miles away. My first impression of the trail running along the shore was that it seemed meticulously landscaped. The placement of large and small-leafed plants, moss covered boulders and bedrock, wide assortments of wildflowers, edible thimbleberries right at arm’s reach, were all under a canopy of trees that flowed with the trail just as it should with nothing out of place. This was especially noticeable in places I decided to stop for short breaks, like at Suzy’s Cave, and along Lake Superior’s rocky shoreline.

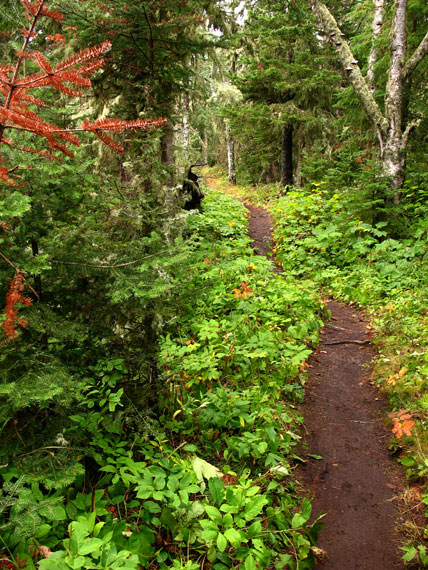
I picked several thimbleberries along the trail. I got somewhat addicted to them. They look like raspberries and the taste reminds me of buttery pomegranate. They get their name from the shape, but to me, they looked more like little red berets on the ends of my fingers than thimbles. I put them on my fingertips like when we’d put those pointy Bugles snacks on our fingertips as kids. We’d pretend they were witches nails, and walk around with our hands up near our face, fingers curling, cackling, and saying things like “I’ll get you, my pretty, and your little dog too.” 

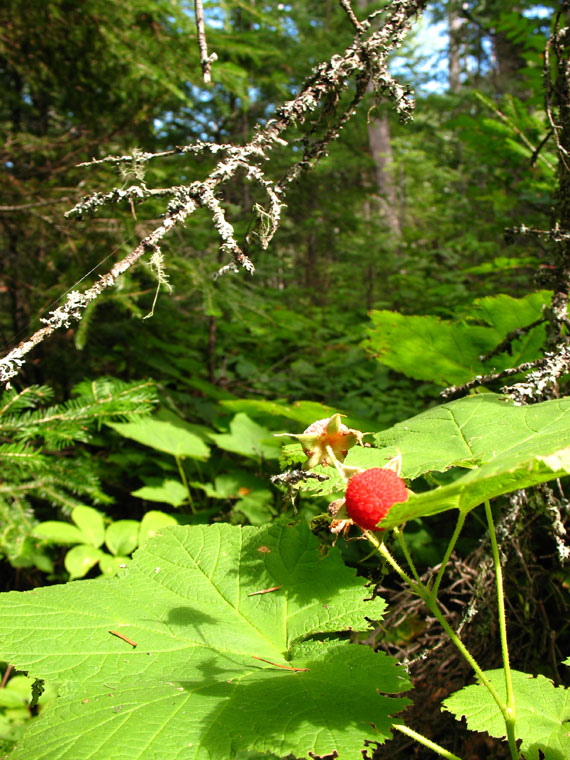
Once my index finger had on a red beret, suddenly I imagined it had a French accent (I really didn’t have a choice, it just happened.) Beret-Wearing Index Finger didn’t care much for vile, despicable, American scum. Beret-Wearing Thumb tried to do a ‘Rerun from What’s Happening’ impersonation but all he knew to say was “Hey, Hey, Hey!” although I had my doubts that that was Rerun’s catchphrase on the show, but I kept my comments to myself. Beret-Wearing Pinky just incoherently yelled things like” Viva La Revolucion!”, in a high-pitched and futile attempt to sound threatening, but nobody paid attention to the pinky. They never do. That just fuels his desire for revolution. I ate so many thimbleberries that my fingertips were dyed red, the sign of true addict. This dialogue only took place in my head. Does that make it less odd?

Nearing Daisy Farm, hiking up a slight incline, I encountered a nonchalant red fox standing in the middle of the trail. He stood staring at me. I quickly got out my camera to take pictures. Not concerned in any way, he just sat down on the ground looking around in different directions, almost as if he was posing. After eight or more photos, he remained unmoved. After finally putting my camera away, he looked as if it might say, “Okay, now that I have your attention, please answer me these riddles three and you shall pass.”

As another noisy group started to approach behind me, he strolled away from the trail slowly and out of sight.

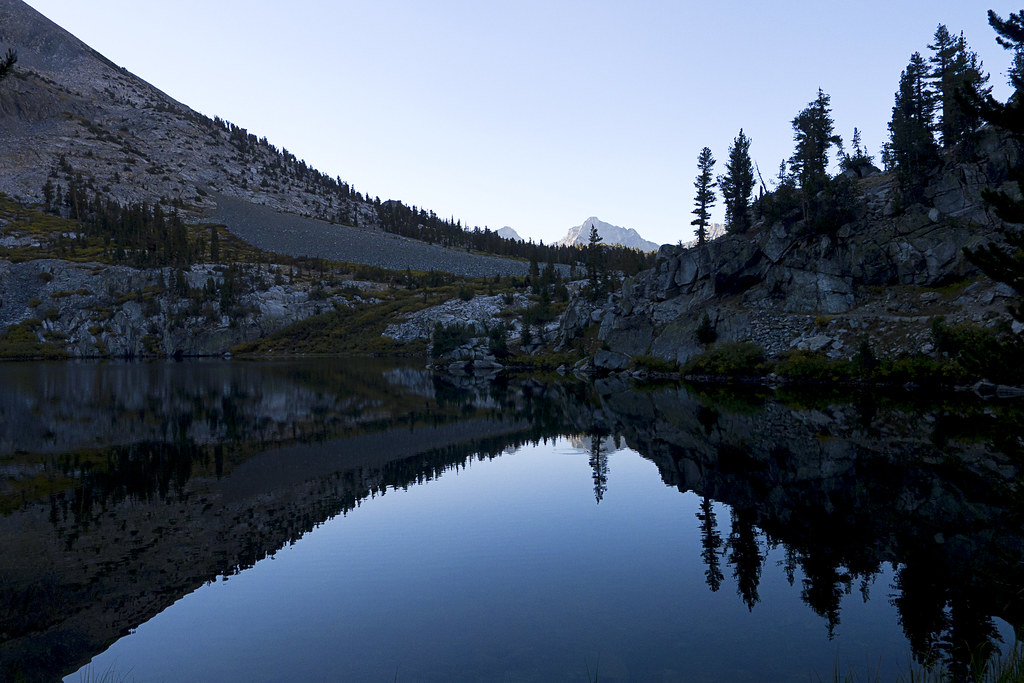
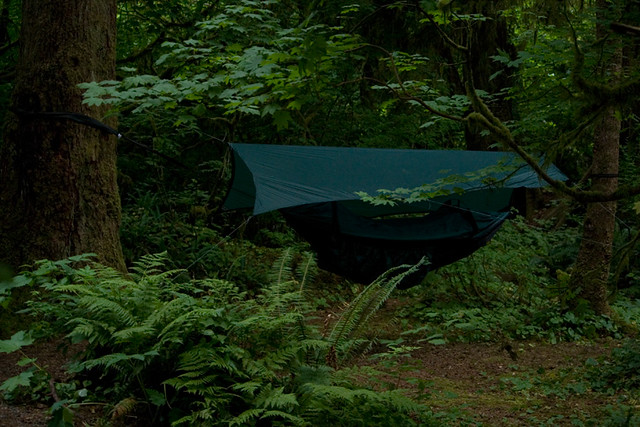
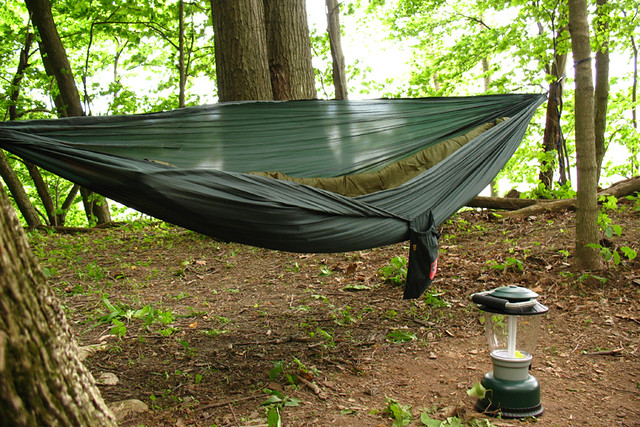
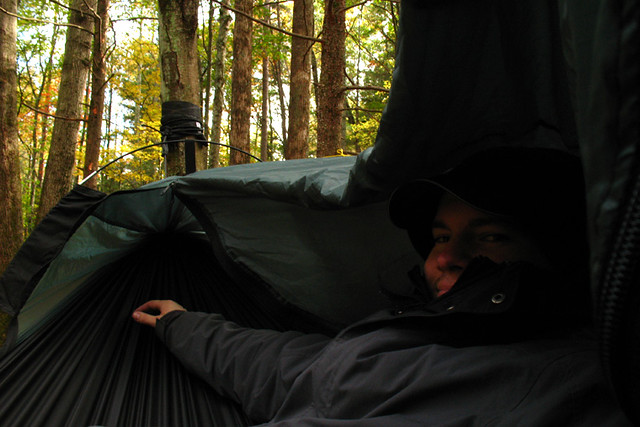
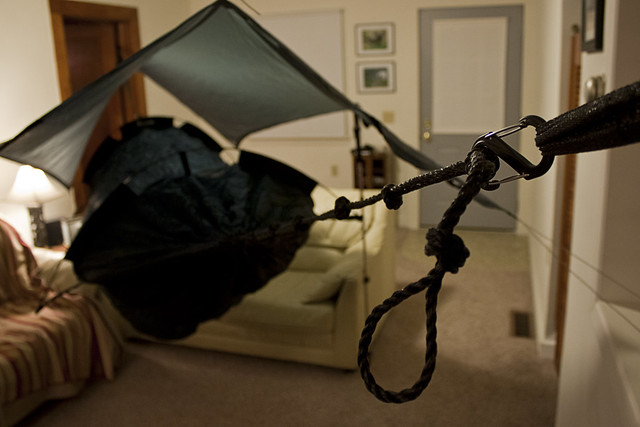
I arrived at Daisy Farm and found only one site unoccupied. I was lucky, since the next site was four miles away. I unpacked, ate a quick meal (including some thimbleberries that were growing nearby), and relax in my hammock under spruce needles and birch leaves.

Even with the crowded campground, the sounds of screen doors from shelters and pit toilets tapping shut, and the sound of mumbling and laughter, it was a peaceful night. The young couple from the boat walked by three times, searching for an open spot. I thought I would once again hear him say, “Mind if we join you?” Luckily, I did not.

Creative Commons License
A Backpacker's Life List by Ryan Grayson is licensed under a Creative Commons Attribution-NonCommercial-NoDerivs 3.0 Unported License.   

Follow Your Bliss

Have you ever heard the phrase, “Follow your bliss”? If you’re not sure which direction to take your life, simply “follow your bliss.” The more I thought about it, the more it felt like another idealistic platitude. 

Then I went backpacking. 

I’ve been re-reading old journals from my first backpacking trips, before the Appalachian Trail, before leaving everything behind... other than what I could carry on my back, of course. It's nice to have a record of how I felt. How those first emotions on the trail would one day lead me to where I am now. 

Mt. Franklin at Isle Royale
Before those trips, I didn’t even know what “bliss” meant. Don’t get me wrong, I could have given you a definition and used it in a sentence, but my description would have been as lifeless as a sentence in Webster’s. Now bliss has a feeling. It’s not some meaningless abstraction. I understand it with all five of my senses. 

Nevertheless, with this recently acquired and frequently profound understanding, I can no longer tell you in words what "bliss" means. 

One thing I can do is repost some of those old journals, which some of you have already read, but since I’m not hiking right now, and since I have new Kindle subscribers (who I want to get more value for their money), I’m going to post a few reruns. I'll continue to write about gear, but today I am going to start reposting my journal from Isle Royale National Park, which was the first time I got it into my head that “following my bliss” meant living the life I live today.

- - -

My journal from Isle Royale, September 2008


Part One: A Long Drive North

Sometimes I reach up to feel the edge of my glasses to see if they're still on my face. On my drive home from work, I’m occasionally surprised to see that final turn without realizing I've already passed all the familiar landmarks. I know I am wearing underwear but I can’t feel it. My brain signals my consciousness only when there is a change; the repetitive is consistently blocked out.

There is an evolutionary advantage to disregarding the ordinary. It allows us to focus and react quickly to a dangerous or advantageous situation; but the shortcoming is that much of life is repetitive and thus ignored as insignificant. The result is realizing one day I’m 30 and can’t remember where all the time has gone.

I can’t smell myself either, but I've been on a trail for a couple days as I write this, so I’m sure I stink.

One night, while my brain was trying to block out the repetitive chore of folding laundry, I stared at a mound of socks on my bed rolled into balls. Each ball of socks represented a day in my life. Looking at them piled together, I felt like someone with amnesia seeing unfamiliar photographs of themselves with smiling strangers. What did I do with all of these days? Where was I? It seemed like I just did laundry. I was troubled by the number of days now piled up on my bed.

The speed at which this particular year is traveling by is quite alarming. This is the reason I started a life list. The only way I know how to apply the brakes is to do something different, always be thinking of the next adventure, and strive to live in the moment.

Quieting the mind and living in the present is not always an easy task; I pretty much fail at daily actually. I find that it is effortless, however, when I’m alone in nature… and there is no better place for solitude in a pristine natural world than the island of Isle Royale, number 75 on my life list.

Isle Royale National Park is a series of islands tucked away in Lake Superior about 15 miles off the shores of Minnesota and Ontario, although technically part of Michigan. This archipelago encompasses over 400 islands. All of which dwarf the main 45 by 9 mile island, Isle Royale, with 165 miles of trails.

Our more frequented national parks like the Grand Canyon and Yellowstone will see more visitors in a single day than Isle Royale will see in an entire year (approximately 20,000), making it the least visited national park in the United States. It is however, the most revisited park. Over 40% of first time guests will return; a statistic that instantly intrigued me.

Opting for a more spontaneous trip, I didn’t do much planning. I wanted to be surprised. I didn’t want to do a lot of research and expect anything in particular. I did learn about the moose that live on the island however, and saw an opportunity to simultaneously cross 42 off my list, see a wild moose.

My goals were simple: go to an isolated island, hike, camp, lounge in my hammock, see a moose, live in the moment, and slow down the passage of time. How hard could that be?

I purchased my ticket for the Isle Royale Queen IV ferry, departing from Copper Harbor, Michigan, a month before this late-August trip. I left work a little early and drove north through Chicago just missing rush hour, then through Milwaukee while of course singing the theme song from Lavern and Shirley as I passed various breweries. Then I passed Green Bay, which somehow I don’t even remember, but I know I did. My brain ignores a tedious drive as much as anything, and I do a lot of it.

After twelve hours of driving, stopping only for gas, I arrived in Copper Harbor around midnight. I searched for the dock where I would need to be at 8 AM the next morning, then for an unassuming place to sleep in my car.

I pulled into a motel parking lot about 200 feet from the boat. It looked closed. I would be waking early, so I figured nobody would notice a strange man sleeping in his car. Just then, a woman walk to the front desk with a Golden Retriever by her side, holding his beloved tennis ball. I’ve never met a Golden Retriever that didn’t share this peculiar love for tennis balls.

She was heading out the door, so I decided to go talk to her and check for vacancies. The dog’s friendliness was also typical of the breed. He dropped his ball and reared up to put his paws on me, a greeting that never fails to make me happy.

“Get down!” she yelled, but I really didn’t mind. “Can I help you?” she added.

“Are you getting ready to leave for the night?” I asked while crouching down to pet the dog.

“No, just making rounds to check ice machines and whatnot.”

I asked if she had a room available. She did and it would be $60. I quickly went through my options: sleep in the front seat of a small Honda or a bed with blankets and a pillow, shower or no shower, private restroom or find one in a gas station, extra alarm clock or rely on my unreliable cell phone alarm, a private place to change clothes or that gas station bathroom. It was an easy decision.

I put the key in the door numbered 17 and it popped open, unlocked and unlatched. It was a butterscotch colored room with two beds and a hot pink bathroom. The door would barely shut behind me and the curtains didn’t really close all the way, but it was clean (at least on the macroscopic level).

Another benefit to staying here, that I didn’t consider was cable television; I could watch Letterman, which I hardly ever get to do since I don’t have TV at home. His guests were the women’s beach volleyball gold medalists. It was clear I made the right choice in staying. There would be no regrets.

- - -

Thanks for reading, or rereading... I'll re-post part 2 tomorrow. 

  
Creative Commons License
A Backpacker's Life List by Ryan Grayson is licensed under a Creative Commons Attribution-NonCommercial-NoDerivs 3.0 Unported License.   

How to Make an All-Weather Journal

Two of my Trail Notebooks with Grocery Bag Covers
I have never backpacked without a journal in my pocket. Apart from loving to write, I do it because I have a very poor memory. I think of my notebook as a way of saving my thoughts to a hard drive.
Sometimes, I stop to write so often that I don't arrive at my planned destination before dark. I trip from time to time while trying to write while hiking, but who hasn't done that a couple of dozen times in their life?
Recently, I started making my own all-weather notebooks with Rite-in-the-Rain copier paper and fused grocery bags as covers. You'll find detail instructions below.
The notebooks can be made with regular copy paper for about 5¢ each, but one day on my Appalachian Trail thru-hike, I decided to look into waterproof paper. It had been raining all day. I had my journal in a ZipLoc bag in my pocket, but apparently I didn't seal it properly. The pages became water-logged and fragile. The ink bled and smeared. I looked at those disappearing memories like I was watching a photo album melt in a fire.
I ducked into an abandoned bus stop shelter to dry it off as best as I could, then I put it in a dry Ziploc and inside my pack. I vowed to switch to waterproof notebooks.
I could have just spent $5 to buy a Rite-in-the-Rain all-weather notebook, but I enjoy making my own. The only significant expense is buying waterproof paper, which will run about $35 for 200 sheets, or $1.41 each for 25 sixty-four page notebooks up to 4.25" - 5.5" in size.
If there's a good way to waterproof regular paper, while still being able to write on it, I haven't found it, so as of now I'll just have to buy it. If you'll never go through 25 notebooks, you can use the extra paper to print your own waterproof maps.
It's an easy project. And other than cost, a big advantage to making your own notebooks, is being able to print things on the pages, before you bind it. For example, you could print:
  • Maps
  • Trip itinerary
  • Trail information
  • Flight, bus, or train information
  • Important phone numbers
  • A few Sudoku puzzles for when you get bored
For the covers, I fuse old plastic grocery bags into flat sheets of plastic. Any waterproof material would work, but grocery bags are plentiful and I had been looking for a project to use them on.
Alright, here's how I do it...
Before you get started, you'll need:
  • All-Weather Paper (If you want it waterproof, otherwise cheap copier paper will work just fine.)
  • Ruler
  • Box Cutter or X-Acto Knife with a nice sharp blade
  • Sewing Needle
  • Thread
  • Glue
A thick upholstery needle would be great, but I just use the thickest sewing needle that came with my sewing kit and it works fine. I use heavy-duty polyester outdoor thread. For glue, I use a glue gun, but you can try it with whatever glue you have that is suitable for paper and plastic.
To make the cover out of plastic grocery bags, you'll need:
  • Plastic Grocery Bags (Trash bag, Plastic Sheeting, or an old throw-away poncho also works)
  • Scissors
  • An Iron
  • Wax Paper
STEP 1
Decide if you want to print anything on the pages first. If you're using standard Rite-in-the-Rain waterproof paper, you will need a laser printer or copier to do this, inkjets will not work. They do make waterproof paper for inkjets, but it's very expensive.
I tend to print graph paper lines on mine. For printable graph paper, check out printfreegraphpaper.com, or download my graph paper PDF here.

STEP 2
Decide how many pages you want and the dimensions. I like to make the pages about 1/4"-1/2" bigger than what the final notebook will be, because I trim the notebook to size at the end. That way, it has nice clean edges.
Eight pieces of copier paper will make this 64-page notebook.

STEP 3
Next, fold the pages in half, one at a time.

STEP 4
Take 5 or 6 pages and tuck them into each other, like a small book, to make what bookbinders call a "signature," or "folio". You'll be making 3 signatures for this 64-page notebook.
One reason for making three signatures rather than just folding all the paper together into one, is so the book will lay nice and flat when closed. The fold also helps prevent pages from tearing out of your notebook, unlike just gluing them all together at the spine.

STEP 5
Stack the signatures and mark 4 holes equally spaced apart. The holes are where you'll be sewing them together. I used binder clips to hold them in place. If you're going to be trimming the sides at the end, be sure to measure from the center out, so your holes are still relatively centered after trimming.

STEP 6
Poke holes into each mark along the fold in each signature. Put something soft underneath for the needle to go through. I use an eraser.

Now you're going to sew the pages together, like the diagram below. Use heavy duty thread. Polyester or wax-coated thread will be better for waterproofing. Also, wax-coated thread will prevent the thread from cutting into the paper.

STEP 7
Click the image above to enlarge it. I promise this will all seem less complicated once you've done one.
Start by cutting off about 18" of thread and tie a knot about 2" inches from one of the ends, to stop the thread from going all the way through the first hole. Now thread your needle on the other end and sew into hole 1, then out 2, then into 3, and so on in the numbered order on the photo. Keep the string taut as you go, but not so tight that you tear the paper. 
When you go out of hole 10, you're going to tie a knot with the loose piece of thread hanging out of hole 1, and then continue sewing into hole 12. When you get to the end, feed the thread coming out of hole 17 through the loop created between holes 4 and 5.
If you want more pages, and so have more signatures, just keep this same pattern going until you're done. When finished, trim off the excess thread and you'll have something that looks like this: 
Put it aside for now, and next I'll show you how to make a cover by fusing together plastic grocery bags with an iron.

STEP 8
You certainly don't have to use plastic grocery bags to make a cover, but they are waterproof, free, and most of us have tons of them. Also, you'll have something unique that you'll want to show people, and you won't find anything else like it anywhere (that I know of).
A big reason I use plastic grocery bags is because they will otherwise become waste. Try to avoid taking extra bags at the store to make covers if you can, otherwise you're not really recycling anything. If you don't have any extra bags, I'm sure one of your neighbors will.

STEP 9
One standard size grocery bag is enough to make a cover. Just cut off the handles and the bottom of the bag, then fold it in half two times, so you have 8 layers total. As you can see in my photo above, I didn't want any store logos on my cover, so I cut out the blank sections of multiple bags instead, and made a stack of 8 layers.
If you have bags that have colors or designs that you like, even better, get creative. I made the cover on the left with a yellow Dollar General bag layered on top of a bag from Target.
If there is any ink on the bags, make sure that it is not on the top or bottom of the layers, or the heat from the iron will smear it and make a mess. Either turn them upside down, or put a layer without ink on top.
If you do mix bags from different stores, or use bags with lots of ink, they may not fuse as well, but it has worked well for me most times.
You can also use markers to draw your own patterns onto the bags. On this notebook cover, I decided to draw an Appalachian Trail logo. Just remember to place the ink upside down, or put one layer on top of it.
If you look at the image at the top of this post, you'll see that I used this same method on one of my journals to embed the "recycle plastic bags" logo that I found on one of the grocery bags. You could also write something like, "Volume 1" or "2013 Yosemite Trip," to keep multiple notebooks organized.

STEP 10
Place the plastic between two pieces of wax paper on an ironing board. As in the photo above, I trimmed the plastic, so it fits between the wax paper with enough overhang, so they don't come in contact with the iron.
Set your iron temperature to medium-high, or about the same setting for silks. All irons are different, though, so you may have to adjust if it's not hot enough. It doesn't have to be perfect, as you'll see, but if it's not hot enough, it may take a long time to fuse the plastic together. If it's too hot it could melt or shrivel up the plastic too much.

STEP 11
When the iron is hot, iron the bags while maintaining a constant slow motion and applying some pressure. I start from one of the edges and work my way to the opposite side, to prevent air bubbles. The wax paper will stick to the iron at first, but it will get easier after a few passes. Do this for about 30-60 seconds, and then flip it all over to iron the other side. When you're done, peel away the wax paper like a giant Fruit Roll Up.

STEP 12
If all goes well, what you end up with will look something like this. Rub it between your fingers to make sure the layers are all sticking together. If not, iron it again. If it's not sticking well, then the iron may not be hot enough.

STEP 13
So now you have a sheet of plastic to use as a cover. Get the notebook you sewed together and your glue. I prefer using a glue gun, but if you don't have one, most glues suitable for paper and plastic will work.
If longevity or archiving is important to you, use an acid-free glue.
Bend the plastic where the spine of the notebook will go. It's okay if the plastic is bigger than the pages, cause we're going to trim it all up at the end anyway.

STEP 14
Run a line of glue along the spine of the notebook pages and stick it into the bend of the plastic, like the picture below. Note: You want to put hot glue on the paper first, and not into the fold of the plastic first. The glue comes out too hot and can cause the plastic to shrink.


STEP 15
Now using a ruler and box cutter or x-acto knife, trim off the three sides. I do this at the end, so it will have perfect edges, and at this point the cover won't need to be heated anymore, and so, won't shrink anymore.

STEP 16
This step is optional, but I like to glue the first and last page to the cover itself. It gives the cover more rigidity and prevents the cover from ever tearing off. Place a heavy book on top of it while the glue dries to prevent curling. You can use pieces of wax paper on the outside and inside of your covers to keep glue from getting on any of the pages or the heavy book.
And here is the final product! It sounds more complicated than it is. Once you get the hang of it, you can make them pretty quickly.
Other Tips
• The fused plastic grocery bags can be sew together on a sewing machine to make reusable shopping bags, wallets, clothes, or whatever. To give you an example, I sewed pockets in the notebook on the right, to store a credit card and ID. Also, the paper can be taken out so the cover can be reused.
• You don't have to use grocery bags. Trash bags fuse together well also, and have a fake black leather look to them when done. You can also fuse trash compactor bags or plastic sheeting with this method to make custom-size plastic bags for pack liners or waterproof food bags, but I'll talk more about that later.

The Best Backpacking Pen: Space Pen Ink Cartridge

Used to be, when deciding which pen to take on a trip, the most important quality it could have was its proximity to me while I packed. I just grabbed anything, but like every unattached man who spends a considerable percentage of his life walking, I've had plenty of time for superfluous contemplation.

Sometimes it might be about the nature of existence or how everything in the universe is connected in a very real way, or I might wonder how salmon would feel if they knew we had a color called "salmon", but it wasn't the color of their healthy scales... My thoughts on the trail aren't always meaningful or useful, but I think about practical things too. Like what would be the best writing utensil for a backpacker. Also, cheeseburgers come up a lot.

I write most nights, while lying in a tent or hammock, at weird angles. Sometimes while hiking, I stop to write something down in cold temperatures or at high altitudes and get frustrated with pens that fail.

After some research (i.e. watching the "Pen" episode of Seinfeld), I decided to try using the astronaut pen, aka Fisher Space Pen. Actually, I just use the refill ink for it, which offers some advantages for backpackers:
  • It's very lightweight, only 2g
  • It's small enough to fit inside my pocket-sized journal 
  • The refill is relatively inexpensive, $4-6 for the refill, depending where you buy it and if you buy them in bulk. (The full pens cost around $18-30)
  • They write upside down or at any other angle, which is great when laying in a tent
  • It will write on just about anything, even wet or greasy paper. 
  • The ink doesn't smear if the paper gets wet
  • There's never any reason to scribble in your journal to get the ink to start flowing, it just always writes no matter what
  • It can write in altitudes up to 12,500 feet
  • Works in temperatures down to -30°F
  • Its design prevents leaks
  • It lasts three times longer than standard ball point pen and has a shelf life of 100 years
     
The metal refills are a bit too thin and slick to write with comfortably, so my instinct was to wrap some of my duct tape around it. I already have it with me and it works perfectly fine, but thanks to an idea by Brian Green at Brian's Backpacking Blog, I now wrap it in heat shrink tubing.

The tubing runs about $3-4 in most hardware stores, for 8 tubes.

First, slide the tube over the pen with about a 1/16th of an inch hanging over the end.

Shrink the tube with a heat source. A heat gun works better, but since most people don't have one, I used a lighter to show that it will work too.

Constantly move the flame back and forth so you don't burn the tube. It will start shrinking in a couple of seconds.

The extra length at the end is to hold it in place, because the rubber tubing will eventually expand slightly and slide off. If it ever does get loose, you can reheat it with the lighter for a few seconds to shrink it again.

Now it's comfortable to write with and it stays put when I stick it on my ear, which I do a lot. Final weight, just 3 grams.

Want to know more nerdy stuff about the Space Pen? No? Well, that's why I'm writing this at the end...

Since I use a space pen, occasionally I hear the joke about how NASA spent millions of dollars to develop a pen that would work in zero-gravity, when crafty Russians solved the problem by using a pencil. This would be a funny anecdote about wasteful government spending if it were true, but it's a myth. What can I say, I'm a huge NASA fan, so I'm compelled to defend them...

Actually, NASA didn't develop it, Paul Fisher did, independently and without government money. He presented it to NASA, they tested it thoroughly, and started using it on space missions. Cost to NASA, $2.95 each.

It's not clear how much he spent to develop the pen, but it is clear that he did it to market his pen company. The space program was incredibly popular in those days, and he wanted to capitalize on it by making the pen the astronauts used.

Hmm, now I'm wondering if his marketing genius had anything to do with that Seinfeld episode.

It's true that Russian cosmonauts used pencils, because before these pens were invented, pens didn't work well in extreme temperatures or in a vacuum. Pencils are problematic too, though. Wood and lead burn rapidly in a pure oxygen environment and plastic mechanical pencils with graphite "lead" broke easily, which caused problems when floating around in zero gravity by shorting out electronics and floating into eyes and noses.

Then the inventor, Paul Fisher, walk in with an inexpensive solution to a potentially expensive problem, a little cartridge of thixotropic ink hermetically sealed and pressurized with nitrogen gas. It has been used in all manned space missions since. Not long after the Americans adopted the space pen, the Russian started using it as well.

So, a story that has been touted as proof of wasteful American spending, is actually a story of American innovation and our entrepreneurial spirit. And most importantly, now I don't have to roll over on my elbow in the middle of the night to write down a thought that I'm convinced is interesting or clever, even if I'm on top of Mount Whitney in the middle of winter.

I may have walked 3,000 miles with gear on my back, but rolling over on my elbow to write? Come on, I'm not Superman.

Cleaning Clothes in the Backcountry

"Alright," I said to Lightfoot on our John Muir Trail hike in 2012. "Smell this sock again and tell me if the baking soda made any difference." The sour look on his face gave me the answer as he slowly handed the sock back to me.

After a while on a long distance hike, you start to lose your ability to smell yourself, at least to a certain point. This is a blessing when you're alone, otherwise it's a curse. It would be great if I was a cartoon and could just look up to see if there were stink lines drawn above my head, but sadly I'm not, so Lightfoot offered to smell my socks after a thorough rinse and again after they had soaked in a baking soda and water solution for thirty minutes. Only a true friend would take a bullet like that.

"Hmm, alright, next time I'll let it soak longer or add more baking soda."

I began experimenting with environmentally-safe ways to clean my clothes in the backcountry after hiking the Appalachian Trail. Since I started backpacking, I've pretty much started to define "clean" as "dry," so don't get me wrong, clean out there isn't the same thing as clean at home. I decided, however, that long-distance backpacking would be more enjoyable if I could feel cleaner. Being tranquil and at peace in the natural world is a lot easier if you don’t smell like a corn chip’s foot. That's why cleanliness is next to godliness, and why you haven't seen a drawing of Buddha with stink lines above his head.

First, I pack a recycled plastic bread bag or a one-gallon Ziploc and at least 2 tablespoons of baking soda. Since I'm usually only washing one or two pairs of socks, a pair of underwear, and a lightweight shirt at one time, the bread bag or Ziploc is big enough.

1. After setting up camp at the end of the day, I put the offending clothes into a one-gallon Ziploc bag.
2. Then I add water.

Don't put the clothes directly in the water source. Clothes hold residual detergents from previous washes, which you may see proof of in the form of suds during the next step. Clothes may also contain other chemicals from deodorants, bug sprays, etc. Consider putting your backpacking clothes through another rinse cycle after you've washed them at home.
3. Seal the bag with a little bit of air inside. Now, shake it vigorously. This is where most of the cleaning happens, and the longer you agitate the clothes the cleaner they'll get.
4. Make sure you're at least 200 feet from all water sources then empty the bag and squeeze as much water out of the clothes as you can. Avoid twisting wool and synthetic fabrics when wringing out the water. It's less damaging to roll them up and squeeze the water out.

Repeat steps 2 through 4 as often as necessary. I usually do it 3 to 5 times, and agitate for at least a couple minutes each time.

This alone will make a tremendous difference, and more so the longer you agitate and the more times you replace the water as you do it. Your clothes will be a lot less smelly, and a lot more comfortable to wear. Actually, if your clothes weren't that dirty to begin with, water and agitation would probably be enough to get them clean. After wearing the same clothes on the trail for a couple days, however, they'll probably still smell at this point, but hey, at least people won’t be able to smell you from ten feet away.

If you want to stick with slightly smelly clothes to save weight in your pack and have as little impact on the environment as possible, feel free to skip the next two steps. If you want to get them cleaner, however, it's time to get out the baking soda.
5. If you want to remove a stain, mix a little water with baking soda to make a paste, apply it to the stain, gently rub the stained fabric into itself, and then continue.
6. Fill the bag with about a quart of water and about 2 tablespoons of baking soda (more on why I don't use detergents below). Shake vigorously to mix. If you need more water to cover your clothes, just increase the baking soda as well by roughly that same ratio. It doesn't have to be exact.

Now, let that soak overnight.
7. In the morning, go about 200 feet from all water sources, squeeze the baking soda water out the clothes, and then rinse them in the same way as steps 1 through 4.
8. I attach the wet clothes to my backpack using safety pins, so they can dry while I hike. If it's warm enough, I'll just wear the shirt wet. The synthetic or merino wool fabric my shirts are made of dry quickly from body heat.
Safety pins also work great to hang clothes on a line, so wind doesn't blow them off and so you don't have to fold them over the line, which makes them take longer to dry.

The odors will continue to decrease as your laundry dries in the sunlight.
9. And finally, go find Lightfoot and have him sniff your sock to see if it worked.

More Uses for Baking Soda


Before I go into why I don’t use detergents in the backcountry, one reason I take baking soda instead of the other alternatives is it's useful for other things on the trail. For example:

1. You can mix some baking soda and a little water in the palm of your hand to form a paste and use it as a gritty hand and foot scrub to remove dirt and odors.

2. Relieve the itch of bug bites, bee stings, or Poison Ivy by applying the baking soda paste like a salve onto the affected skin.

3. You can scrub cook pots with that baking soda paste solution, as well. Or just sprinkle some on a damp bandanna and scrub away.

4. The paste can also be used to brush your teeth. It doesn't contain fluoride, but it makes a decent toothpaste if you run out.

5. You can also dissolve a teaspoon in 4 ounces of water to make a mouthwash. Slosh it around in your mouth to get rid of bad breath or relieve canker sore or tooth pain.

6. Dust some under your arms and on your feet to use it as a deodorant. Not a good alternative if you're going on a date, but it helps a little bit on the trail.

7. You can cool a sunburn, windburn, or other minor burns or rashes by saturating a bandanna in a warm water and baking soda solution and gently dabbing it onto the affected area.

8. Supposedly, you can rub dry baking soda on your roots to degrease your hair, and then just towel out the excess after 1 to 3 minutes. I haven’t tried this yet, but I have heard of people doing it.

9. Sprinkle some dry baking soda on your dirty clothes so they don’t stink up your whole backpack.

10. Relieve a sore throat by gargling a mixture of ½ teaspoon of baking soda and ½ teaspoon of salt with a ½ cup of warm water a few times a day until it’s gone.

That's a lot, but I'm sure there are many other uses for baking soda on the trail.

Why I Don’t Use Detergents

I'm not totally opposed to people using certain environmentally-friendly biodegradable detergents, but I'm just not convinced any are 100% safe. I prefer to keep as many chemicals out of the backcountry as possible and baking soda is useful in so many other ways.

If you prefer to use a detergent, there are some that are considerably safer for the environment, and safer ways to use them.

First, there are no detergents safe enough to dump directly into a water source, even if the detergent's label has a bright blue sky and green leaves on it, and you can only buy it in a locally-owned co-op from a barefoot hippie drenched patchouli oil. Always dump the wastewater into a 6 to 8” deep hole dug at least 200 feet from a water source, and use it sparingly.

It’s hard to tell which detergents are the safest to use because they don’t have to disclose all ingredients on the label. So, choose a detergent based on what they claim they don’t add. They don't have to legally tell you if it does contain certain things, but false advertising is still illegal (sort of). For example, look for detergents that are phosphate-free, chlorine-free, fragrance-free, dye-free, and ones that are plant-based and contain no petroleum solvents.

Fragrance-free is also important because it can attract animals, but also because companies may be able to hide certain chemicals in their fragrances and still legally claim the product is free of it. (As of this post, that is the case, but there is a proposed law in the US that may change that soon.)

Biodegradable Soap

Also, in addition to the advice above, only use biodegradable detergents. Just remember that no soap is biodegradable in water. Biodegradable soaps are only biodegradable when buried in the soil.

Spend enough time on the trails and you'll eventually hear something like, “I have biodegradable soap, so I just jump in the lake to bathe.” If that is how you’re using it, it’s not biodegradable soap. If biodegradable soap accumulates in water sources, it can lead to excessive plant and algae growth and decrease dissolved oxygen in the water.

To print biodegradable on a label, the product just has to be “capable of being decomposed by biological agents, like bacteria, fungi, or algae, and break down into carbon dioxide, water, and biomass in a reasonable amount of time in the natural environment.” Further, it could take up to six months to biodegrade in the soil, and still be deemed biodegradable. By then, if not properly buried at least 6" in the soil and 200 feet from a water source, it could work itself into the aquatic ecosystem.

Biodegradable soap is a good example of the cobra effect, when an attempted solution to a problem actually makes the problem worse. Overall, biodegradable soaps are a good thing. They are technically much better for the environment, but because the term is often misunderstood, the product is often used in an environmentally unfriendly way. So, a product with good intentions can actually end up being worse for the environment.

It’s like being okay with producing more garbage, because you recycle, or leaving an energy-efficient light bulb on more often because it uses less energy.

Also, since there is an assumption that it is safe for the environment, some people may end up using more of it than they would otherwise. With the method above, a couple drops is all you need.

Here are a few other tips for keeping your clothes clean in the backcountry:

1. You can reduce odor and the number of times you have to wash your clothes, if you wear clothes made of merino wool. It doesn't absorb body odors or hold onto bacteria like most synthetic fabrics, like those used in Under Armor for example.

2. Choose clothing made of materials that will dry fast in the sun. Hiking clothes made to quickly wick moisture from your body will likewise dry fast in the sun after you wash them.

3. If it's overcast and your socks are still a little damp at the end of the day, put them in your sleeping bag at night. Your body heat will help dry them out.

4. Before heading to the trail, wash your clothes at home with just water. This will remove residual detergents and make it safe to jump in a lake with your clothes on to give them a quick wash.

Let me know if you have any questions, concerns, or suggestions by emailing me at ryan@abackpackerslife.com.

My Gear Checklist: Sleeping Pad

Therm-a-Rest NeoAir XLite Sleeping Pad
12 oz.

Is it just me, or does that picture make you also want to be backpacking? This series of gear posts have partially been to show how inexpensive backpacking can be, but this is one item where I was able to silence my typical thriftiness. The comfort of that yellow sleeping pad contributed a lot to that sunset in Badlands National Park.

So, whether I'll be sleeping in a tent, hammock, or shelter, I bring along a sleeping pad. In the hammock, it's more for insulation than comfort, so if it's very warm, I can go without it. Otherwise, it's always with me.

Since I've been spending such a large percentage of my year sleeping on the ground, I justified buying the most expensive sleeping pad there is, the Therm-a-Rest NeoAir XLite. I didn't actually fact-check that statement, but I've never seen anything more expensive. It was especially expensive when compared to my first sleeping pad, a $6 piece of blue closed-cell foam from Wal-Mart.

If you're looking to save money, definitely start out with a blue foam pad (8 - 12 oz.) or something slightly better like the $35 Therm-a-Rest ZLite Sol (10-14 oz.)

Before my first trip, I cut the blue foam mat down to torso length, to reduce its weight to 8 oz. That got me by just fine on my first few backpacking trips, but I didn't sleep very well and woke up with a sore back. Once I realized I was in love with life on the trail, and knew I would be doing a lot more of it, I decided to upgrade to a torso length Therm-a-Rest ProLite (11 oz.) for around $80.

Later, I realized that torso-length pads with my legs hanging off the end made me colder at night, so I needed a warmer sleeping bag to compensate. That meant I wasn't really saving much weight. So, I regretted that purchase.

Since I'm cheap and reluctant to add more ounces to my pack, I stuck with that pad for a few years. Until one morning when I woke up to the sound of a dog chasing a cat.

I had been couchsurfing with someone in Vermont when hiking the Long Trail. I felt her dog and cat run across me and my sleeping pad. I fell back to sleep, but a few minutes later, woke up again when I realized I was on the hard floor. The animals poked a hole in the pad. I didn't care, though. One, I loved her happy dog and believed it could do no wrong, and two, I finally had my excuse to upgrade.

The NeoAir XLite weighed about the same (12 oz.), but was full length, three times as thick, and looked way more comfortable. Then I saw the price tag.

"Oh snap, $160!?" What follows is a dramatization, loosely based on my actual decision-making process.

The figurative angel and devil popped up on my shoulders, "Ryan, you're spending most nights outside, this is your bed now. It's okay to spend money on it," said the devil.

"But Ryan, you're not working right now, you can't spend that kind of money," said the angel, who had a point.

"Good sleep is better for your health," the devil interjected. "You'll be happier and live longer if you start sleeping better."

"But it's $160, that's more than you spent on your real bed," said the know-it-all angel SOB who suddenly didn't seem to care about my well-being.

"This cozy and warm NeoAir has an R-Value of 3.2, one more than your old sleeping pad," the brilliant devil said. "And it's only one ounce heavier than your other Therm-a-Rest, that you regretted buying, the one you wasted $80 on. You want to waste even more money by buying something else you won't like?"  The devil just about had me convinced with the idea that I would be wasting money. He used my cheapness against me.

"And," he continued, "The NeoAir XLite packs down to the size of a Nalgene bottle, that's simply unprecedented. We need this sleeping pad. Ryan..." He leaned closer to my ear and whispered, "We deserve this sleeping pad."

He was right, of course.

"But Ryan," said the angel who, foreseeing defeat, collapsed to his knees and began to beg. "We could just patch your old one for next to nothing..."

"Oh shut up, angel, nobody likes you!" Which I'd like you to pretend I whisper yelled to my empty shoulder in the crowded outfitter. "And honestly, angel, I'm starting to question the very point of you? We need this to be happy and healthy, don't you see? It's as though you want us to die sad and bitter, because that's exactly what will happen if we don't buy this."

Betrayed and alone, the angel vanished. I made my way to the checkout.

And... Scene.

Back in reality, what followed were weeks of buyer's remorse. The thickness of the pad seemed almost uncomfortable at first, and I missed the days of being able to throw my sleeping pad on the ground to sit on, without worrying about getting a hole in it.

Every night, I was on the ground fastidiously removing every sharp rock before setting up my tent. I didn't exactly resemble Rick Moranis searching in his backyard for his tiny children in 'Honey, I Shrunk the Kids', but sadly, I can't say it wasn't similar.

Eventually, I forgot about the money and realized I didn't have to be so careful with it. For its thinness it holds up pretty well. I also started using the sit pad that doubles as the back padding of my Mariposa Plus backpack, so I still have a worry-free thing to throw on the ground to sit on without adding more ounces.

On my first night below freezing, I realized how much warmer I was. And once I figured out the right amount of air to blow into it for maximum comfort, I did sleep much better. For the first time, I could sleep through the whole night without waking up once.

And so, I lived happily ever after. The End.
M Y   G E A R   L I S T

• Backpack
• Backpack Liner
• Shelter
• Sleeping Bag
Sleeping Pad
• Cooking Supplies
• Food
• Food Container
• Water Treatment
• Clothing
• First Aid & Toiletries
• Hand Sanitizer
• Ziploc for Laundry
• Baking Soda
• Bandannas
• Headlamp
• Ziploc Wallet
• Lighter and Matches
• 50' of Paracord
• 15' Braided Mason's Cord
• Bug Repellent
• Camera
• All-Weather Journal
• Space Pen (Refill)
• Map & Compass
• Book
• Cell Phone
• Knife
• Duct Tape
• Extra Ziploc bags
• Trekking Poles
  
Creative Commons License
A Backpacker's Life List by Ryan Grayson is licensed under
a Creative Commons Attribution-NonCommercial-NoDerivs 3.0 Unported License.
  

My Gear Checklist: Sleeping Bag

Sleeping Bag
26 - 45 oz.

One morning on the Appalachian Trail, Liv woke up and said, "I can't wait until the day is over so I can get back into this sleeping bag." She hadn't even gotten out of it yet. I mention that to illustrate how great a great sleeping bag can be.

I carry one of two synthetic bags. A lightweight 40°F bag in the summer that weighs 26 oz., and if temperatures could get colder than that, I take a 15°F bag, which weighs 45 oz.

Note: I fill my sleeping bag stuff sack with extra clothes, rain gear, bandannas, or any other soft gear I'm not using that night, to make a pillow.

If you can't afford two sleeping bags starting out, a 30°F - 35°F bag is a good compromise, and you can always add a sleeping bag liner to reduce the temperature rating an additional 8 - 15°.

S L E E P I N G   B A G   L I N E R S

If a 30° bag isn't going to be warm enough on a particular trip, and don't want to spend a couple hundred dollars on a second sleeping bag, for about $50 - $60 you can get a sleeping bag liner and subtract up to 15°F from your bag's temperature rating. I'm currently working on making my own for a fraction of this cost, more on that later.

They offer other benefits as well. Liners are more comfortable against your skin than the typical sleeping bag nylon or polyester. They will minimize wear and keep your bag cleaner. A liner can be washed separately, reducing the number of times you have to wash your sleeping bag. Washing can compress your bag's insulation and make it considerably less warm. Not to mention cause even more wear and tear. In other words, a liner can save money in the long run by extending the life of your sleeping bag.

And if you're camping in very warm weather, you can leave the bag at home and just sleep inside your lightweight 8 oz. liner.

T E M P E R A T U R E   R A T I N G S

When deciding on which temperature rating you'll need, remember that manufacturers assume you are wearing a layer of thermal underwear and laying on a sleeping pad. And since metabolisms vary, and the rating methods vary from one manufacturer to another, temperature ratings are only a guide. If you're a cold sleeper, if you're not staying in a tent, or you're not using a well-insulated sleeping pad, you'll probably want to add at least 10-15 degrees to the rating.

W H Y   I   U S E   S Y N T H E T I C   O V E R   D O W N ?

Because I'm cheap. I'm not proud of that, but I am what I am. Down bags are much lighter than synthetic, so I would love to have one, but the weight savings comes at a significantly higher cost.

When trying to get my pack weight lower, I made a list of all my gear that I knew could be lighter. Then I figured out how much it would cost to replace each item and how many ounces it would save. (Yeah, I used an Excel Spreadsheet. I can't decide if I should be ashamed of this attention to detail. You could say this is either smart or borderline obsessive compulsive and I'd agree with you either way.) Next, I sorted the list by highest weight savings per dollar and slowly replaced those items first. Replacing my sleeping bag was near the bottom of that list, so I haven't replaced it.

Rather than admit my cheapness, I could have told you I go with synthetic because a down bag won't dry as fast and will lose 90% of it's thermal properties if it gets wet, which is definitely true, but so far, I've never gotten one wet. I keep my sleeping bag in a water-resistant stuff sack in addition to the two trash compacter bags that line my pack. I could drop it in a lake and it should stay dry.

So, yeah. The real reason I use a synthetic bag, is that they are much cheaper. I found my 40° bag on clearance off-season at Backcountry.com for $38, not bad for a 26 oz. bag. If I wanted to spend 10 times more than that, I could have bought a high quality down bag and saved 10 or 11 ounces, but I have a hard time justifying that.

My 15° synthetic bag cost about $170 and weighs 2 lbs. 13 oz. When I'm able or willing to spend 2-3 times that amount on a 15° down bag, I'll be able to shave a pound off the weight. Again, I haven't been able to convince myself to do that yet.

O T H E R   F E A T U R E S   T O   C O N S I D E R

Sleeping pad sleeve - I haven't used a bag with this feature yet, but it intrigues me. Some sleeping bags have the underside insulation removed and replaced with a sleeve for your sleeping pad. It has the added benefit of preventing you from rolling off your sleeping pad at night, which can make you cold and interrupt your much needed sleep.

Zipper compatibility - If you're backpacking with your significant other, you can purchase sleeping bags that zip together to form a two-person sleeping bag, but still use them separately too.

Finally, I won't recommend specific sleeping bags because there are so many great ones that will work just fine and I can't try them all. I'll just say that you're doing fine if your summer bag weighs less than 2 lbs, and your cold weather bag weighs less than 3. Also, if you're new to this and reluctant to use a mummy bag. Remember they are warmer for the weight. When I bought my first mummy bag I thought I would feel claustrophobic, but I quickly got used to it. 
M Y   G E A R   L I S T

• Backpack
• Backpack Liner
• Shelter
Sleeping Bag
• Sleeping Pad
• Cooking Supplies
• Food
• Food Container
• Water Treatment
• Clothing
• First Aid & Toiletries
• Hand Sanitizer
• Ziploc for Laundry
• Baking Soda
• Bandannas
• Headlamp
• Ziploc Wallet
• Lighter and Matches
• 50' of Paracord
• 15' Braided Mason's Cord
• Bug Repellent
• Camera
• All-Weather Journal
• Space Pen (Refill)
• Map & Compass
• Book
• Cell Phone
• Knife
• Duct Tape
• Extra Ziploc bags
• Trekking Poles
  
Creative Commons License
A Backpacker's Life List by Ryan Grayson is licensed under a Creative Commons Attribution-NonCommercial-NoDerivs 3.0 Unported License.   

My Gear Checklist: Backpack Liner

Two Trash Compactor Bags
3 oz. each

No rain cover will keep your gear dry in a downpour, so I don't bother carrying one anymore. Water is insidious, it will find a way in. A bag liner is much more effective. And it's cheaper and lighter.

I use trash compactor bags because they are thicker than regular trash bags. I use two in case one gets a hole in it, but also because I use them for other purposes at camp.

When using a tent or cowboy camping under the stars, I use two as a ground cloth. When sleeping in a hammock, I'll lay one on the ground beside the hammock to stand on when changing clothes or when getting in and out of my sleeping bag.

I sometimes use the other bag to store all my gear in at night to keep it dry or to waterproof my food bag hanging in a tree.

Pack Rain Cover
A pack rain cover will cost $25 - $40, but if you want your gear to stay dry, you'll still need to line your pack, or use several dry bags which can cost $10 - $30 each. I bought a pack of trash compactor bags for $10 in 2006 and didn't use them all until 2012,  and my gear has never gotten soaked. So, if you're looking to save money, this is an easy way to do it without reducing any comfort, convenience, or safety.

When I want more protection for more sensitive items, like a digital camera, or when I want to keep small items organized like my first aid kit, I use Ziploc Freezer Bags with the double seal. Avoid generics, Hefty brand zip locks, or any bag with the zipper top, they can't be trusted. ZipLocs are cheaper and lighter than dry-bags, especially lighter than clear dry-bags, but admittedly, ZipLocs are not as environmentally-friendly, so someday I may switch. That being said, nothing is better for the environment than a population that has developed a deep fondness for the outdoors. If finding ways to save money gets more people to try backpacking, then I believe in the long run we'll all be doing more to protect it.

At least that's what I tell myself to reduce any eco-guilt.

Anyway, enough preachiness, every once in a while I get a small tear in the liner, as you're probably assuming, but it doesn't happen often. When it does, I patch it up with a small piece of duct tape, which I always have wrapped around my trekking poles.

One final note, if using trash compactor bags for a ground cloth, be sure to fold in the parts of the trash bag that stick out under your tent. Otherwise, it will divert rain water under your tent, which defeats some of it's purpose.

M Y   G E A R   L I S T

• Backpack
Backpack Liner
• Shelter
• Sleeping Bag
• Sleeping Pad
• Cooking Supplies
• Food
• Food Container
• Water Treatment
• Clothing
• First Aid & Toiletries
• Hand Sanitizer
• Ziploc for Laundry
• Baking Soda
• Headlamp
• Ziploc Wallet
• Lighter and Matches
• 50' of Paracord
• 15' Braided Mason's Cord
• Bug Repellent
• Camera
• All-Weather Journal
• Space Pen (Refill)
• Map & Compass
• Book
• Cell Phone
• Knife
• Duct Tape
• Extra Ziploc bags
• Trekking Poles
  
Creative Commons License
A Backpacker's Life List by Ryan Grayson is licensed under a Creative Commons Attribution-NonCommercial-NoDerivs 3.0 Unported License.   

What I Carry With Me Out There

My first set of gear, all of which has been replaced
One of the great aspects of the backpacking life, is the freedom you feel when you only have what you can carry on your back. I get asked what I have on mine quite a bit, so below you'll find my list. It's amazing what you can live without.

Today, I'll just talk about the backpack, but eventually I'll post about each item. I'll give advice for buying gear, suggest tips for saving money, and in some cases, give detailed instructions on how to save money by making your own gear.

Most of my advice will be for new backpackers (especially those wanting to save money on their first set of gear), because with experience your gear gets modified and minimized until it is unique to your own comforts and needs. Mine certainly has evolved over the years.

Nevertheless, I hope I can also give a few ideas to a seasoned pro to consider or criticize. Please leave any thoughts and suggestions in the comments below.

Mariposa Plus, by Gossamer Gear
26 oz.
I purchased two other packs before finally settling on the Mariposa Plus, by Gossamer Gear. There are a couple ways to save money on a pack, but none would have saved me more than getting more experience before buying my first one. My problem was that I didn't have a friend with a pack to borrow and I didn't lived near an outfitter that rented out gear (such as REI).

My first mistake was buying my first pack online. Since I didn't have an outfitter nearby, I didn't get fitted or get to try on multiple packs. Consequently, the pack didn't fit right and I didn't have enough experience to even realize that was the problem. All I knew was, after my first three miles, my shoulders were already getting sore and I was wondering what I got myself into.

All packs will seem comfortable when empty, so a good outfitters will give you sand bags to put inside the packs to simulate the full weight and will be able to tell you if it's fitted properly.

For my second pack, I drove ninety minutes to the nearest outfitter. It fit much better this time, but after a few trips I decided to reduce my gear weight and found backpacks that were 2 lbs. lighter, but just as comfortable. That's important to remember when looking for an ultralight pack. A one-pound backpack, with a total packed weight of 21 pounds, might be less comfortable than a five-pound backpack with a total weight of 25 pounds. Lightweight is important, but not more important than comfort.

Also, the comfort of a pack will drop the heavier it is. That might go without saying, but generally an ultralight pack will not hold more than 25 - 30 lbs. comfortably. Make sure to put enough sand bags in when testing one out. It might feel great at 25 lbs., but terrible at 35.

So, finally, three packs and $550 later, I had a pack I was happy with.

B U Y I N G   O N L I N E

If you're lucky enough to have a knowledgeable local outfitter, who can answer all your questions, it's well worth it to support that business. That being said, there are a couple benefits to buying a backpack online other than finding a better price and seeing a wider selection.

The first that comes to mind is that I haven't yet seen a backpack in an outfitter that has an interchangeable suspension system. With some online companies, like Gossamer Gear and ULA Equipment, you can customize your backpack by selecting different size hip belts, torso lengths, and shoulder straps. If you're like me, and nothing seems to fit exactly right, you may find it beneficial to be able to order a pack with a large torso length, let's say, but have them attach their medium-size hip belt.

Also, many online outfitters have pages devoted to sales and clearance items that you can check periodically for deals, such as these pages at REICampmor, and Backcountry.com.

When buying online, checkout the return policy. REI, for example, will let you return any item for almost any reason, even if you have used it on the trail. If you live near an REI, or any store with a similar policy, that's a good place for a beginner to start.

B U Y I N G   U S E D   G E A R

Expect to spend at least $125 - $250 on a backpack, if you buy new. If that's not an option for you, start by looking for a used pack. Many people buy backpacking gear, but after one or two trips find out it isn't for them and want to recoup some of their money. It's like exercise equipment, you can find good deals on barely used items. Many outfitters sell used gear in their stores, or you can find a lot of used packs online at sites like GearTradeeBay, or Craigslist.

When looking for used gear, remember that many outdoor gear companies will repair their products for free, for life. If you find a good deal on a pack with some kind of defect, call the manufacturer and see if they'll fix it for free. I recently sent a backpack to Gregory Packs that had a pretty major flaw, a torn zipper that left a giant hole exposed. I suspected this would be covered under their lifetime warranty and it was. They fixed it free and sent it back. It only cost me $4 in shipping. Some people don't want to mess with the return process, or don't even know their pack has a lifetime warranty. Take advantage of that if you can.

G E T T I N G   A   P R O P E R   F I T

If you're unable to get to a good outfitter to be sized properly, or if you'll be buying online, here's how to fit yourself for a pack.

First, get your torso length. Have a friend measure your spine between two points. The starting point is your C7 vertebra (the vertebra at the base of your neck that protrudes when you touch your chin to your chest). Next, imagine a horizontal line on your lower back going across the top of your hips (the Iliac Crest). Where this line intersects with your spine is the ending point for your measurement. If you're like most adults, your torso length will fall between 16 and 22 inches.

Next, measure around your waist at the top of your hipbones. Those two measurements will get you close to a perfect fit, without having to try it on before ordering.

There are other factors that you still won't know before trying it on, though. For example, how it feels with a full weight, the placement of shoulder straps, or the location of side pockets, which you want to be able reach without taking off your pack. Check out the return policy before ordering and if something isn't right, send it back. Losing a few bucks in return shipping is much better than being uncomfortable on the trail.

C A P A C I T Y

I didn't want to get into specific pack features on this post, because everyone has their preferences. There is one more thing you'll want to consider when buying your first pack, though, the total capacity. This is largely a personal preference as well, but a beginner might wonder how big is big enough. For me, 3,600 cu. in. (Or 59 L) of total capacity, is the right combination of being large enough to fit what I need, without being so large that I'm tempted to carry something I don't need. I can fit all my gear and a week's supply of food.

That's it for now. Don't forget to leave your comments or suggestions below!
M Y   G E A R   L I S T

Backpack
Backpack Liner
• Shelter
• Sleeping Bag
• Sleeping Pad
Cooking Supplies
• Food
• Food Container
• Water Treatment
• Clothing
• First Aid & Toiletries
• Hand Sanitizer
• Ziploc for Laundry
• Baking Soda
• Bandannas
• Headlamp
• Ziploc Wallet
• Lighter & Matches
• 50' of Paracord
• 15' Braided Mason's Cord
• Bug Repellent
• Camera
• All-Weather Journal
• Space Pen (Refill)
• Map & Compass
• Cell Phone
• Knife
• Duct Tape
• Extra Ziploc bags
• Trekking Poles
  
Creative Commons License
A Backpacker's Life List by Ryan Grayson is licensed under a Creative Commons Attribution-NonCommercial-NoDerivs 3.0 Unported License.   

What I'm Carrying With Me Out There

For me, one of the great aspects of the backpacking life, is the freedom you feel when you only have what you can carry on your back. I get asked what I have on mine quite a bit, so below you'll find a list.

The advice below is mostly for new hikers, or people just curious about what I take, because with experience your gear will be modified and minimized until it is unique to your own comforts and needs. Mine certainly has evolved over the years. Nevertheless, I hope my list can help out a new hiker, perhaps save them some money, or give new ideas to a seasoned pro to consider or criticize.

With new ideas, products, and materials becoming available every year, adapting your gear list is a never-ending process, so please feel free to email me your ideas or advice at grayson.ryan@gmail.com, or post a comment below. I will never learn enough, so this page will change as I change.

Click on an item below to get more information.


► Backpack - Kind of essential to carrying all my belongings on my back.
► Backpack Liner - Two Trash Compactor Bags, to keep my gear dry and as a ground cloth for a tent
► Shelter - One of two hammocks with a rain tarp, or a lightweight solo tent, depending on where I'm hiking.
► Sleeping Pad - For warmer, more comfortable sleep
► Sleeping Bag - One of two bags, depending on weather
► Cooking Supplies
► Food Bag/Bear Canister - To keep my food contained and safe from wildlife
► Water Treatment and Containers
► Clothing
► First Aid Kit
► Zip Lock Bag for Laundry
Bandanna - Tons of uses. Probably the most versatile thing in my pack.
Headlamp - with an extra set of batteries
► Zip-Lock Wallet - With a credit card, debit card, cash, photo ID, and health insurance card.
► Mini Bic Lighter - They are easier and more convenient than matches, and it lasts me a very long time.
Matches - Good to have a backup.
► Kindle - I keep it inside a zip-lock bag and a homemade foam protective sleeve. If I'll be on a long distance hike with a resupply, I take the charger as well. I can carry hundreds of books, maps, first aid and survival information, and any document I created myself. And it never weighs more than 7 oz. The battery can last a couple weeks on a charge.
► Cell Phone
- with Extra Batteries and a set of ear buds. I take short charging cable if on a long distance hike with a resupply.
► 40' of rope - I use paracord, mostly to hang a bear bag at night.
► 15' of braided mason's cord
-  Strong for it's weight. I use this mostly as clothes line, but it comes in handy for other purposes too, like tying water bottles together when going to fill them up, lashing sticks together for making a variety of things, or to repair a broken guy line on a tent or rain tarp.
► Toilet Paper
- Kept in a zip-lock bag. It's better than leaves, and makes a fantastic fire starter.
► Bug Repellent
- 100% DEET in an eyedropper bottle goes a long way. Just a dab on the back of my neck, wrists, and ankles. Nothing repels bugs completely, but it helps. DEET may dissolve some plastics, rayon, spandex, other synthetic fabrics, so I apply with a plastic baggie turned inside out. I ruined a raincoat with DEET on the back of my neck, so I wipe off my neck if putting a rain coat on (mosquitoes aren't a problem in rain anyway). This doesn't necessarily mean it's bad on your skin though. Vodka and Coke can dissolve a number of things too, but it's not harmful to the skin. Like all things, follow directions, wash off at the end of the day, and use in moderation.
► Camera - with extra SD cards, lens cleaning cloth, extra batteries, charger if on a long trip, and mini Gorilla Grip tripod.
► Journal and Pen - I just use a Pilot G2 ink refill as a pen. It's lighter and fits in my pocket better. I use a heat shrink tube to give it a nice feel. I write a lot.
► Map or Guidebook

► Compass
- I only take one if going off trail, or if a trail may not be marked well. I can always use the compass app on my cell phone as a backup, and some knowledge about the sun and stars.
► Safety Pins
- For hanging wet clothes onto my pack or on a clothes line to dry if wind might blow them off. Also, they may come in handy for gear repair someday.
► Knife or Razor Blade
- If in the middle of nowhere, or backpacking off trail, a good knife is probably the most essential survival tool you can carry. I'm usually on a well-marked trail though, and needing one for survival is unlikely, so to save weight, I'll just put a razor blade in my box of matches. I rarely need to cut anything bigger than what a razor blade can handle. 
► A Few Extra Zip-lock bags - I always find a use for them. Mostly used for waterproofing, food storage, and organizing.
► Trekking Poles - With some handy duct tape wrapped around them.

That's it. It's amazing what you can live without.


A Backpacker's Life Listt by Ryan Grayson is licensed under a
Creative Commons Attribution-NonCommercial-NoDerivs 3.0 Unported License.
  

Why I use plastic soda or water bottles

  1. I carry 2-3 plastic water bottles. One 16 oz and one or two 32 oz. That way, I can lose or break a bottle and still have a way to transport water. A hiker with a dog came to my shelter on the Long Trail in Vermont, and the dog decided one of my water bottles was a fun chew toy. I'm glad I had a backup.
     
  2. Plastic soda/water/gatorade bottles are free, lighter than Nalgene or aluminum bottles, and they are readily available and otherwise destined for a landfill. One argument I've heard for not reusing plastic soda bottles is that they release dioxins in your water. This is an urban legend. There are no dioxins in plastic soda bottles. That being said, a group of chemicals called phthalates are sometimes added to plastics to make them flexible and less brittle. These can leach into water if you heat up the plastic. I don't cook with them, so I'm not worried about this. (Reference)

    Another reason I've heard, for not reusing plastic soda bottles, is that bacteria can develop under the cap, but these get cleaned regularly during my bleach treatment, so I'm not concerned about that. If you know of any other reasons I shouldn't reuse soda bottles, please let me know at grayson.ryan@gmail.com.
     
  3. Nalgene and other hard plastic or aluminum bottles cannot be squeezed to fill my cook pot with the Squeeze Filter. Or to get all the air out to treat the cap and threads when chemically treating the water.
     
  4. I've never been a fan of hydration bladders, since they are difficult to get in and out of my backpack, hard to see how much water you have left, and not easy to attach to the outside of any of my packs.

Safe Drinking Water in the Backcountry, Part 2: Filtration

Saint Mary Falls, Glacier National Park
In my previous post on using bleach to treat water in the backcountry, I said my method for treating water is a combination of household bleach and an inline filter. You might be wondering why I would use both. Especially since most people only use one or the other and some don't treat their water at all... read more >

If I was only going to take one treatment method, it would be a .1 micron inline or straw filter every time, but below are good arguments for carrying both.
  1. It's good to have a backup method... read more >
  2. Filters allow me to drink up at the source and carry less... read more >
  3. An eyedropper of bleach only weighs 1 ounce, so even though I prefer an inline or straw filter, 1 ounce isn't a noticeable addition to my pack.
  4. Filters, unlike any chemical treatment, are very effective at removing Cryptosporidium and Giardia, the two most common water-born illnesses in American backcountry... read more >
  5. Bleach is very effective at removing viruses and bacteria, filters are not... read more >
  6. Bleach can be used to sterilize my toothbrush and eating utensil... read more >
  7. Filters improve taste... read more >
My preferred filter:

Sawyer Squeeze Filter
With the variety of filters on the market, I haven't found a good reason to continue using my traditional pump-style filter. If I can help it, I'd rather not get down on my knees, dangle a filter hose in water, and pump it into a bottle. I prefer inline or straw filters.

4-Way Filter Bottle
Rather than pump water through the filter, an inline or straw filter uses your suction to filter as you sip. You can just scoop and go, without having to take off your pack. And to fill a cook pot, you can use gravity or squeeze the water from the pouch or bottle.

When on a trail with plenty of water sources, it's not inconvenient to get water, so I don't carry around as much water weight. In addition, the inline filters themselves are also lighter than a pump filter. My favorite inline/straw filter is the Sawyer Squeeze Filter or the Sawyer 4-Way Filter Bottle. Here is why:
  1. They have a .1 micron filter... read more >
  2. Multiple ways to use... read more >
  3. Easy to use... read more >
  4. Small and Lightweight. The Squeeze filter with a pouch weighs about 3 ounces, the 4-Way Bottle, about 5.
  5. Sawyer has a one million gallon guarantee!... read more >
  6. Easy to clean/backwash... read more >
  7. Cons, because there is always one, right?... read more >
At the time of this post, Amazon is selling the Sawyer Squeeze Water Filter for $42.38 (Click here to order or read more reviews). For that price, you will get: three lightweight collapsible pouches (0.5 L , 1 L, and 2 L pouch), Sawyer 0.10 Absolute Micron Hollow Fiber Membrane Screw On/Off Water Filter, Replaceable Pop Up Drinking Spout, Cleaning Syringe, and the 1 Million Gallons Guarantee.

The 4-Way Filter Bottle is currently $36.86 at Amazon (Click here to order or read more reviews). For that price, you will get: a 1L water bottle, Sawyer 0.10 Absolute Micron Hollow Fiber Filter, faucet attachment for backwashing, extra straws, hose adapter for hydration bladders, and the 1 Million Gallons Guarantee.

See the Sawyer Squeeze Filter in action:

See the Sawyer 4-Way Filter Bottle in action:


More water related information:

Why I don't use Sterilizing Pens... read more >
 
How much water to carry... read more >

Using Bleach To Treat Water in the Backcountry... read more >
Why I use plastic soda or water bottles... read more >

Safe Drinking Water in the Backcountry, Part 1: Using Bleach

Click here to skip right to my method for treating water in the backcountry with household bleach. If you're like me, you hate reading through a lot of unnecessary paragraphs when you're looking for specific information, and I can be unnecessarily long-winded. Here's proof...
- - - 
As many of you know, this blog has primarily been a place to share stories and photos from my trips, but my next trip won’t be for at least a couple months. So until that time comes, my blog will be more of a practical guide to backpacking. Or with the direction my life has taken, a practical guide for the deliberately homeless.

Either way, I've learned a lot from my experiences and I love to chat about this stuff. I get a lot of questions and could spend hours answering them, as many unfortunate people have realized after asking me a seemingly simple question.

Many of the questions I get involve obtaining safe drinking water in the backcountry. When I tell people I use common household bleach, they often look at me like I have a death wish. So that's where I'll start.

Few things are as refreshing as drinking all-natural water straight from a cold mountain stream, untainted by chemical treatments. Or to just plunge your face into a spring on a hot day and quench your thirst without fussing around with filters, pumps, and hoses.

If you are smart about choosing your water source, you could go for days, weeks, or even years without treating your water and never get sick. It's a gamble, but after spending a few days stepping over moose poop, or seeing a bloated dead animal floating in a water source, or worse yet, having to witness your friend doubled over with stomach pains and running off into the trees to decorate that beautiful foliage in vomit or explosive diarrhea... I'm getting a bit off the rails here... what I'm trying to say is, that stuff kind of diminishes the "all-natural" romanticism of drinking from a cold mountain stream. So, I treat my water.

Everyone has their own preferred method, but here’s what I do:

My Water Treatment Method:
My method for treating drinking water in the backcountry is a combination of household bleach (one drop per 16 oz.) and/or an inline or straw filter. And don't forget the often skipped step of cleaning your hands after touching potentially contaminated water. I carry a small bottle of hand sanitizer for this. Not doing so could negate everything you do to treat your water.

First, I should say that nothing is more effective as boiling to treat water in the backcountry. Boiling water vigorously for 60 seconds, or three minutes at altitudes higher than 6,500 feet, will kill everything. No other safe chemical or filtration method can claim that. If you're already boiling water for cooking, it's great. For drinking water, however, it is perhaps the most impractical method... read more >
.
Why I use bleach:
1. It's safe... read more >
2. It's effective... read more >
3. It's cheap... read more >
4. It's easy to find... read more >
5. It's lightweight... read more >
How I use bleach:

My method is based on recommendations by the Centers for Disease Control, the American Red Cross, and hours of additional reading. If you find any mistakes or have questions or suggestions, please contact me at grayson.ryan@gmail.com. I will always be happy to learn something new and will update this information accordingly.
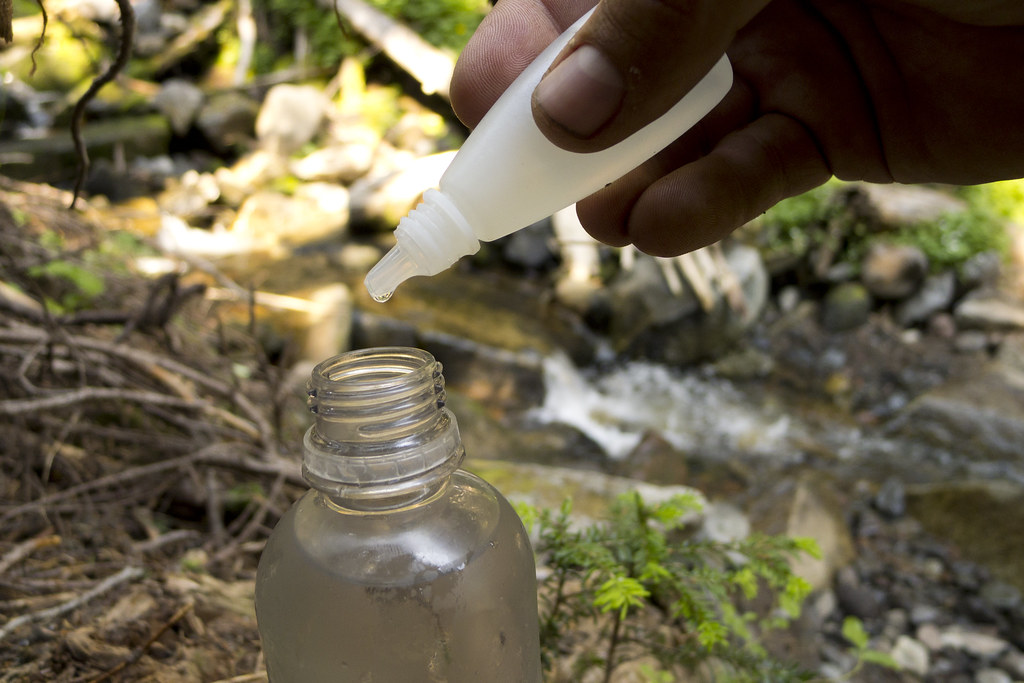
1. Fill an eyedropper with bleach.
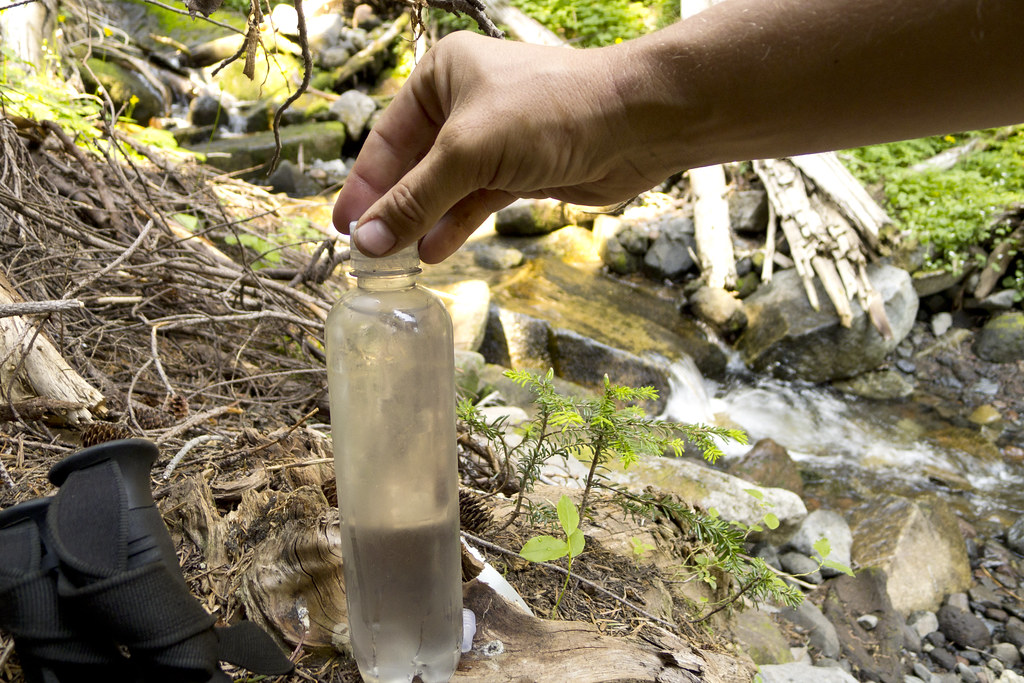
Before heading out, I fill an eyedropper bottle with common household bleach. I use an old Visine bottle or breath drops bottle. Since bleach will degrade in direct UV light and become less effective, consider covering the bottle in duct tape, or paint, or something.

To fill the bottle without spilling bleach, I often use a ZipLoc bag as a funnel. Put the desired amount of bleach in the bag. Hold it by one of the top corners, so one of the bottom corners is above the bleach. Cut a tiny bit of the corners off, then tip the bag and pour the thin stream of bleach into the dropper bottle.

I keep the bottle in a ZipLoc freezer bag or in an empty wide-mouth Gatorade or Powerade bottle to prevent damage to gear and clothes. So far, I have not had a problem.

Also, keep in mind, the decomposition rate of bleach increases by a factor of 3.5 for every 18° F increase in temperature, so if not stored at 60-80 degrees, it's probably a good idea to dump it out and replace it after a couple weeks to be safe.
2. Fill your water bottle with water.

The best water source is actually the top few inches of lake water. The longer time under the sun’s UV rays does a lot of the sterilization for you. Otherwise, a spring or swift moving creek will be fine.

If the water source is not clear, I tie a bandanna around the top of my bottle when filling. If your water is still cloudy, let it sit until all sediment has settled, then pour the clear water into another bottle before treating. Chemical treatments are much less effective if the water is not clear or contains free-floating organic material. Organisms that are clinging to free-floating particles are harder to kill.
3. Add one drop of bleach per 16 oz. of clear water.

Use two drops if the water is really cold, cloudy, or discolored. If your bleach is not the common 4-6% solution of sodium hydrochlorite you may have to use more or less. The amount of sodium hypochlorite added to bleach may depend on the season. More may be added in the summer to compensate for the higher temperatures. It could be as high as 10%, so check your bleach bottle’s label and adjust dosage accordingly.
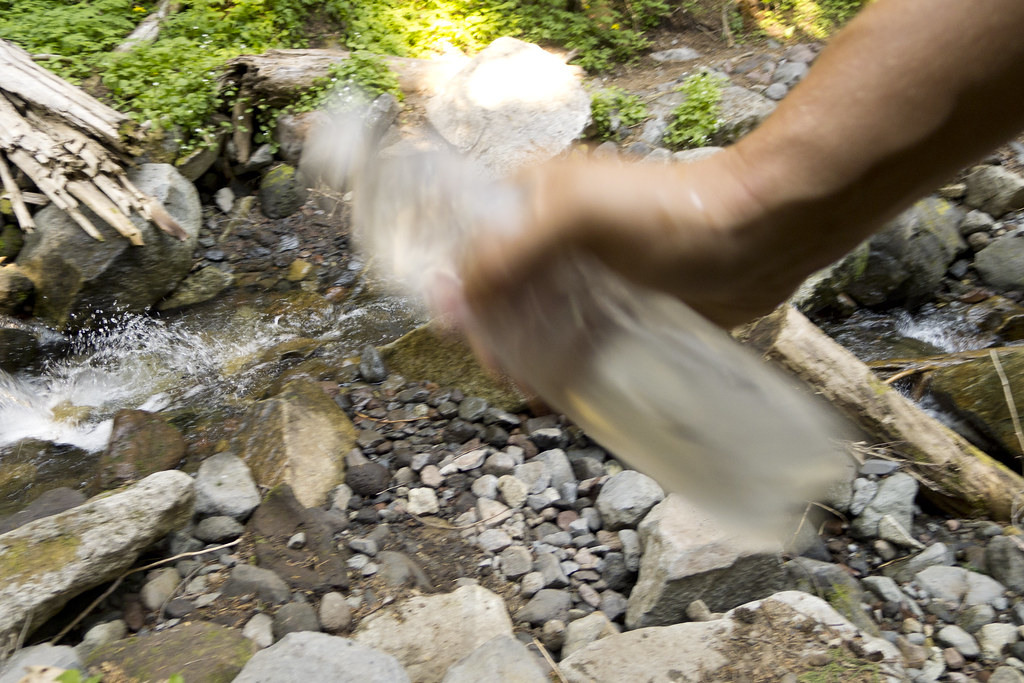
4. Shake it like a Polaroid. 
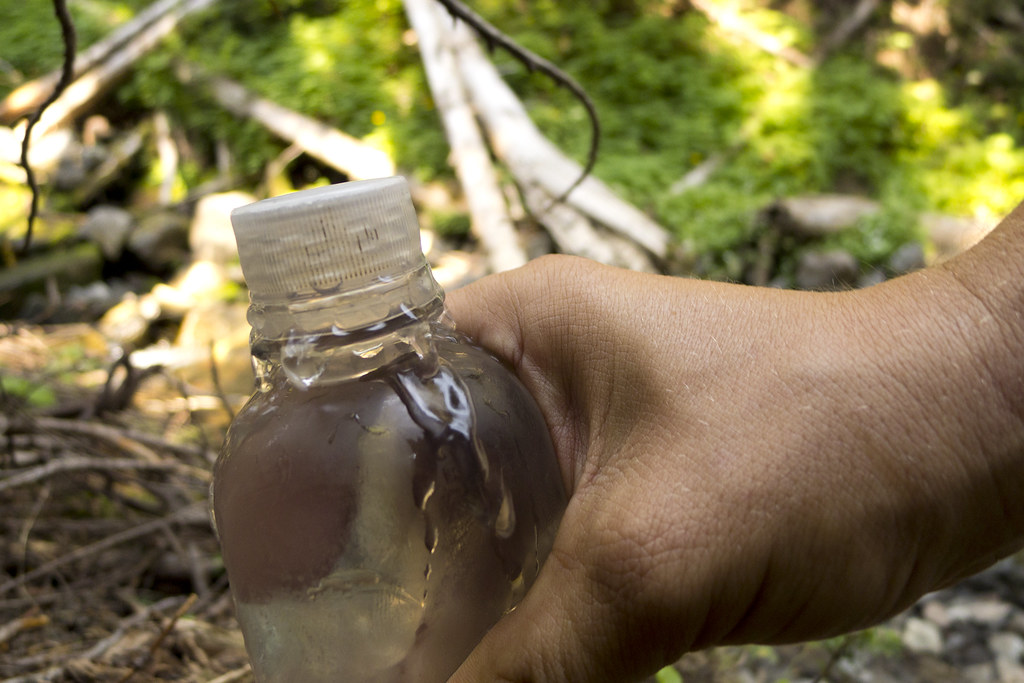
5. Screw the cap nearly all the way on, then squeeze the bottle until it starts to pour out, and then tighten the lid.

This ensures that the entire bottle, including the cap and threads, get disinfected.
6. Wait 30 minutes. And in the meantime, clean your hands with a hand sanitizer. Not cleaning your hands after touching a contaminated water source could negate everything you have done to prevent a water-borne illness.

If after 30 minutes, your water does not have a slight chlorine smell similar to municipal tap water, repeat steps 3 through 5. Think of bleach as an army of soldiers you're sending into battle. They kill organisms, but die in the process. The more organisms there are to kill, the more soldiers you need. That's why it may be necessary to treat a second time. And why sometimes you'll smell or taste more chlorine than other times. Keep in mind though, this isn't the fault of bleach alone. It's true for any chemical treatment.


More water related information:

Why I don't use Sterilizing Pens... read more >
 
How much water to carry... read more >

Using Filters To Treat Water in the Backcountry... read more >
Why I use plastic soda or water bottles... read more >

Sixteen Months of Wandering

It has been less than a year and a half, but every day it gets a little harder to picture how my day-to-day life used to look. It’s like trying to recall a face I haven’t seen in years that I used to see every day. I close my eyes, but can’t quite get a clear image.

Used to be, a year and a half would pass by frighteningly fast, but life doesn't seem as short anymore. I credit that to doing more in 16 months than all my previous years combined.

I backpacked through 3,000 miles of wilderness and the occasional small mountain town. That's over six million footsteps with nothing but the bare essentials on my back. These trails had a cumulative elevation gain of more than 675,000 feet or 130 miles, twice the distance to outer space, or more than the height of 23 Mount Everests.

I'm not sure which has received more wear-and-tear though, me or my worn-out Honda Civic. It racked up 26,000 miles on American highways since March of this year. The car is one of the few things in my life that hasn't changed, although we are much more acquainted now.

If you haven't read every post on my blog, here's what I've been up to. On June 10, 2011, I quit my job, packed a backpack, left everything else behind, and then....

  • Hopped on a train to Washington D.C.
  • Saw the Smithsonian, the Jefferson Memorial, Lincoln Memorial, Washington Memorial, the White House, the Library of Congress, the Capitol building, The Constitution, Declaration of Independence, and every other D.C. monument, artifact, and museum on my life list
  • Stayed in the first of many hostels and met people from all walks of life
  • Took a bus to New York City
  • Roamed aimlessly around Time Square and Broadway
  • Heard a never publicly performed piece of music played by a symphony in Central Park
  • Got lost in Central Park at night. It took a few hours to find my way, but after thinking about my upcoming hike from Maine to Georgia, you can rest assured, I fully appreciated the dramatic irony.
  • Then, at two in the morning, I went to the top of the Empire State Building to see the lights and bustle of the city that never sleeps
  • The next day, I took the subway to Ground Zero
  • Saw the Statue of Liberty from the Staten Island Ferry
  • Unexpectedly witnessed Will Smith filming Men in Black 3 in Battery Park
  • Strolled down the "pre-occupied" Wall Street
  • Walked to Brooklyn on the Brooklyn Bridge
  • Watched a taping of the Late Show with David Letterman, with Eddie Vedder and Cameron Diaz
  • Took a train to Boston
  • Walked the Freedom Trail and saw every historical site I know of in Boston, and some I didn't know of
  • Bought tickets from a scalper in Fenway Park and watched a Red Sox Game
  • From my stadium seat, sang Sweet Caroline and yelled YOUUKK!, without understanding why
  • Helped a schizophrenic homeless man update his blog (I always knew I would someday)
  • Took a bus to Maine
  • Met my new friend Erik (a.k.a Red)
  • Hiked the 2,181-mile Appalachian Trail from Maine to Georgia, through 14 states. On the trail I...
  • Met Sam and Liv (a.k.a. Bambi and Thumper), who became my favorite people in the world
  • Backpacked through the Hundred Mile Wilderness in Maine
  • Hitchhiked for the first time
  • Spent the night behind an abandoned bank, a city park dugout, and many other random places like a hobo
  • Backpacked through the White Mountains in New Hampshire
  • And the Green Mountains in Vermont
  • Hiked through Hurricane Irene and Tropical Storm Lee
  • Had lots of fun in random mountain towns drinking with trail friends
  • Hiked along the Housatonic River through Massachusetts and Connecticut
  • Then through New York, New Jersey, Pennsylvania, and Maryland
  • Slept under Jefferson Rock National Historic Landmark in West Virginia
  • Met my new friend Gregg (a.k.a Lightfoot)
  • Backpacked the length of Virginia's Shenandoah National Park during the peak of fall colors
  • And in the snow in Tenneesee and North Carolina's Great Smoky Mountains
  • Encountered several black bears, a wild boar, and interesting mountain people
  • Fell in love with a new and exciting way of life
  • And a girl
  • Reached the AT's southern terminus in Georgia 183 days after leaving the northern terminus
  • I went back home for the holidays and recovered from injuries
  • Then I went to Kentucky to visit Sam and Liv on their family farm
  • I was lucky enough to convince Liv to quit her job and go on an 8,200-mile road trip on old Route 66 from Chicago to Santa Monica, California. After an early morning start on March 3rd we...
  • Toured Chicago, Illinois
  • Visited Lincoln’s Tomb and the Lincoln Home National Historic Site
  • Accidentally went into a gay bar in Springfield, Illinois
  • Saw numerous aging roadside statues, attractions, and museums
  • Played legendary games of pool in the bars of Tulsa, Oklahoma with a level of skill that we have never been able to repeat
  • Trespassed on private property, so we could sleep in an 80-foot concrete blue whale in Catoosa, Oklahoma
  • Hiked into Palo Duro Canyon, the second largest canyon in the United States, near Amarillo, Texas
  • Found Billy the Kid's Grave
  • But found no aliens while in Roswell, New Mexico
  • Sled down bright white gypsum sand dunes in Southern New Mexico's White Sands National Monument
  • Tossed a football on a vacant desert road in Southern New Mexico, and car camped under a dark starry sky
  • Explored the caves of Carlsbad Caverns National Park
  • Had to deal with the exhaust pipe falling off the car in a New Mexico ghost town in the middle of the night
  • Found a saloon next to a mechanic's shop in Magdelina, New Mexico who we hoped could fix it, so we played pool, drank beer all night, and then slept in the car. 
  • Drove with a loud muffler-less car to the Very Large Array Radio Telescopes near Socorro, New Mexico
  • Stared out into Arizona’s Painted Desert National Park
  • Hiked in Arizona's Petrified Forest National Park
  • Climbed a volcanic crater in Arizona’s Sunset Crater Volcano National Monument
  • Saw ancient ruins at the Wupatki Monument in Arizona
  • Watched the sunset while driving through the Mojave Desert in Southern California
  • Peered into the deep and magnificent Grand Canyon
  • Listened to Grand Canyon tourists mutter about "that crazy girl" (Liv) boulder scrambling so I could get a better picture of her
  • Lived in our car for a couple days in Southern California’s Slab City
  • Drove many miles in silence while Liv concentrated on writing an epic poem about the trip
  • Hiked around Joshua Tree National Park and climbed a mountain named Ryan
  • Arrived at the end of Route 66 on the Santa Monica Pier
  • Drove up the Pacific Coast Highway
  • Walked along the Pacific Ocean in Big Sur State Park
  • Had dinner with Liv’s sister in Monterrey, California who she hadn't seen in two years
  • Hiked on 3 feet of snow to see the world’s largest tree in California’s Sequoia National Park
  • And more giant trees in Kings Canyon National Park
  • Sat on the ground at the lowest point in North America, 282 feet below sea level, in California’s Death Valley National Park
  • Backpacked in Utah’s Zion National Park and woke up with snow on our tents
  • Nervously watched Liv climb up rocks in Southern Utah’s Capitol Reef National Park without a rope, and had to have her rescue me when I got stuck in a “pothole”
  • Saw the rock formations in Utah’s Arches National Park
  • Then watched the sun set in Canyonlands National Park
  • Toured ancient cliff dwellings in Colorado’s Mesa Verde National Park
  • Climbed sand dunes in Colorado’s Great Sands National Park
  • Then, after regretfully taking Liv back home in Kentucky, I picked up my AT friend Red to hike Vermont’s 273-mile Long Trail, from Massachusetts to Canada. 
  • But first I spent a few days in New York City to meet Red's friends and family 
  • Took a tour of Long Island's wine country
  • Then headed to the southern terminus of the Long Trail
  • Slept in stranger's homes and a college "social house" during pledge week, to get out of bad weather
  • Got a free night's stay and a steak dinner at a fancy lodge
  • Spent the night on a Big Lots department store loading dock
  • Arrived at the northern terminus of the Long Trail and stepped into Canada
  • Took Red home and went to visit Sam and Liv in Kentucky again, the closest thing to home these days
  • Backpacked in Kentucky’s Red River Gorge
  • Then my second westward road trip began
  • I camped at Badlands National Park in South Dakota
  • Hiked around Devil’s Tower in Wyoming
  • Backpacked for five days along the Teton Crest Trail in Wyoming’s Great Teton National Park
  • Saw Old Faithful, the Grand Prismatic Spring, and many other amazing natural wonders in Wyoming’s Yellowstone National Park
  • Backpacked a 75-mile loop in Montana’s Glacier National Park
  • Circumnavigated Washington’s Mount Rainier on the 93-mile Wonderland Trail
  • Climbed Garfield Peak for a bird’s eye view of Oregon’s Crater Lake
  • Drove down the northern half of the Pacific Coast Highway that Liv and I didn't get to see
  • Hiked while staring up at the towering trees in California’s Redwood National Park
  • Cruised down the “Avenue of Giants” in Humboldt Redwoods State Park
  • Watched Pacific Ocean waves crash on several beaches along the highway
  • Drove over the Golden Gate Bridge in San Francisco, California
  • Visited Port Reyes National Seashore in California
  • Thru-hiked the 219-mile John Muir Trail. On that Trail, I....
  • Backpacked through Yosemite National Park
  • Sat by a campfire with a backdrop of a moonlit Half Dome
  • Then backpacked through Tuolumne Meadows
  • Then the Ansel Adams Wilderness
  • The John Muir Wilderness
  • And alongside Devil's Postpile National Monument
  • Got to hike with my AT friend, Lightfoot, again
  • Took a 30-mile side trip over Italy Pass to resupply in Bishop, California
  • Then backpacked through Kings Canyon National Park
  • And Sequoia National Park
  • Climbed above treelines and over mountain passes
  • Sometimes while the sun was setting
  • Once while lightning streaked through a dark anvil shaped storm cloud
  • Was brought nearly to tears from another mountain view
  • Never got tired of the miles or sleeping on the dirt
  • Summited Mount Whitney, the highest mountain in the Contiguous United States
  • Hitchhiked, for the couple-hundredth time, back to my car
  • On my drive back I stopped to see friends I wish I could see more often, then went back to see the girls in Kentucky, and family in Indiana
  • And finally… spent many nights wondering how I could ever go back to that old day-to-day life ever again
I experienced a lot in these sixteen months, but also learned a lot. About myself and about the country I call home. I didn't always like what I learned about myself, but the country never disappointed. People have asked me if I plan on venturing outside of the United States on my future trips. And I do, but I'm glad I took the time to see America first. Knowing what I know now, I'm relieved that I didn't let my life go by without seeing it up close, slowly and on foot. The only way to really see anything. 

I thought I knew the country before leaving home last year, but I really didn't. I know now that it is beautiful beyond imagination. And even though bad things occasionally happen, its citizens are overwhelmingly good and caring. The number of people who went out of their way to lend a hand, a ride, a home, or home-cooked meal, were too numerous to count. They were people that knew nothing of me other than I was dirty, smelly, unshaven, and probably hungry or tired. And it seemed that the less they had, the more they wanted to help.

Ignore the news. Ignore the partisan politicians that get us worked up over nothing like they’re starving pit bulls just to win a dogfight. Ignore people that want us to believe we are divided. I learned that my favorite people and places align with me the least politically, scientifically, or religiously.

Ignore overzealous preachers and doomsayers. Our country is far from evil. I have to believe that anyone who believes it is has not made much of an effort to really see it. Other than on a television screen, which is a lot like listening to a symphony on blown-out cellphone speakers then believing music is a dreadful thing.

I've learned a few other things in these sixteen months. I know that I don't need much to be happy. I could lose all my possessions and be alright, and possibly happier because of it. And I learned that no matter how many unknowns my future holds, or how daunting something can be, I know I can get through it and come out just fine on the other side.

Perhaps the biggest lesson I learned in these sixteen months, is that you have to follow your bliss, whatever it may be. Life isn't permanent. I will continue to follow mine and continue to write about it.

I guess a better title for this post might be, "Sixteen Months of Wandering... and counting."


John Muir Trail Photos, Day 18: Mount Whitney

After 18 days on the John Muir Trail, I stood on Mount Whitney, the tallest point in the contiguous United States. My 16-month stretch of being unemployed and homeless on some of America's great trails came to an end. Actually, I don't like that word, "end.” It suggests that I'm going back to the way things were. I don’t think that is possible anymore. I think I’ll just take some time off to work.

That's how much my life has changed since I decided to hike the Appalachian Trail last year, I just used, "Time off," to refer to the time when I'm working.
Hitchcock Lake
Guitar Lake
Whitney Junction
Heading Up Mount Whitney
Hiking to Mount Whitney
Nearing the Whitney Summit
Ranger's Station on Mount Whitney Summit
From the Whitney Summit
Near the Whitney Summit
Whitney Summit Sign


John Muir Trail Photos, Day 17: Forester Pass

Standing on Forester Pass, at an elevation of 13,153 feet, I stared into the thirtieth national park I’ve seen since leaving home last year. With Kings Canyon behind me, I crossed over the boundary into Sequoia National Park.

This road trip lasted three months, but it feels like at least double that. When I told someone that I was surprised only three months had passed, they were surprised it had been that long. To them it seemed like I left only a month ago. Six months to one. I think I discovered the secret to longevity. I've been going at it all wrong. I had been trying to live a healthy lifestyle to extend my life, but that doesn't guarantee longevity. Killing monotony and repetition, however, does.

In the words of the great philosopher, Eddie Vedder, "I escaped it, a life wasted. I'm never going back again."

Heading to Forester Pass
Sunset on Forester Pass
First Look Into Sequoia National Park
Last Look at Kings Canyon National Park
Forester Pass, Sequoia / Kings Canyon Boundary

  
Creative Commons License
A Backpacker's Life List by Ryan Grayson is licensed under a Creative Commons Attribution-NonCommercial-NoDerivs 3.0 Unported License.   

John Muir Trail Photos, Day 16: Independence, CA

Lake Near Kearsarge Pass
The time came for another resupply. I turned off the John Muir Trail and hiked toward the road on the other side of Kearsarge Pass. From the top of the pass, facing west, I could see pristine blue lakes and the unspoiled rocky peaks of the Sierra Nevadas. With a 180-degree turn on my heels, I could see the town of Independence, California, 7,800 feet below.

After four miles of descending switchbacks, I got to a trailhead and campground parking lot. A couple I met on top of Kearsarge, who were also hiking the JMT, were pulling food out of bear lockers that they stashed before starting their hike. I still had fifteen miles of road between food and me. It reminded me that I used to be a planner. I used to have every detail of a trip figured out before I left the house, but when I left the house nearly three months earlier, I didn’t even know I would be in California or hiking the John Muir Trail. I’ve grown to love not having a plan.

“Well, enjoy the rest of your hike,” I said to them. “And if you see anyone heading to their car, tell them the guy hitchhiking down the road is really nice and not at all a murderer.”

A half mile down the road, I heard cars behind me. I turned and put out my thumb. A defeated-looking gold Ford Taurus, that was riding the bumper of the SUV in front of it, skidded to a halt on the side of the road. 

Me on Kearsarge
“Someone told me I should pick you up,” said a girl in sunglasses that covered half her face.

I tossed my gear in the back, next to all her mountain climbing gear, and got in. She put her heavy foot on the gas pedal and got back on the road, spitting gravel behind us. Every hairpin curve meant slamming on her breaks to slow down, then revving the engine to get back on the SUV’s bumper. 

“So where do you want dropped off?” she asked. “I’m going to Bishop, but I’ll be going through Independence.” 

“Anywhere in Independence is fine. I don’t really know where anything is anyway, so it doesn’t really matter," said the man without a plan.

As with most hitches, we talked about traveling, what we’ve done and where we’ve been. I noticed that my list is getting really long. 

After she dropped me off, I thanked her for the ride and hoisted my pack onto my shoulders. It didn’t take long to find a cheap place to eat. Actually, in a town with a population of 600, there is only ever one place for cheap food. The Subway in a gas station. 

They had everything I needed in addition to cheap food: washing machines, showers, and groceries. After doing all that, there wasn’t time to hitch back to the trail before dark, so I hung out in the Subway for hours. I wrote in my journal, updated my blog, and ate two feet of sandwich. (Hey, backpacking burns a lot of calories, don’t judge me.) 

“If you were homeless, hypothetically-speaking, where would you sleep in town?” I said to the woman closing up the sandwich shop. We’d gotten to know each other pretty well by this point. 

“Umm, well, there is a park just up the road,” she said while leaning on her mop handle. “And the only cops we have are from Bishop. They never come here unless they’re called."

The word homeless is such a misnomer. I had a home that night, a bare patch of ground in a thicket of shrubs  and trees in a small town park. I rolled out my sleeping pad and slept like a baby. 

It’s easy to sleep like a baby when you have no debt, no plan, and the knowledge that you could lose everything and still be okay.


Creative Commons License
A Backpacker's Life List by Ryan Grayson is licensed under a Creative Commons Attribution-NonCommercial-NoDerivs 3.0 Unported License.   

John Muir Trail Photos, Day 14: Taboose and Pinchot Passes

I pulled out my camera right before crossing over Pinchot Pass. What will be on the other side? I wanted to remember the moment, those seconds between not knowing and knowing. While backpacking, that transition is always good and exciting. What will be on the other side? On the trail, knowing is always better. That's yet another reason it's so hard to return to a normal life, where I have been reminded that sometimes ignorance is bliss.
Taboose Pass
A great sky over Taboose Pass
Lake Marjorie
Heading up Pinchot Pass
North side of Pinchot Pass
The Other Side of Pinchot
Red Rocks
Hiking Along Woods Creek
Sunbeam
Woods Creek

  
Creative Commons License
A Backpacker's Life List by Ryan Grayson is licensed under a Creative Commons Attribution-NonCommercial-NoDerivs 3.0 Unported License.